Appendices, Sampling frequency setting, Limitations when using the 192 khz setting – Roland OCTA-CAPTURE - High-Speed USB Audio Interface User Manual
Page 68
68
Appendices
Sampling Frequency Setting
If you want to connect the OCTA-CAPTURE to your computer via USB and use it as a USB audio
interface, you’ll need to set the OCTA-CAPTURE’s sampling frequency to match your software’s
sampling frequency, as follows.
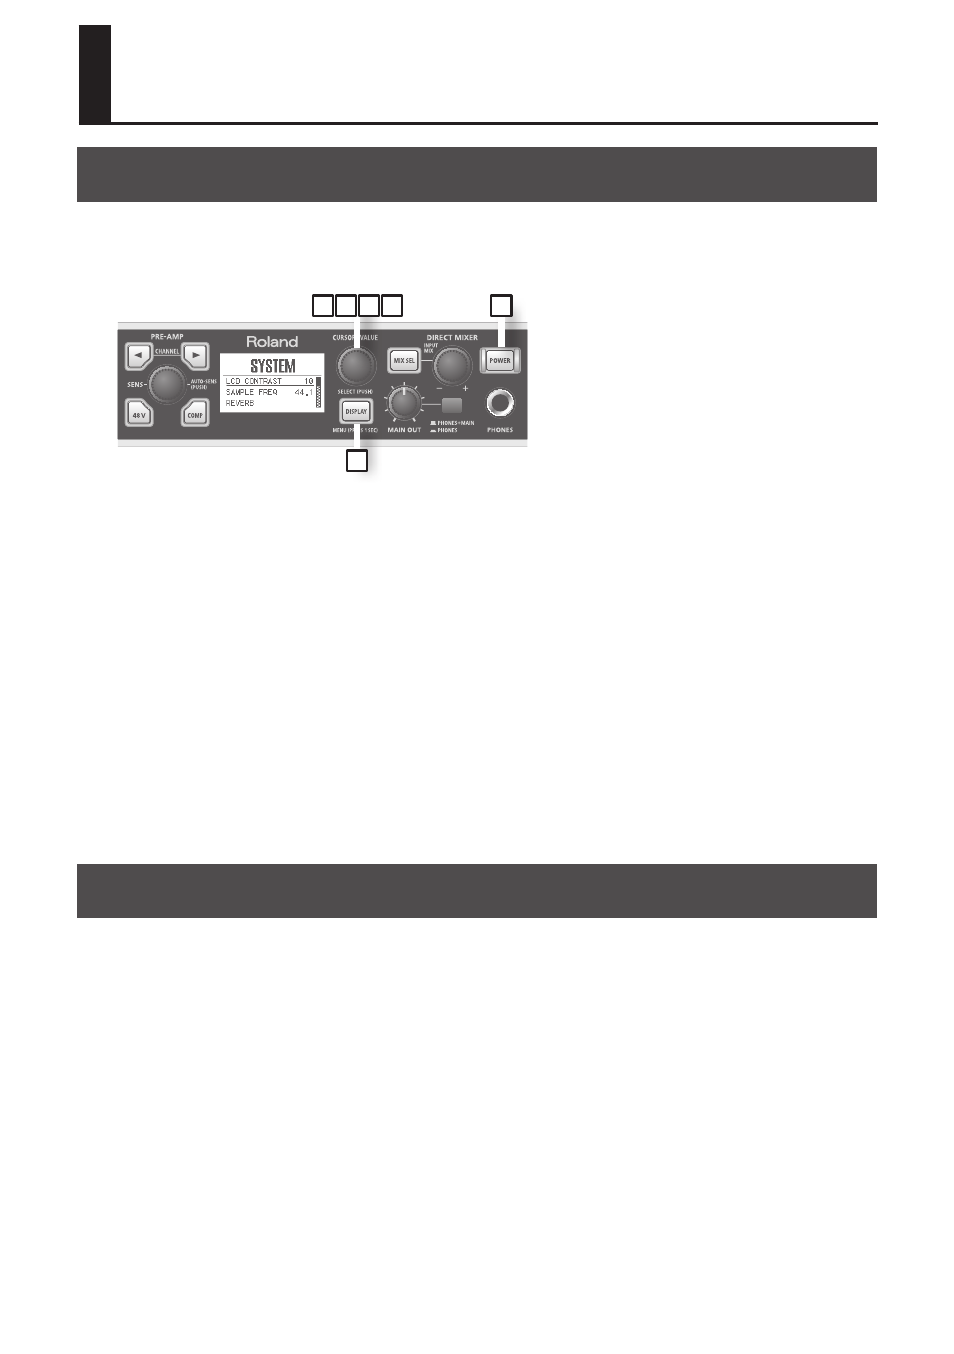
3
2
4 5
1
6
*
After you’ve changed the sampling
frequency, you must turn the OCTA-
CAPTURE’s power off, then on again .
*
If software that uses the OCTA-CAPTURE is running, you must close the software .
1.
Press and hold the [DISPLAY] button for one second to access the system setting
(UTILITY) screen .
2.
Turn the [CURSOR/VALUE] knob to move the cursor to “SAMPLE FREQ .”
3.
Press the [CURSOR/VALUE] knob to highlight the value .
4.
Turn the [CURSOR/VALUE] knob to change the setting .
5.
Press the [CURSOR/VALUE] knob to confirm the setting .
6.
Switch off the OCTA-CAPTURE’s power, then turn it back on again (p . 31) .
Start up your recording software.
*
If the sampling frequency is set to 192 kHz, only INPUT 1–4 and OUTPUT 1–4 can be used .
Limitations when using the 192 kHz setting
If the OCTA-CAPTURE’s sampling frequency is set to 192 kHz, its operation will be limited as follows.
•
Only INPUT 1–4 and OUTPUT 1–4 can be used.
•
Direct Mixer A will be the only direct mixer available.
•
Reverb will be unavailable.
•
The patch bay will be disabled.
The output settings will be fixed at the four channels OUT 1-2: Direct Mixer A and OUT 3-4: WAVE
OUT 3-4. The inputs will be fixed at INPUT 1–4.
•
The digital input/output jacks cannot be used.
•
A second OCTA-CAPTURE unit cannot be used.