Canon imageCLASS MF3010 VP Multifunction Monochrome Laser Printer User Manual
Page 133
●
EUDORA
●
Netscape Messenger
●
Windows Mail
●
Becky! Ver.2
●
Mozilla Thunderbird
Previewing the scanned image and entering Exif information (Viewing the
scanned image)
Follow the steps in the procedure below to display a thumbnail preview of the scanned image before specifying
the file format and location where the scanned image is saved.
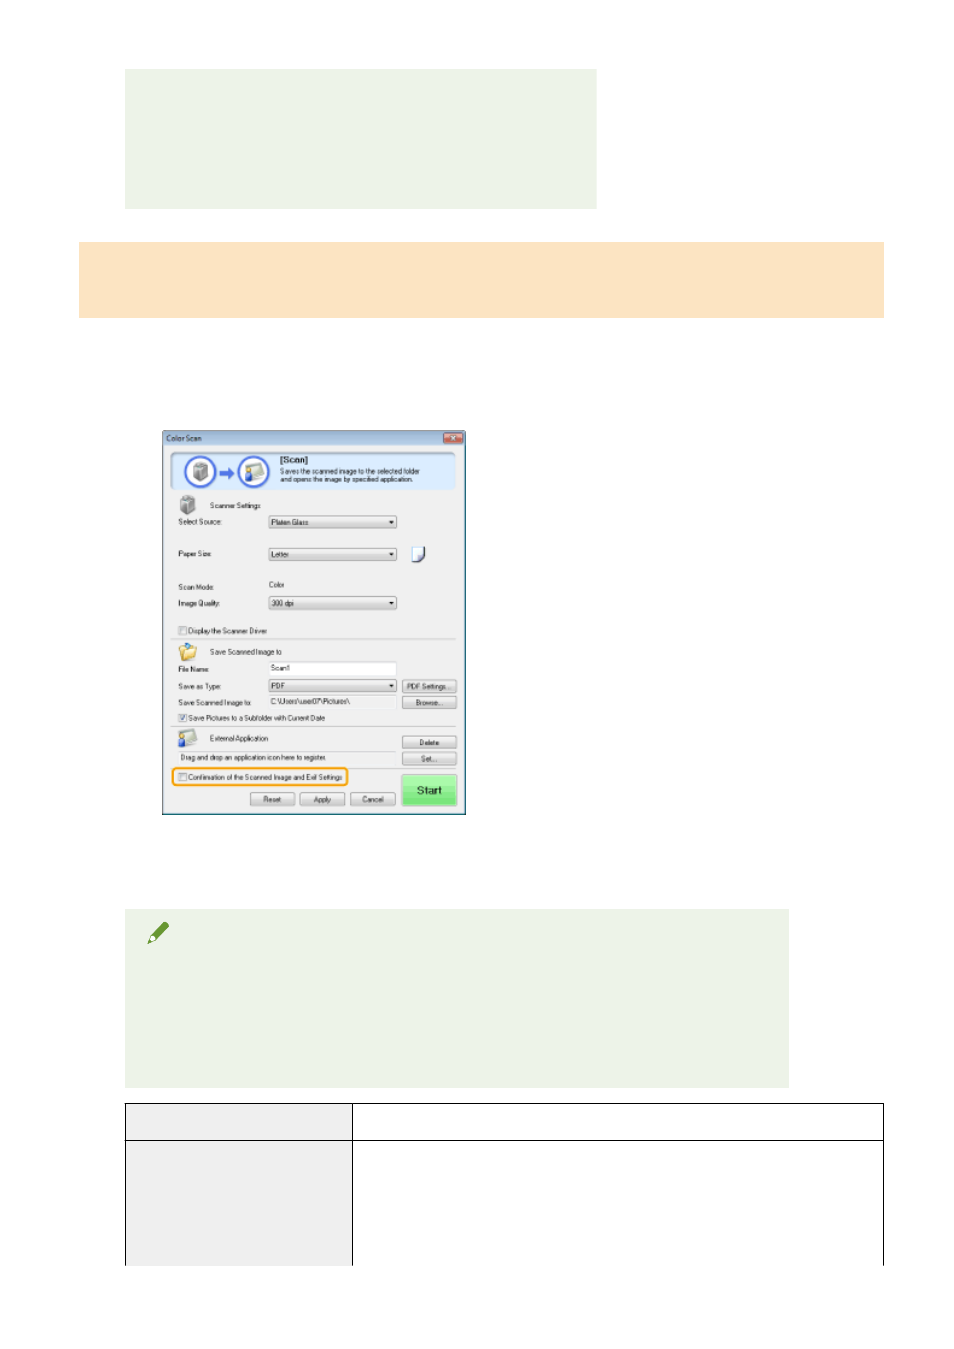
(1) Select the [Confirmation of the Scanned Image and Exif Settings] ([Confirm the Scanned Image] for the
[PDF] button) check box.
(2) Press [Start].
The scanned image is displayed in the [Scanned Image] dialog box. See the following instructions to
specify the file format and location where the image is saved.
NOTE
When scanning using the [OCR] command button
This check box is unselectable.
When scanning using the [PDF] command button
You can only preview the scanned image and specify the location where the image is saved.
[Save as Type]
Specify the file format to save the scanned image in.
[Exif Settings]
When [JPEG/EXIF] is selected for [Save as Type], display the [Exif Settings] dialog box
for you to enter the Exif information. You can add such information as comments and
the scanning date to the JPEG file. Choose a file from the drop-down list and add
information.
●
[Basic Information]
Display the information acquired automatically when the image was scanned.
Scan
128