Doremi DSV-J2 User Manual
Page 11
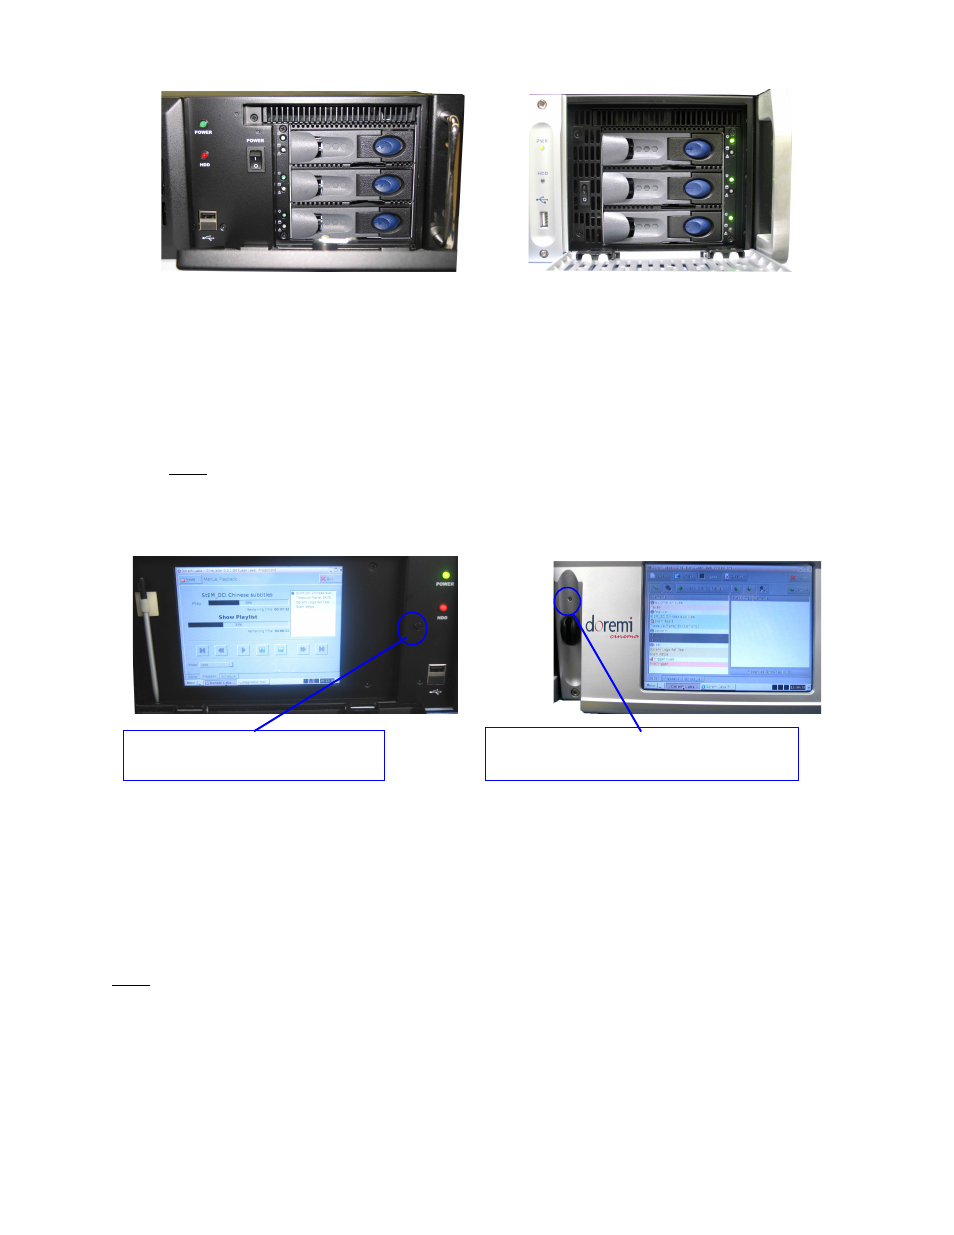
(a)
(b)
Figure 7: DSV-J2 Front Panel, Right Door Opened, Three HDDs
(a) Black Front Panel, (b) Silver Front Panel
Each hard disk has a blue button that allows removal of the drive from the chassis. Be careful
not to remove the hard disk when the DSV-J2 is running.
Additionally, there is one USB 2.0 connector on the center of the front panel that can
accommodate an external hard drive as well as a mouse or keyboard.
Note: On the black front panel, two USB connectors are presents while only the upper
USB connector is active.
The left side of the front panel provides an LCD screen (covered by a door on the black chassis)
with its associated power on/off button (Figure 8):
(a)
(b)
Figure 8: DSV-J2 Front Panel, LCD Screen
(a) Black Chassis - with left door opened, (b) Silver Chassis
On the black front panel, the LCD power on/off button is automatically controlled when opening
or closing the door that covers the LCD.
On the silver front panel, the LCD has to be turned on or off by pressing on the LCD power
button using the stylus attached to the front panel.
Note: The use of this LCD screen requires that the two rear panel VGA connectors are linked
using the VGA cable provided with the DSV-J2. See Section 4.1 for details about the VGA cable
connections.
DSV.OM.000391.DRM
Page 11 of 68
Version 1.3
Doremi Labs
LCD power ON/OFF button –
controlled by the door
LCD power ON/OFF button – to be
pushed with the provided stylus