Assembly – Harken 1080 MKIII Jib Reefing & Furling User Manual
Page 31
Assembly
April 2000
Unit 3.25 MKIII
16
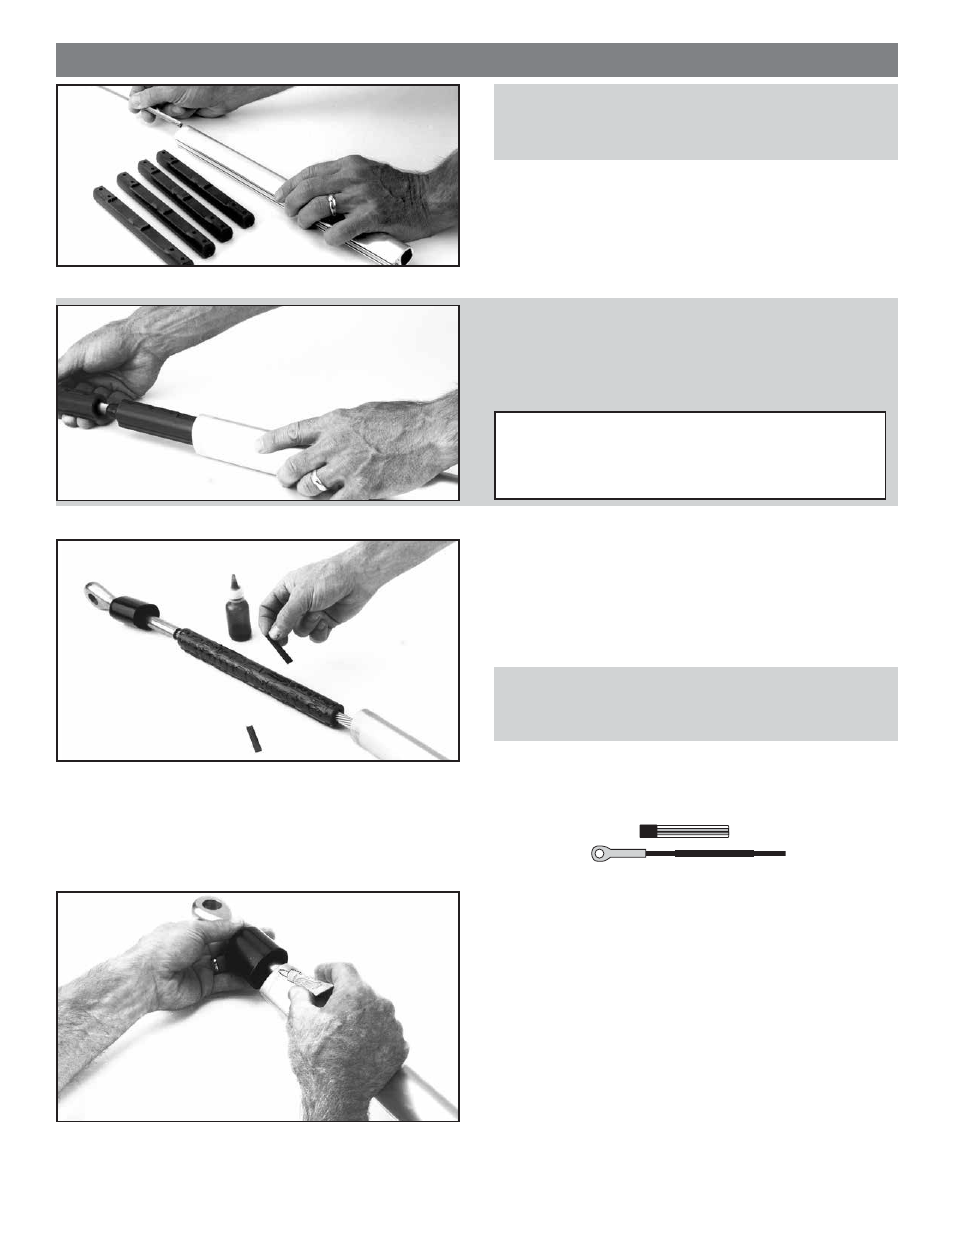
See details on pages 12, 13 and 14 for cutting the
top foil to length. Do not confuse the top foil with
the special bottom foil.
Check the top foil for burrs or shavings at the cut end.
Slide the top foil extrusion to the top of the stay. The
screw holes on top foil must face the bottom of the stay.
Tip: Do not force the foil over the connectors. If you feel resistance,
check the foil and connectors carefully for burrs and dirt. The best
way to see dirt or burrs is to look into the foil while pointing it
towards a light source. Be sure that the connectors are spaced with
enough room to align properly inside the foil section.
Coat the top connector with red Loctite. Place a plastic
wedge in each indentation with the circular mold mark
towards the connector and push the connector into the
top foil until it is recessed:
1" (25 mm) for rod or Norseman/Sta-Lok eye
5-6" (127-152 mm) for swage eye
Tip: This connector must be recessed sufficiently to allow the foils to
ride over the shank of the swage fitting at the top of the wire. Use your
screwdriver to compare the depth of the recess to the length of the
swage shank.
Use Instant Adhesive to secure the trim cap to the
roughened surface of the top of the foil.
The curves in the rod may make it difficult to slide
extrusions over the connectors. The straighter the
rod can be held, the more easily foils will pass over
the connectors.
ROD
Note: If the top foil is less than 19" (483 mm) ignore
this step. The connector used to join the top foil
serves as the bushing.
- 1081 MKIII Jib Reefing & Furling 1082 MKIII Jib Reefing & Furling 1083 MKIII Jib Reefing & Furling 1084 MKIII Jib Reefing & Furling 1085 MKIII Jib Reefing & Furling 892 MKIII Jib Reefing & Furling 896 MKIII Jib Reefing & Furling 882 MKIII Jib Reefing & Furling 815 MKIII Jib Reefing & Furling 1110 MKIII Jib Reefing & Furling