Assembly, Rod wire – Harken 1080 MKIII Jib Reefing & Furling User Manual
Page 49
Assembly
April 2000
Unit 3.25 MKIII
25
In this step, the headstay tension is adjusted.
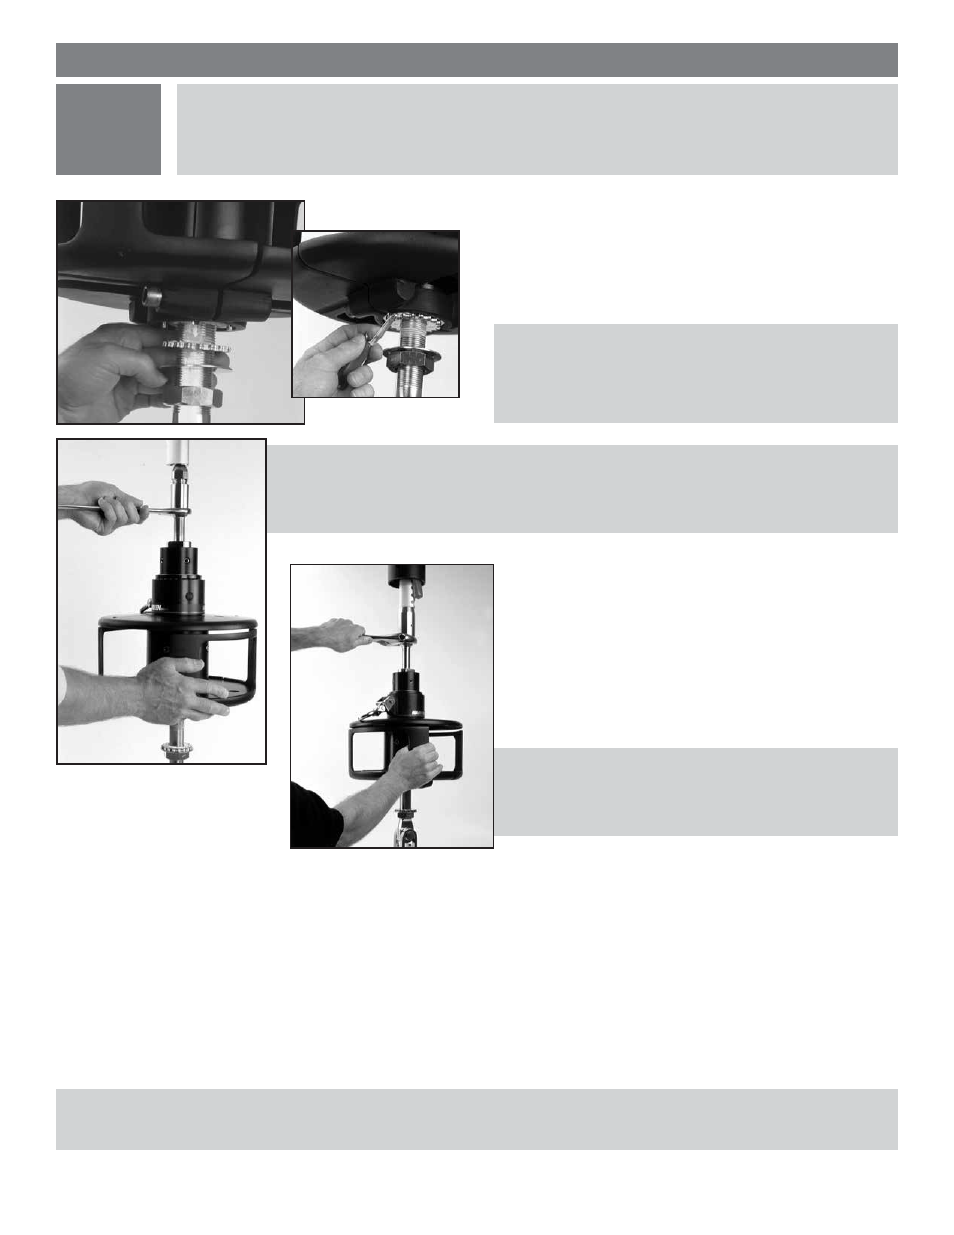
9
Loosen the nut on the lower stud to allow the restraining
washer and notched locking washer to fall away from
the bottom of the furling unit.
NOTE: The lower stud has left-handed threads, so the
nut will loosen in the opposite direction.
Tip: Sometimes the notched locking washer “hangs
up” on the pins on the bottom of the furling system.
Gently turn the stainless basket to free the washer
or gently pry it free with a pen knife or screwdriver.
Hold the Vise-Grips to prevent the headstay from turning.
Turn the line guard assembly to adjust the headstay to normal sailing adjustment. To prevent slippage of the line
guard, make sure the screws below the guard assembly are tight. The system tightens when turned counterclock-wise
when you are looking down at the drum.
Note: if the locking collar threads onto the turnbuckle while you are adjusting the turnbuckle, make sure the collar is
not jammed up against the Sta-Lok or rod adapter stud main body. This will prevent further adjustment. Keep the col-
lar slightly off the main body while adjusting the turnbuckle.
The headstay must be tight for proper operation of the furling unit.
Tip: For easiest adjustment, completely release tension on the backstay, mainsheet and vang before adjusting
the headstay.
Hold a 35 mm 1
3
/
8
" wrench on the lower wrench flats of the Sta-Lok terminal.
Clamp vise grips to main body of the terminal.
ROD
WIRE
- 1081 MKIII Jib Reefing & Furling 1082 MKIII Jib Reefing & Furling 1083 MKIII Jib Reefing & Furling 1084 MKIII Jib Reefing & Furling 1085 MKIII Jib Reefing & Furling 892 MKIII Jib Reefing & Furling 896 MKIII Jib Reefing & Furling 882 MKIII Jib Reefing & Furling 815 MKIII Jib Reefing & Furling 1110 MKIII Jib Reefing & Furling