Assembly – Harken 1080 MKIII Jib Reefing & Furling User Manual
Page 35
Assembly
April 2000
Unit 3.25 MKIII
18
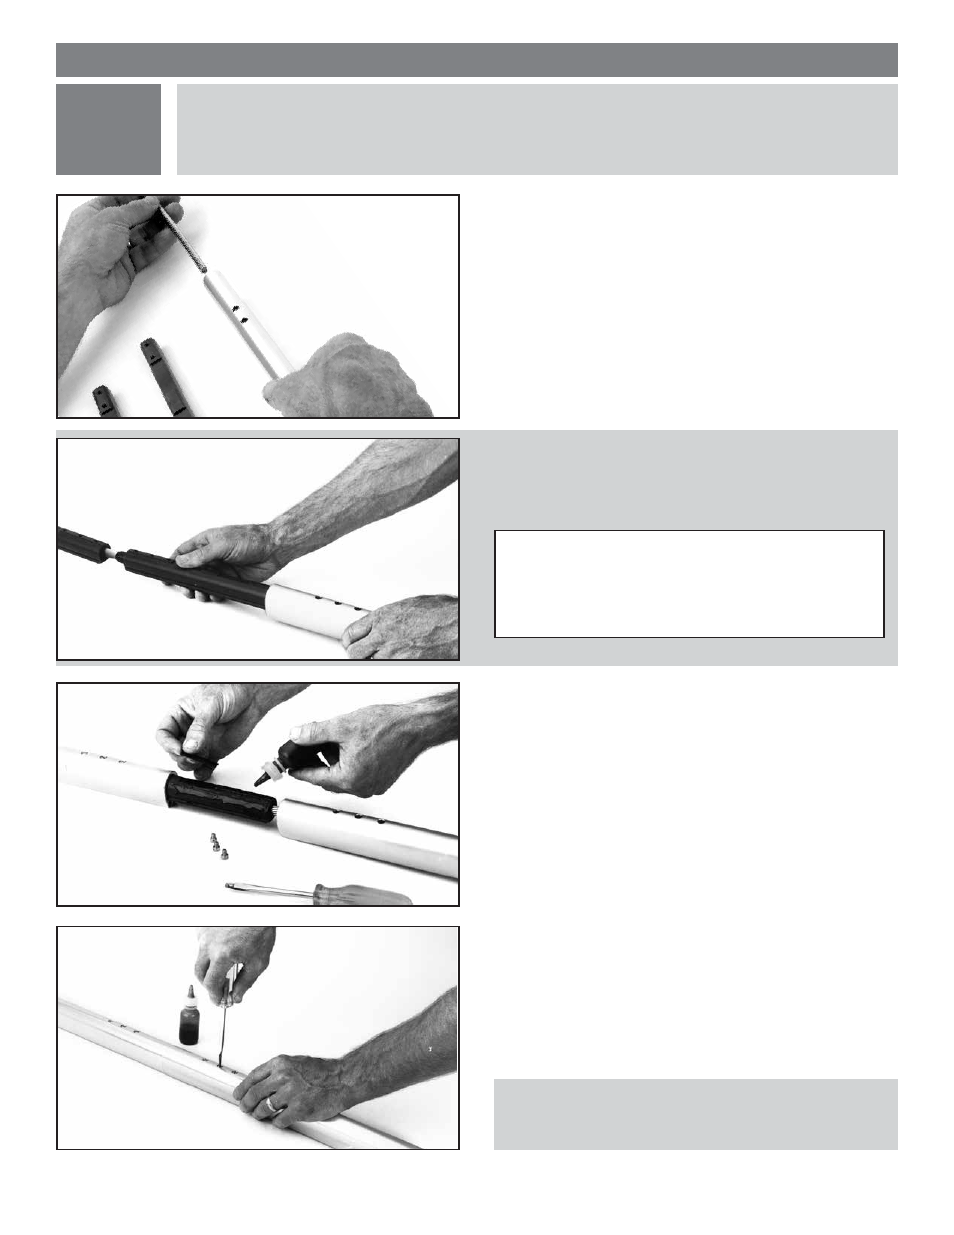
In this step, the first main foil extrusion is slipped onto the headstay and
connected to the top foil.
3
Tip: The connector screw holes should align with the foil holes when
the foil is pushed tightly against the foil above. If the foil does not slip
onto the connector easily, check the alignment of the joint. It may be
necessary to hold the 7' (2.13 m) foil up to achieve proper alignment.
Select a 7' (2.13 m) foil and slide it onto the headstay
and up to the top foil piece.
Coat the exposed half of the connector with red Loctite.
Place a plastic wedge in the indentation on the front of
the connector.
Push the foil over the connector until the holes align.
Coat connector screws with red Loctite. Insert into the
connector and tighten.
Tip: Do not force the foil over the connectors. If you feel resistence,
check the foil and connectors carefully for burrs and dirt. The best
way to see dirt or burrs is to look into the foil while pointing it
towards a light source. Be sure that the connectors at the bottom of
the wire are spaced with enough room to align properly inside the
foil section.
ROD
Slide foil over the coldhead and connectors.
- 1081 MKIII Jib Reefing & Furling 1082 MKIII Jib Reefing & Furling 1083 MKIII Jib Reefing & Furling 1084 MKIII Jib Reefing & Furling 1085 MKIII Jib Reefing & Furling 892 MKIII Jib Reefing & Furling 896 MKIII Jib Reefing & Furling 882 MKIII Jib Reefing & Furling 815 MKIII Jib Reefing & Furling 1110 MKIII Jib Reefing & Furling