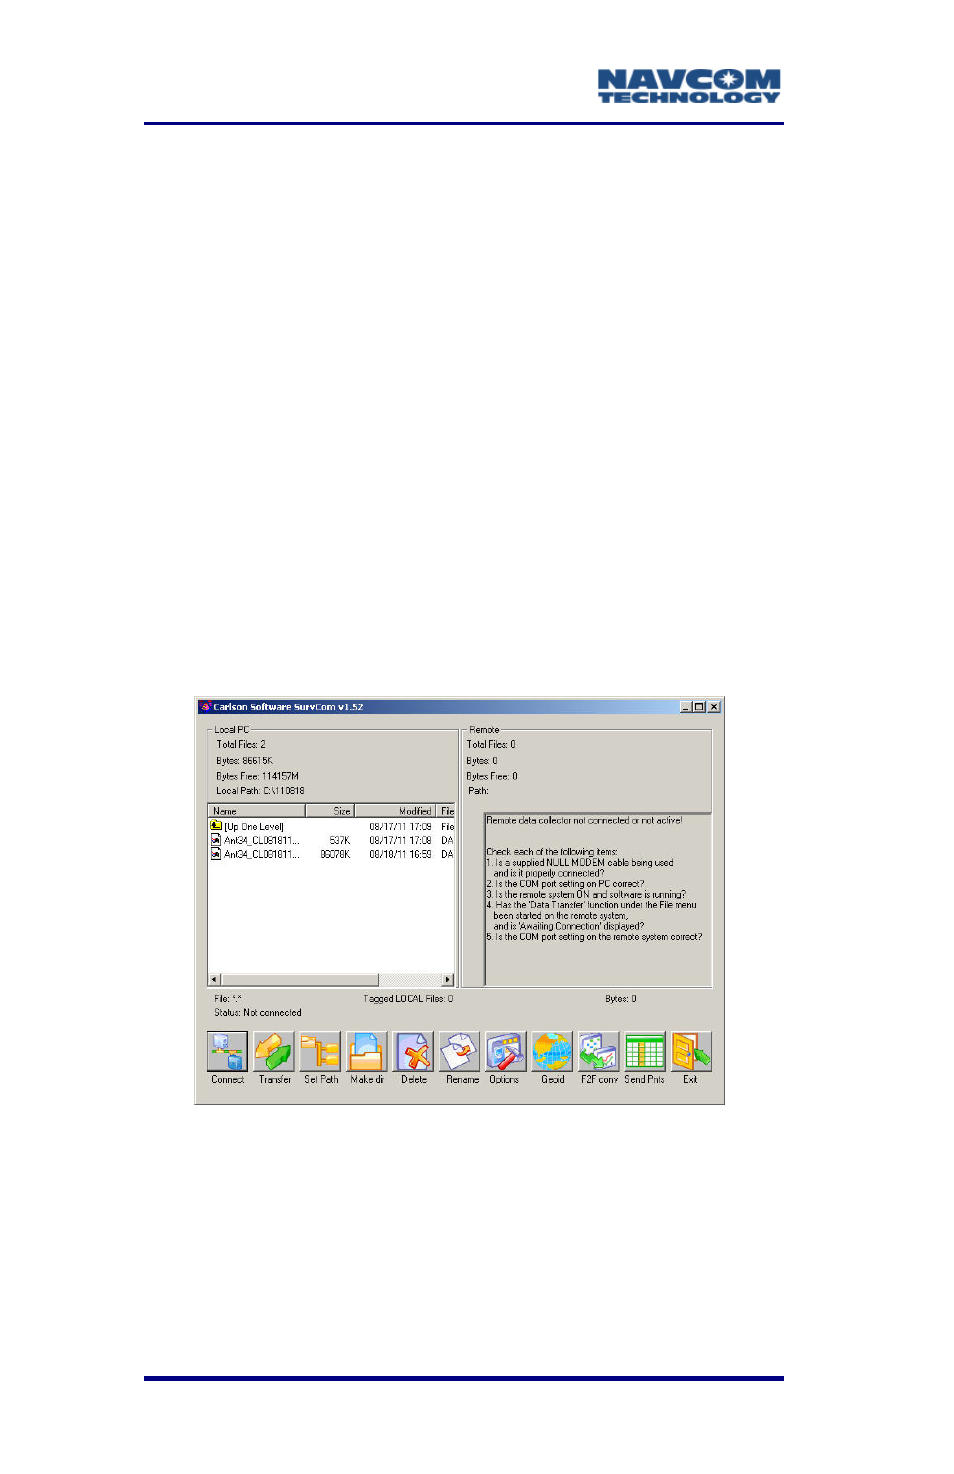
Figure 75: survcom window before transfer – NavCom SurveCE Integration Rev.A User Manual
Page 122
SurvCE™ Integration User Guide – Rev. A
4-120
Exercise 3: Create/Upload Geoid File to Explorer
1. Run X-Port.
2. Connect the data collector to the PC with the
supplied USB cable (in the rover transit case).
3. On the data collector, run SurvCE.
In SurvCE, select File > Data Transfer. The Data
Transfer window opens (see Figure 72).
a. Accept the default COM Port setting, COM1.
b. Tap the Carlson/C&G Transfer button. The
data collector waits for a connection
4. In X-Port, select Tools > Data Transfer > SurvCE/
FastSurvey/SiteForeman. X-Port opens the
SurvCom window on the PC, and connects to the
data collector.
Figure
75
: SurvCom Window before Transfer
5. Select the Geoid button at the bottom of the
SurvCom window. The Set Geoid Area window
opens (see Figure 76).