Defining inverse object, Using text wizard, Text wizard – QuickLabel Designer Express User Manual
Page 44
- 44 -
4. The other method of positioning the object on the label is simply selecting the Ellipse
tool and then clicking the label. A default-sized ellipse will appear and you can resize it
using handles around the object.
Note:
If you want to draw a circle, grab a handle a on one of the ellipse corners, simultaneously press and
hold Shift key, then resize the ellipse. A circle will be drawn. For more useful shortcuts available in
the software refer to the chapter
Shortcuts
.
4. To move a ellipse to a different position simply select it and drag it elsewhere on the
label.
Defining Inverse Object
To place the inverse object on the label, do the following:
1. Click on the Inverse icon in the Toolbox.
2. Click the position on the label, where you want the upper-left position of the object to be
set.
3. Drag to bottom-right direction until the object size is as requested.
Note:
If you want to draw a square, grab a handle a on one of the rectangle corners, simultaneously press
and hold Shift key, then resize the rectangle. A square will be drawn. For more useful shortcuts avail-
able in the software refer to the chapter
Shortcuts
.
4. To move a inverse to a different position simply select it and drag it elsewhere on the
label.
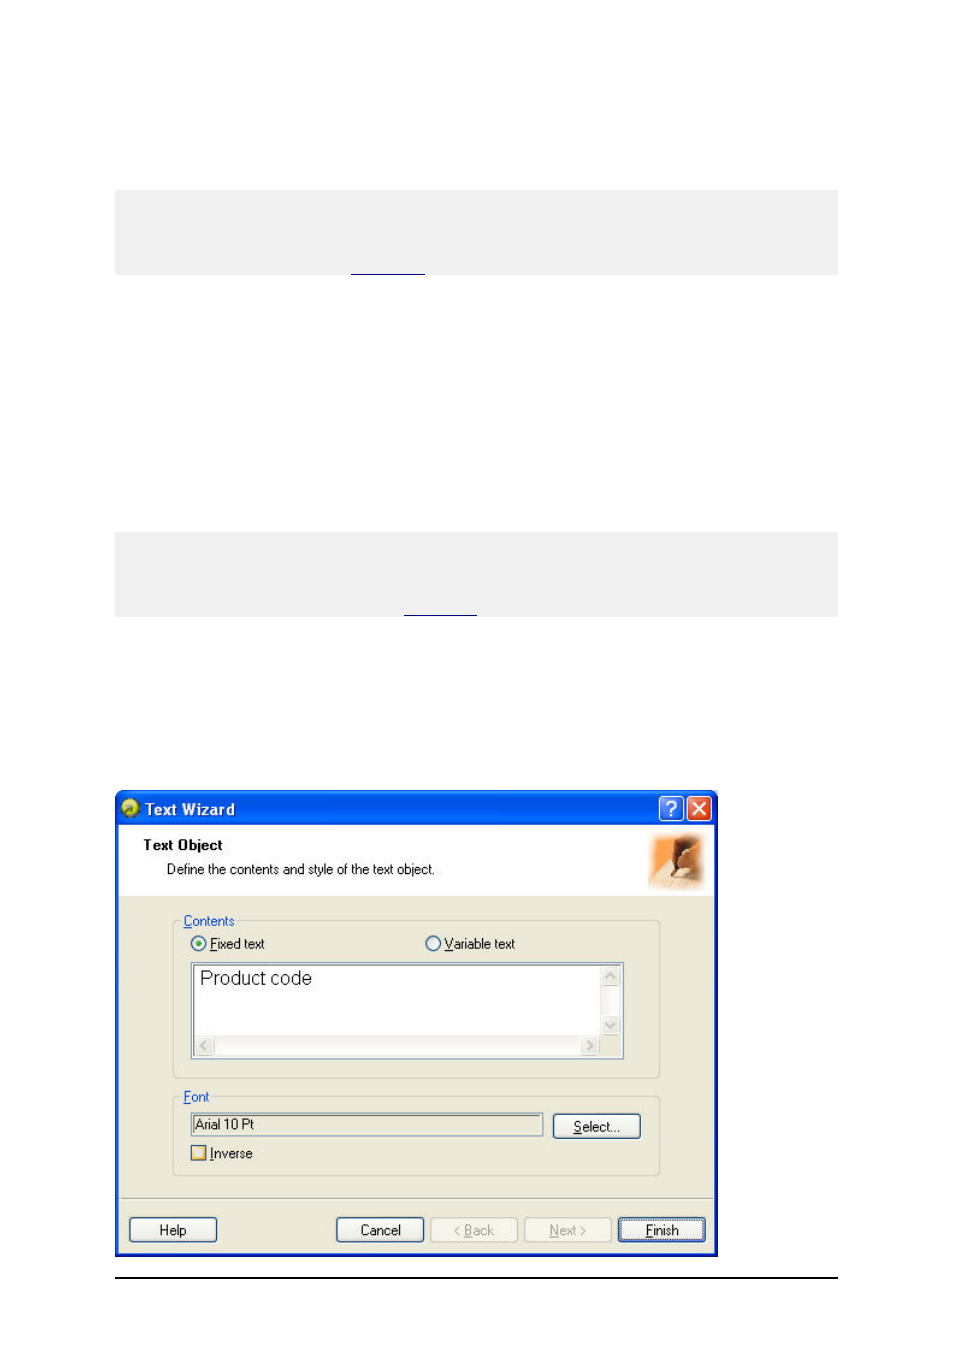
Using Text Wizard
Text Wizard