Connect to line/fxo interface, Connect to line/fxo interface -4 – Quintum Technologies Tenor AS User Manual
Page 40
3-4
P/N 480-0059-00-00
Chapter 3: Installation/Basic Troubleshooting
Connect to Line/FXO Interface
To connect to the Line/FXO port, you must first connect the analog phone lines to another piece of
equipment that houses your telephone lines running to the PSTN, such as the patch panel, punch
down block or wire wrap blocks. If you are unsure of the installation procedures, contact the net-
work administrator or review the documentation you received with the PBX.
For the ASM200 and ASG200, you can connect one device to each Line/FXO port. For the
ASM400 and ASG400, you can connect two devices to each Line/FXO port (using an RJ-11 Dual
Port Splitter).
Chapter 2: Hardware Components
for the RJ-11 cable pinouts you can use to acquire another
cable or adaptor that may be required to connect to the specific external device.
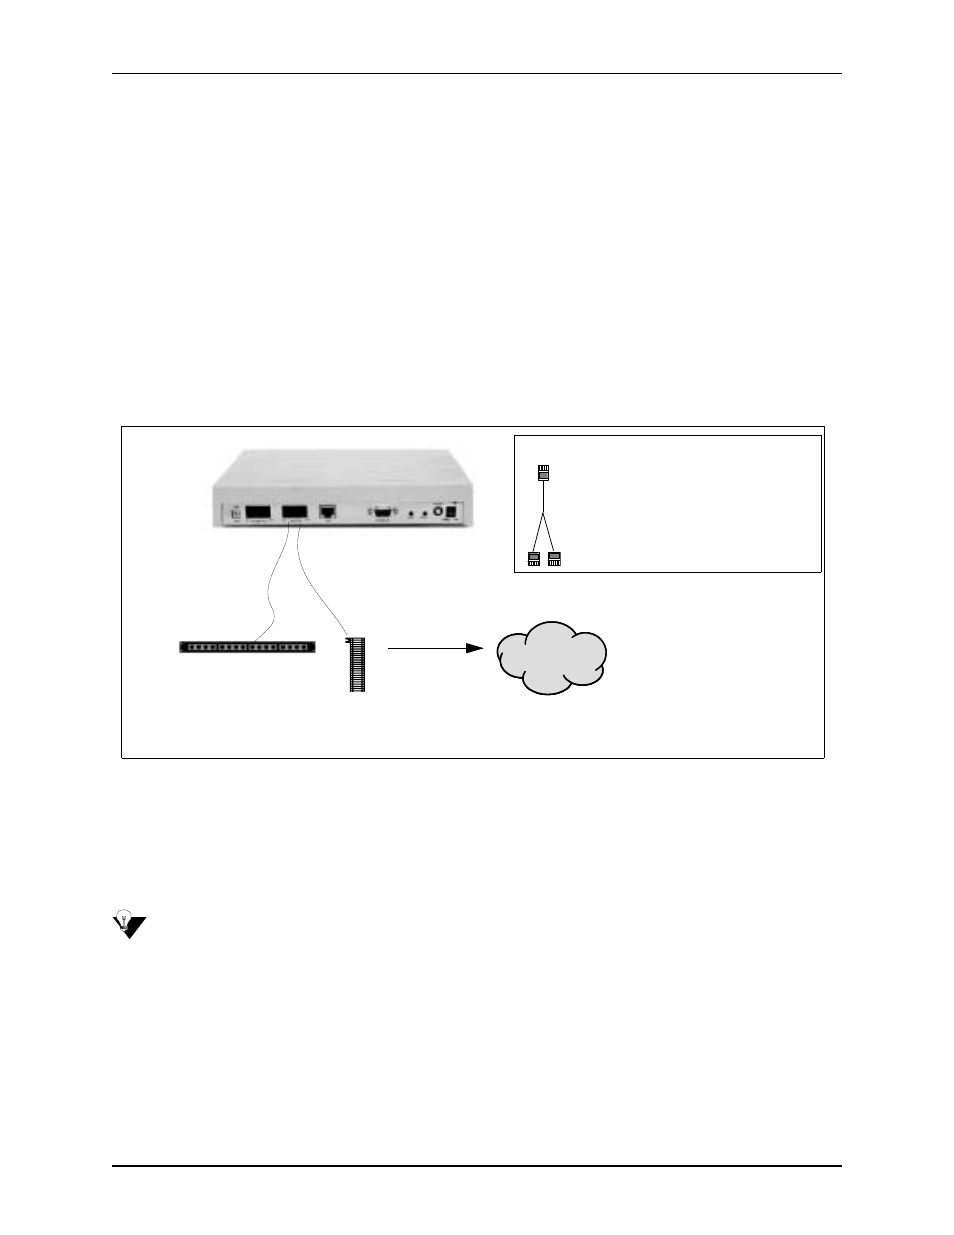
Figure 2-2 Connect to Line/FXO Interface
1. Plug one end of the RJ-11 cable into one of the ports labeled Line/FXO. See
for cable pinouts if you are making your own cable.
2. Connect the other end of the RJ-45 straight cable to the patch panel (or other external device) which
houses your telephone lines.
NOTE:
Connecting to the patch panel may require trained telephone personnel.
Punchdown block
RJ-11
PSTN
For ASM400, an RJ-11 Dual Port Splitter
Cable is used in each port enabled for 4 FX0
RJ-11 Dual Port Splitter
ports.
Patch Panel
Punchdown
Block