Bwf-j cue point (on-air mode), Changing the sampling frequency, Precautions when using on-air mode – Teac HS-4000 User Manual
Page 100: 10 – on-air mode
100
TASCAM HS-4000
10 – On-air mode
BWF-J cue point (on-air mode)
When the Follow BWF-J item is set to ON, if a BWF-J cue point
is detected during playback, the following corresponding
operation will occur. In addition, if the BWF-J Tally item is set to
ON, in response to each BWF-J cue point, the CUE signal and
tally signal will be output from the parallel remote connector.
BC$STANDBY
When the ON AIR button is turned ON, this
point in the first take is made the playback
starting position. During playback, when
this point is reached, playback standby
starts.* In either case, a BC$STANDBY tally
is output.
BC$CM
During playback, when this point is
reached, a BC$CM cue signal is output.
BC$END
During playback, when this point is
reached, a BC$END cue signal is output.
If the BC$END Mode is set to "Jump
to Standby" and the next take has a
BC$STANDBY cue point, the transport
locates to that point and playback
continues.
BC$STOP
During playback, when this point is
reached, a BC$STOP CUE signal is output
and playback stops.
BC$FILE
During playback, when this point is
reached, a BC$END cue signal is output,
and if the next take has a BC$STANDBY cue
point, the transport locates to that point,
playback standby starts and a BC$STANDBY
tally is output.
BC$PAUSE
During playback, when this point is
reached, a BC$PAUSE tally is output, and
playback standby starts.
*If BC$END Mode is set to "Jump to Standby", playback standby
does not occur.
NOTE
If the OnAirOFF BWF-J tally item is off and the ON AIR button
is off, cue and tally signals for corresponding BWF-J cue
points are not output. (BWF-J cue points function normally
otherwise.)
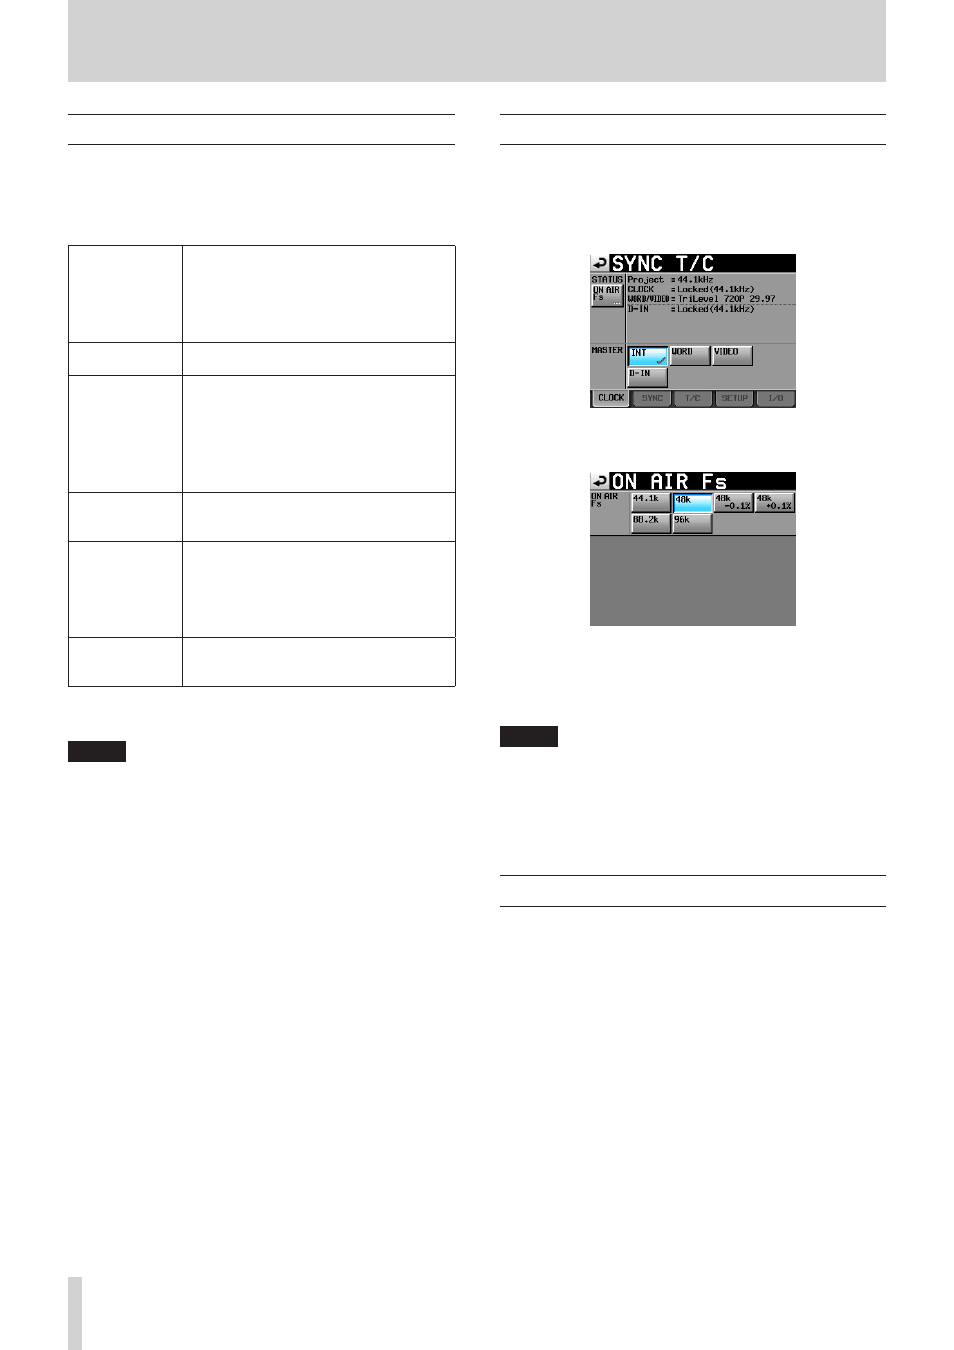
Changing the sampling frequency
When in on-air mode, change the sampling frequency on the
CLOCK page of the SYNC T/C screen.
1. Touch the SYNC button on the Home Screen or the SYNC T/C
button on the MENU screen to open the CLOCK page of the
SYNC T/C screen.
2. Touch the ON AIR Fs button at the top left of the screen to
open the ON AIR Fs screen.
3. Touch the button for the desired sampling frequency. When
a confirmation message appears, touch the OK button.
4. When a second confirmation message appears, touch the
OK button.
NOTE
• After changing the sampling frequency, only files that
match the ON AIR Fs setting will be shown on the ON AIR
LIST screen.
• Even if the sampling frequency is the same, files with 5 or
more channels and other files that cannot be played back
by this unit will not be recognized.
Precautions when using on-air mode
• The following settings on the PLAY SETUP screen will be
turned off when the operation mode is set to on-air mode:
repeat mode, auto cue, auto ready and incremental play.
They can be turned ON, but these changes will not be
backed up.
• In on-air mode, marks cannot be set, edited or deleted.
If you press the Mark key, "Cannot set Mark point in ON AIR
Mode." will appear in a pop-up message.
The EDIT NAME, EDIT TIME and DELETE buttons will appear
disabled on the MARK LIST screen.