Mailbox – TA Triumph-Adler DC 2435 User Manual
Page 523
Appendix-5
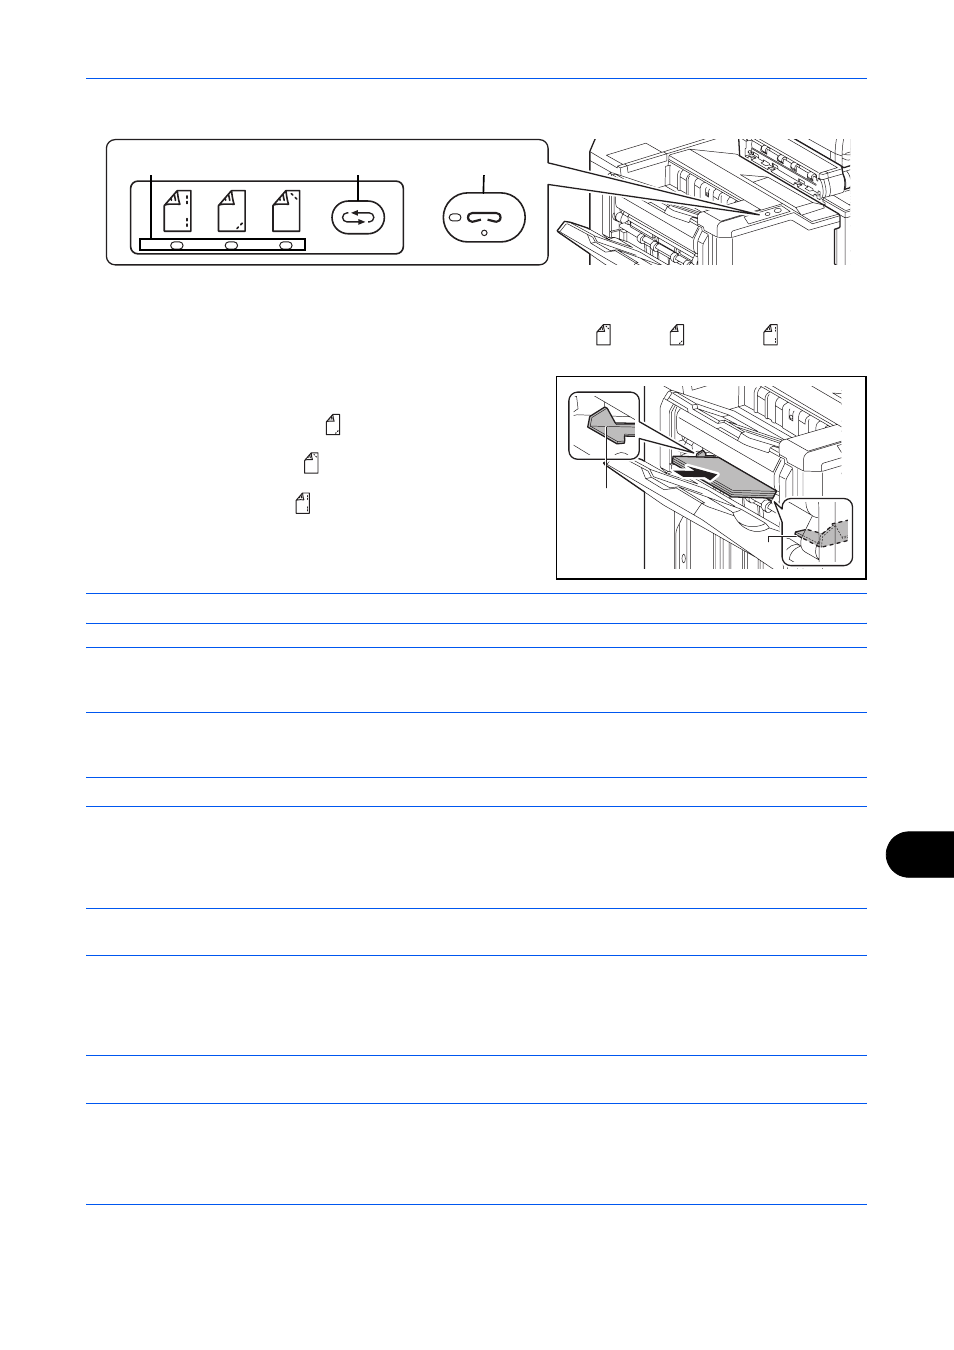
Use the buttons on the stapling control section of the Finisher (optional) for manual stapling.
1
Press the stapling position key on the stapling control section.
The shutter of the paper exit area is opened and this equipment enters into the manual staple mode.
2
Press the stapling position key to select the stapling position (Back
/ Front
/ 2 Points
).
Operation is not possible while the stapling position lamps are blinking. Operate after the lamps light solidly.
3
Straighten the edges of the paper well and place the paper
front side down in the shutter opening of the output unit.
If the near side of the paper (
) will be stapled, place the
paper against the front guide (A).
If the far side of the paper (
) will be stapled, place the paper
against the back guide (B).
If the edge of the paper (
) will be stapled at two points,
place the paper with the center aligned to the center point
between the two side guides (A and B).
CAUTION:
Do not insert your hand inside the open shutter.
NOTE:
Press the stapling position key before you place the paper. Once the paper is placed, the stapling
position key cannot be used.
The stapling lamp lights when the paper is properly placed. If it does not light, replace the paper.
4
Let go of the paper, and then press the stapling key.
Stapling starts. Stapling finishes and the output is delivered to tray A.
CAUTION:
Be sure that your hands are away from the paper while stapling is in progress.
Finishing the manual staple mode
Press the stapling position button several times until the stapling position lamps turn off. The shutter of the
paper exit area closes. It means that manual stapling is finished. If no operation is performed for approx. 10
seconds, the manual staple mode will be automatically finished.
NOTE:
The time after which manual staple mode is automatically exited can be changed. For details, refer to
Mailbox
Makes it easy to sort output into separate trays. Installing this option adds 7 output trays. When multiple
computer users share the printer, each user can print to a specified tray. Installs on the 4,000-sheet finisher.
NOTE:
To deliver output to the mail box, change the Paper Output selection on the operation panel or in the
printer driver, or change in the default settings. (For details, refer to Paper Output on page 9-15.)
Stapling position
key
Stapling
key / lamp
Stapling position
lamps
A
B