Histogram rgb histogram, gps information display, Histogram, Rgb histogram, gps information display – Canon PowerShot G7 X Mark II User Manual
Page 113
113
Wi-Fi Functions
Setting Menu
Accessories
Appendix
Before Use
Index
Basic Guide
Advanced Guide
Camera Basics
Auto Mode /
Hybrid Auto Mode
Other Shooting Modes
P Mode
Tv, Av, M, and C Mode
Playback Mode
●
[---] is shown instead of numerical values for items not available
on your smartphone or items not recorded correctly.
●
You can also display an RGB histogram at the top of the Info
Display 2 – 6 screens. Choose Info Display 2 – 5 on the [Playback
information display] setting screen on the [
6] tab, press the
[
] button, press the [ ][ ]buttons to choose [RGB], and then
press the [ ] button. Note that the brightness histogram is now
displayed at the bottom of the Info Display 3 screen.
●
UTC: Coordinated Universal Time, essentially the same as
Greenwich Mean Time
●
GPS information display is not available for images that lack this
information.
●
You can also switch between the RGB histogram (still images
only) and GPS information display by dragging the lower half of
the screen upward or downward in detailed information display.
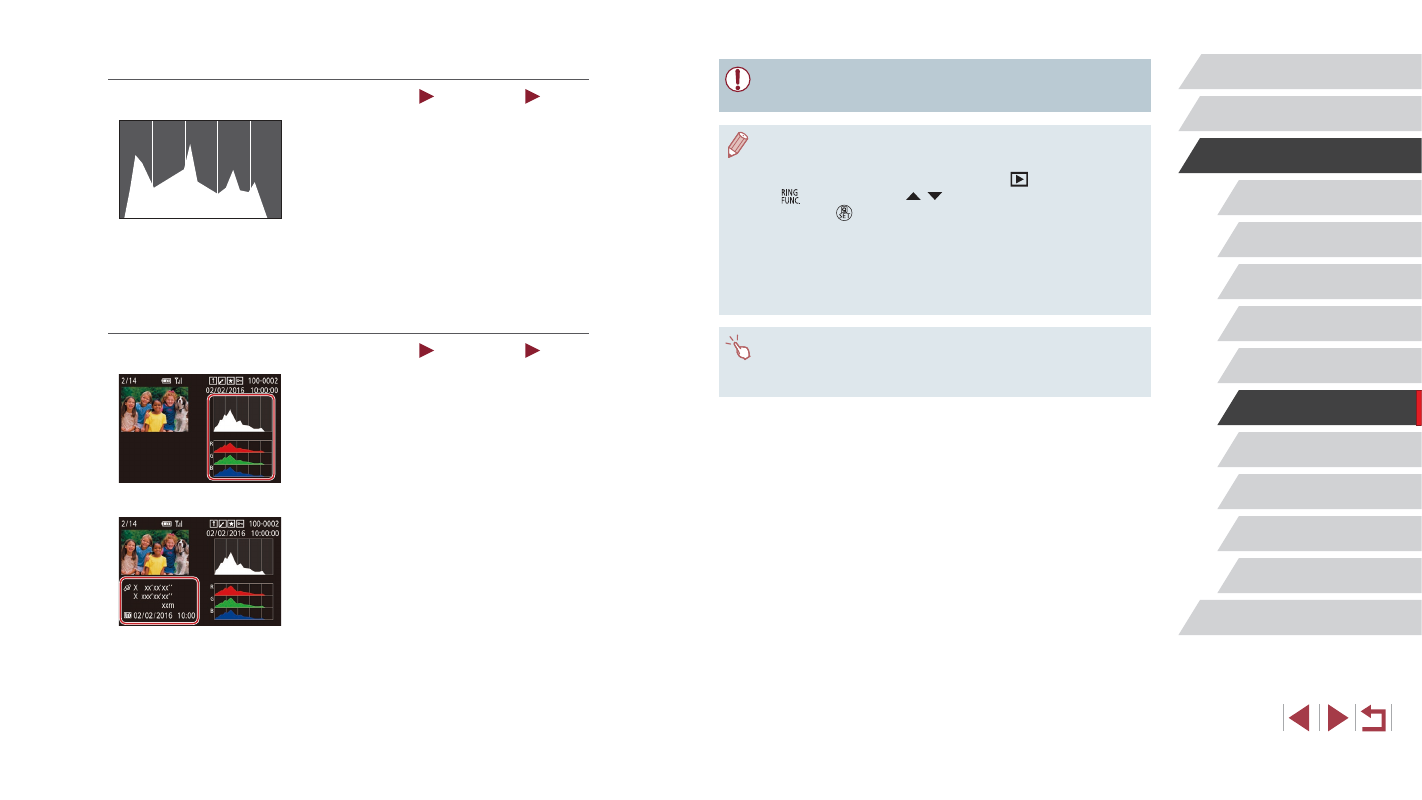
Histogram
Still Images
Movies
z
The graph in detailed information display
(= 112) is a histogram showing the
distribution of brightness in the image.
The horizontal axis represents the degree
of brightness, and the vertical axis, how
much of the image is at each level of
brightness. Viewing the histogram is a
way to check exposure.
z
The histogram can also be accessed
while shooting (= 106, = 197).
RGB Histogram, GPS Information Display
Still Images
Movies
z
The RGB histogram shows the
distribution of shades of red, green, and
blue in an image. The horizontal axis
represents R, G, or B brightness, and the
vertical axis, how much of the image is
at that level of brightness. Viewing this
histogram enables you to check image
color characteristics.
z
Using a smartphone connected to the
camera via Wi-Fi, you can geotag images
on the camera, adding information such
as latitude, longitude, and elevation
(= 164). You can review this information
in the GPS information display.
z
Latitude, longitude, elevation, and UTC
(shooting date and time) are listed from
top to bottom.