Applying filter effects – Canon PowerShot G7 X Mark II User Manual
Page 130
130
Wi-Fi Functions
Setting Menu
Accessories
Appendix
Before Use
Index
Basic Guide
Advanced Guide
Camera Basics
Auto Mode /
Hybrid Auto Mode
Other Shooting Modes
P Mode
Tv, Av, M, and C Mode
Playback Mode
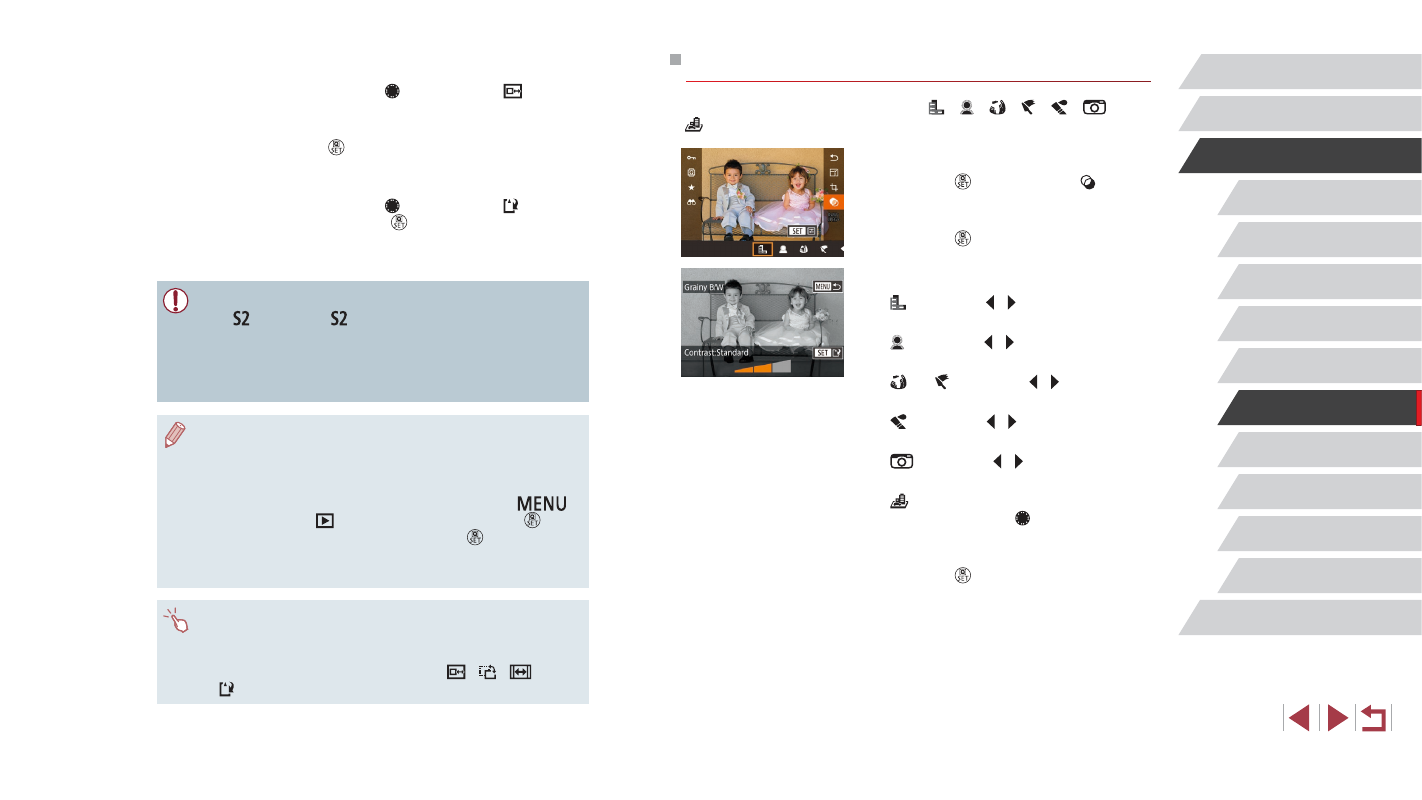
Applying Filter Effects
Apply effects equivalent to shooting in [ ], [ ], [ ], [ ], [ ], [
], and
[ ] modes to images and save them as separate images.
1
Choose an effect.
z
Press the [ ] button, choose [ ] in
the menu, and then choose the effect
z
Press the [ ] button.
2
Adjust the effect as needed.
z
[ ]: Press the [ ][ ] buttons to adjust
contrast.
z
[ ]: Press the [ ][ ] buttons to adjust
defocusing.
z
[ ] or [ ]: Press the [ ][ ] buttons to
adjust the level of the effect.
z
[ ]: Press the [ ][ ] buttons to adjust
color saturation.
z
[
]: Press the [ ][ ] buttons to adjust
color tone.
z
[ ]: Move the zoom lever to resize the
frame, and turn the [ ] dial to move it.
3
Save as a new image and review.
z
Press the [ ] button.
z
Follow steps 2 – 3 in “Resizing Images”
3
Preview the cropped image.
z
Turn the [ ] dial to choose [ ].
z
To switch display between the cropped
image and the cropping frame, press the
[ ] button repeatedly.
4
Save as a new image and review.
z
Turn the [ ] dial to choose [ ], and then
press the [ ] button.
z
Follow steps 2 – 3 in “Resizing Images”
●
Editing is not possible for images shot at a recording pixel setting
of [ ] or resized to [ ] (= 128).
●
RAW images cannot be edited.
●
Cropped images cannot be cropped again.
●
Cropped images cannot be resized or have Creative filters
applied.
●
Cropped images will have a lower number of recording pixels than
uncropped images.
●
While previewing the cropped image in step 3, you can resize,
move, and adjust the aspect ratio of the cropping frame.
●
Operations in step 2 are also possible by pressing the [
]
button, choosing [
3] tab ► [Cropping], pressing the [ ]
button, choosing an image, and pressing the [ ] button again.
●
If you crop still images shot using Face ID (= 45), only the
names of the people left in the cropped image will remain.
●
You can also move the cropping frame in step 2 by dragging it.
You can also resize frames by pinching in or out (= 120) on the
screen.
●
Operations are also possible by touching [
], [
], [
], and
[ ] on the top of the screen in step 2.