Text file import, Text file import setting, Tip shortcut keys – Compix Persona User Manual
Page 72
Chapter 3 File Import and Export
Document No: 2.3.004 Revision: 2.0 Updated: 3/21/2012
Text File Import
Text files can be imported and converted into CG titles when a large amount of pages need to be populated. The format of the text
file must be the standard TXT.
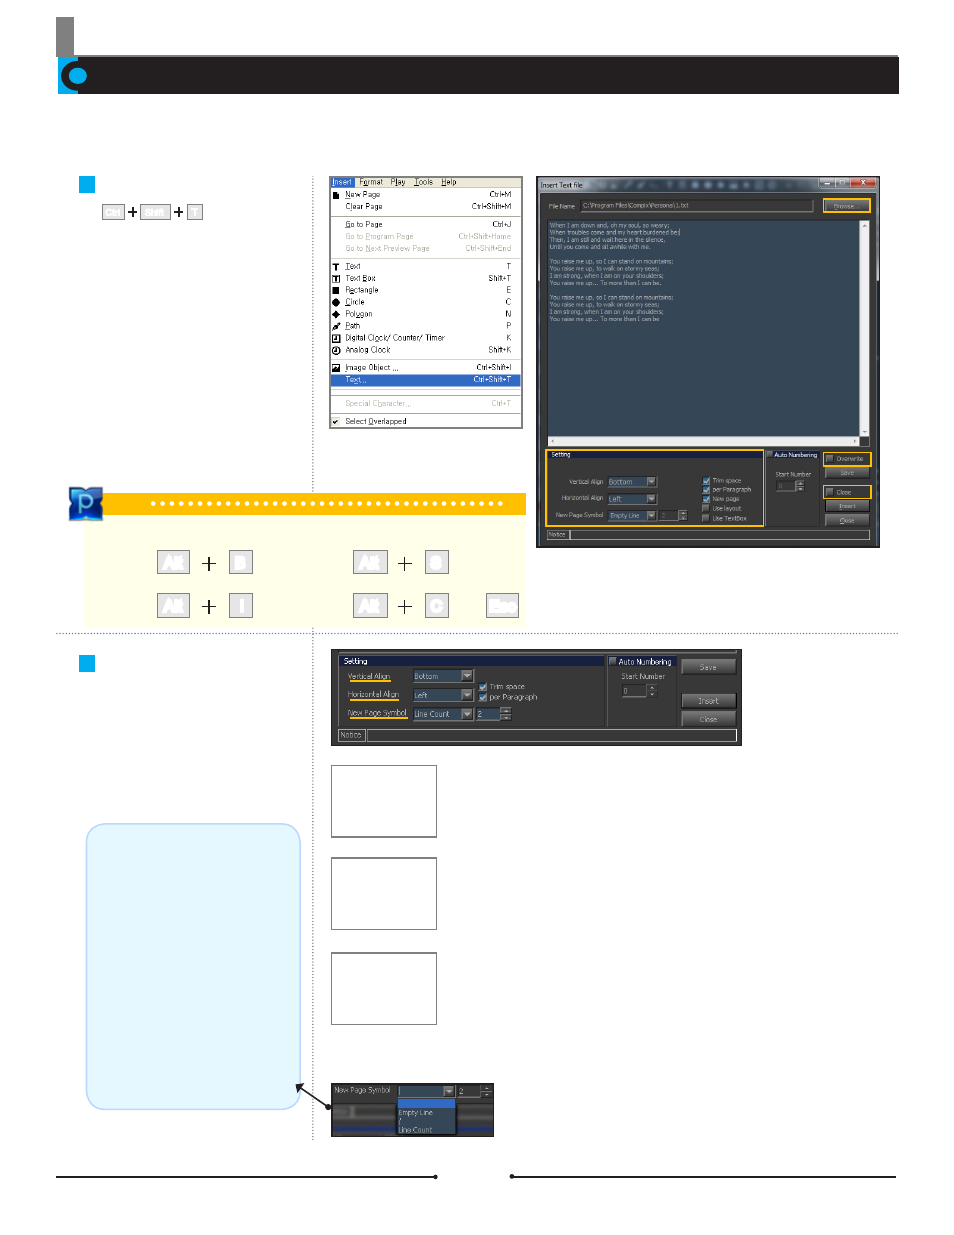
Text File Import
Select [Insert] > [Text...]. Click on
the [Browse...] button in the [Insert
Text File] window. Select the align-
ment and separation method in the
[Setting] window. The text in the
[Insert Text File] window can be ed-
ited and saved by clicking the [Save]
button (it will be saved within the
Working Folder). Click the [Insert]
button to import the text into the Edit
Window.
T
Ctrl
Shift
Text File Import Setting
Customize how the imported text is
arranged on the Edit Window.
Top
Bottom
Center
Vertical Align
Vertical Align: Set the position of the imported text to the Top, Middle, or
Bottom of the Edit Window. (When Horizontal Align is set as Caption, the Vertical
Align will automatically be set as Bottom.)
Left
Right
Center
Horizontal Align
Horizontal Align: Set the position of the imported text on the Left, Right, or Center
of the Edit Window or as a Caption.
Long Caption(Center)
Caption (Left)
Caption
Caption: Longer text will be aligned to the Center and shorter text will be aligned
to the Left.
The Default Delimiter (//):
The default page delimiter is set to the //
symbol.
Set by User:
The user may set the page delimiter by
changing the default to another letter or
symbol. Any language can be used as
the delimiter.
Empty Line:
A blank space can be used as a page
delimiter as well.
Line Count:
Alternatively, the user can set the number
of lines to be imported per page.
New Page Symbol: Set the delimiter or assign the number of lines to be imported per page.
Tip
Shortcut Keys
Browse
Save
Insert
Close
OR
Alt
S
Alt
I
C
Alt
Esc
B
Alt
Compix Persona
72