Pointmaker PVI 65 User Manual
Page 32
Page 22 - Pointmaker PVI-65 HD/SD-SDI Broadcast Video Marker
Boeckeler Instruments, Inc.
Installation
Section One: Getting Started
NOTE: Be sure the Pointmaker is powered down before connect-
ing or disconnecting any controllers. It will automatically detect
the controllers installed upon power up. If users change controllers or
add a new controller, they will need to power down, install the new
controller(s), then power up.
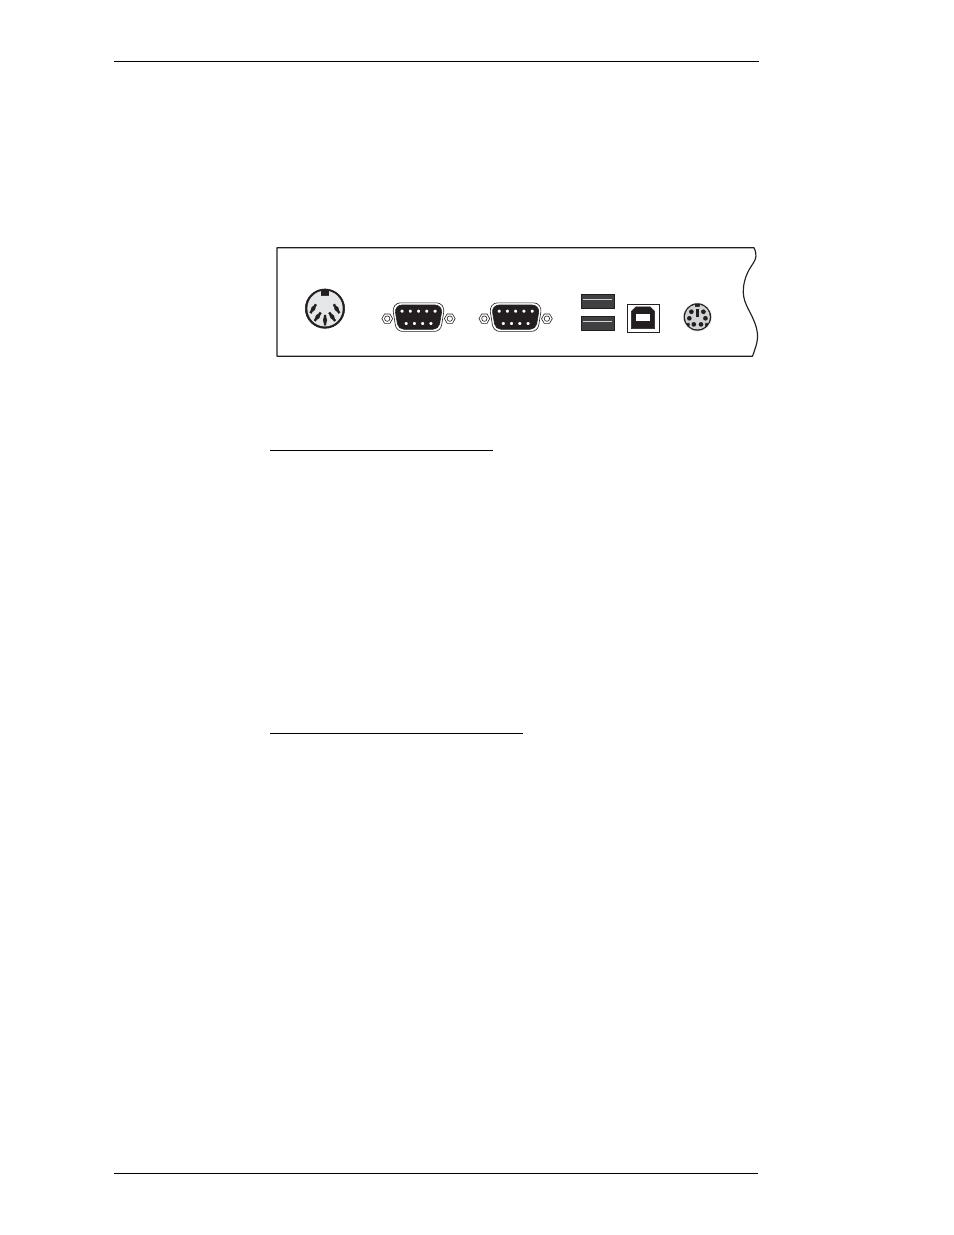
Figure 1-10: Cutaway of back panel, showing power and controller connectors.
Connecting the KB-30 Keyboard:
NOTE: Make all connections before applying power.
NOTE: If you are connecting both the keyboard and the digitizing
tablet, skip these instructions and proceed to the next section for con-
necting a digitizing tablet.
1.
Connect the Pointmaker keyboard cable to the KEYBD port on the
back of the Pointmaker.
This is a female PS/2 port.
Connecting a DT-30 Digitizing Tablet:
1.
Connect the stylus to the digitizing tablet.
2.
Using the RS-232 cable provided with the digitizing tablet, connect
the female 9-pin connector to a COMM port on the back of the Point-
maker.
3.
Connect the power cable (which runs off the tablet cable) to the key-
board adapter cable provided with the digitizing tablet.
There is only one way to plug in these connectors.
4.
Connect one end of the keyboard adapter cable to the female KEYBD
connector on the back of the Pointmaker (for power).
NOTE: If the keyboard is also being attached, connect the other end
of the keyboard adapter cable to the Pointmaker keyboard. The extra
cable that runs off the keyboard adapter cable is extraneous for appli-
cations where the Pointmaker keyboard is not connected.
1
2
POWER
COMM. 2
COMM. 1
KEYBD
USB