Adtec digital Soloist-HD Pro (version 02.07.09) Manual User Manual
Page 49
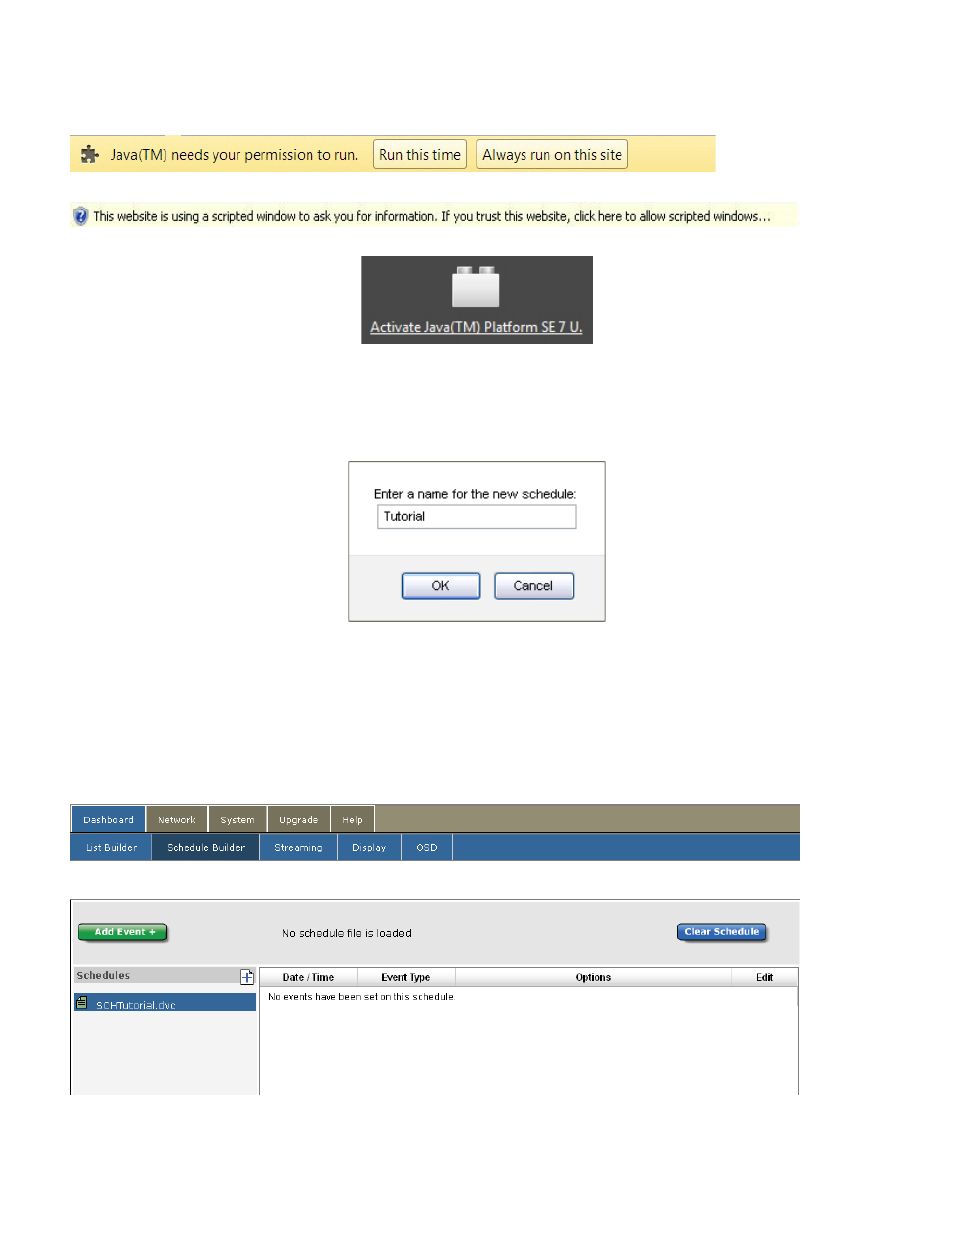
Click the Page Plus Sign (+) next to the Schedules Header (circled in red in the above picture). You may
get a popup notification (will vary depending on web browser and version) that will look similar to one of
these:
If so, click it and select to either “Run” , “Temporarily Allow Scripted Windows” or “Activate.
If you received one of the previous popup messages, click the Plus Sign (+) again.
You will be given a new window to create your new schedule.
This is the name of your new schedule. Add a name and click the OK button. In this example, we are
naming the schedule ‘Tutorial.’ Note: It is best to avoid any special characters or spaces in the naming of
your schedule to avoid issues with file location. In place of spaces, you can use dashes (-) or underscores
(_).
You will now see your schedule under the Schedules Header with the letters ‘SCH’ in front of the name.
Image reduced for clarity