Audioscan Verifit User Manual
Page 118
Verifit
®
User's Guide Version 3.12
May 2015
instrument will remain omni-directional and no separation will be observed. Press <Continue> to capture this
directional test result and end the test.
7. Press <Continue> to close [Directional] and move to [Noise reduction].
8. Viewport On-ear directional test
Refer to On-Ear Measures - Setup to prepare the system for use and for proper positioning of the client and the
probe tube. Insert the earmold/tip or custom hearing instrument into the ear, being careful not to advance the
probe tube further into the ear canal. A lubricant applied in the vicinity of the probe tube will ease insertion and
prevent slit leaks.
1. On the Viewport On-ear screen, highlight and <PICK> [Directional].
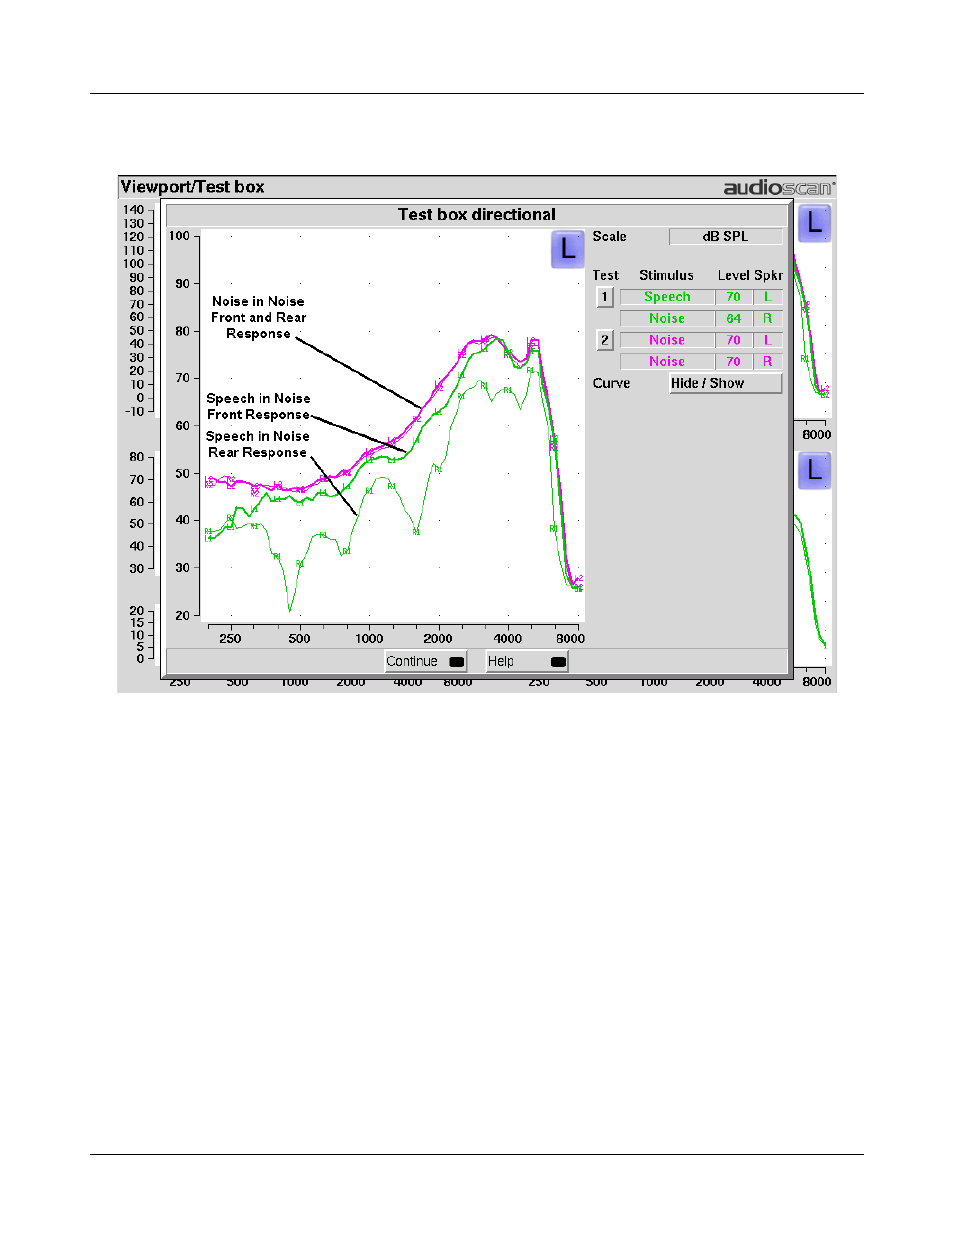
2. Highlight and <PICK> Test 1. This will introduce speech at 70 dB SPL (default) from the front sound-field
speaker and noise at 64 dB SPL (default) from the back sound-field speaker. At periodic intervals, the level
of the speech and noise is momentarily reduced and an additional burst is played from either the front or rear
speakers to measure the response from that direction. Two curves (one heavy line and one thin line) will
appear on the display. The heavier curve is the response to the signal from the front speaker while the lighter
curve is the response to the signal from the rear speaker.
3. If the instrument is omni-directional, the two curves will be nearly identical. If the instrument is directional
the curves will separate indicating different output levels for sounds coming from different directions.
NOTE: Most adaptive directional instruments require between 15-45 seconds of presentation before the
adaptive function is activated and observable.
118