Viewport on-ear feedback test – Audioscan Verifit User Manual
Page 121
Verifit
®
User's Guide Version 3.12
May 2015
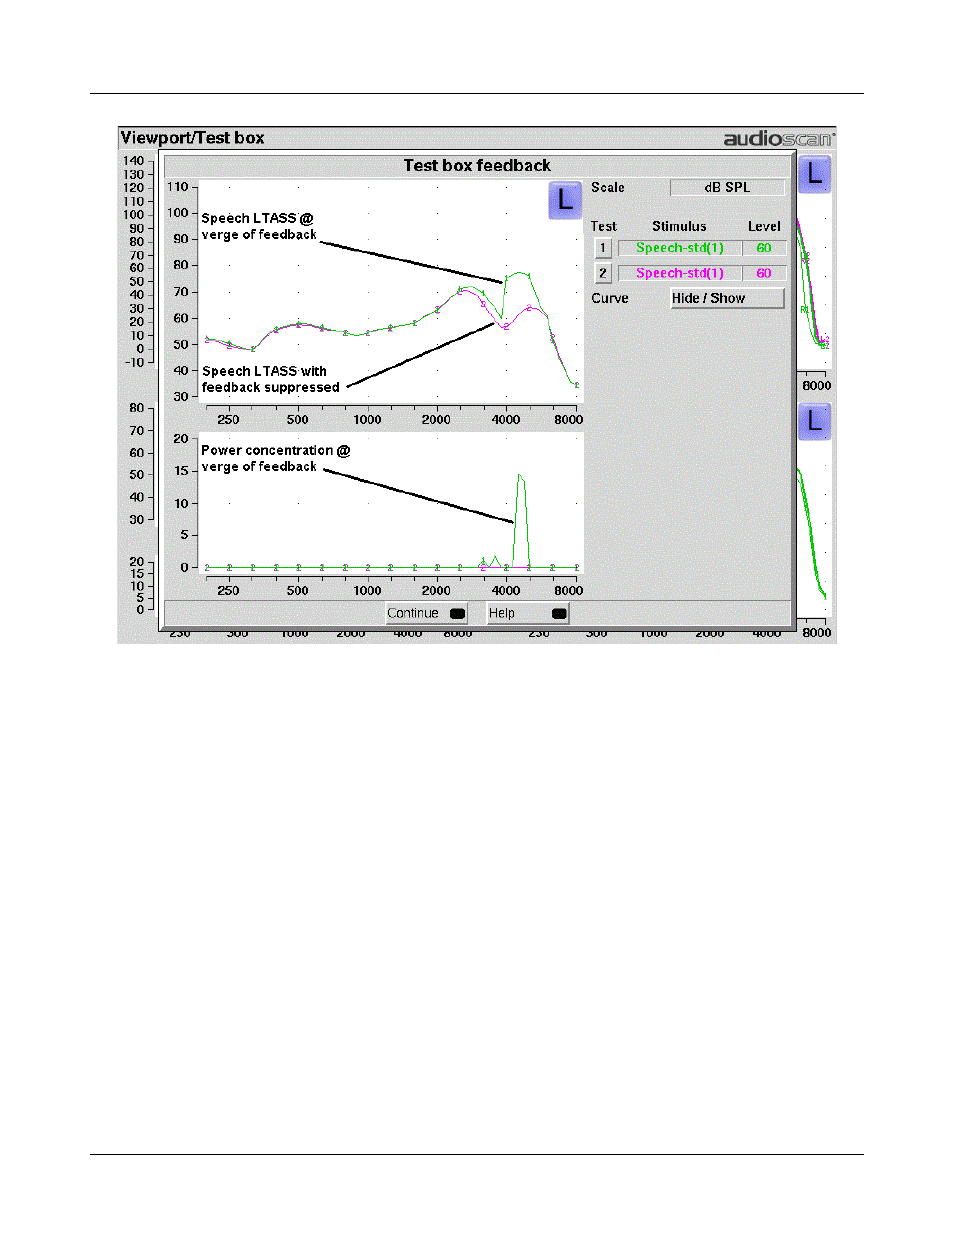
4. When the test has finished, peaks should be apparent in one or both curves.
5. Without changing the setting of the monitor headset volume control, enable the hearing instrument’s
feedback suppression and highlight and <PICK> Test 2. Allow the speech to run for a few seconds, then
press <Continue>.
6. When the test has finished, the peaks in the curves of Test 1 should not appear in the curves of Test 2.
7. Press <Continue> to close [Feedback] and return to the Viewport screen.
Viewport On-ear feedback test
Refer to On-Ear Measures - Setup to prepare the system for use and for proper positioning of the client and the
probe tube. Insert the earmold/tip or custom hearing instrument into the ear, being careful not to advance the
probe tube further into the ear canal. A lubricant applied in the vicinity of the probe tube will ease insertion and
prevent slit leaks.
1. Set the instrument as it will be used, with feedback suppression enabled and initialized.
2. Highlight and <PICK> Test 1. As the speech passage plays, observe the feedback bar and the lower graph. A
yellow Feedback bar and peaks with yellow markers in the lower curve indicate incipient feedback which
may impact sound quality. A red Feedback bar and peaks with red markers in the lower curve indicate
feedback that may be audible and should be mitigated. Press <Continue> to run the full speech passage and
capture average results for the passage.
3. Test 2 is the same as Test 1 but uses live speech (default).
121