22 troubleshooting, Self test failures, Initialize function – Audioscan Verifit User Manual
Page 123
Verifit
®
User's Guide Version 3.12
May 2015
22 Troubleshooting
This section covers common problems encountered when using the Verifit. If you require further assistance, note
your model and serial number (located next to the power switch) and contact your local distributor, or
Audioscan at 519-268-3313 800-265-2093 (USA only), 519-268-3256 (fax) or [email protected]
PLEASE DO NOT SHIP YOUR UNIT BACK TO THE FACTORY. In most cases we can courier you a part
that you can quickly and easily replace yourself.
Self test failures
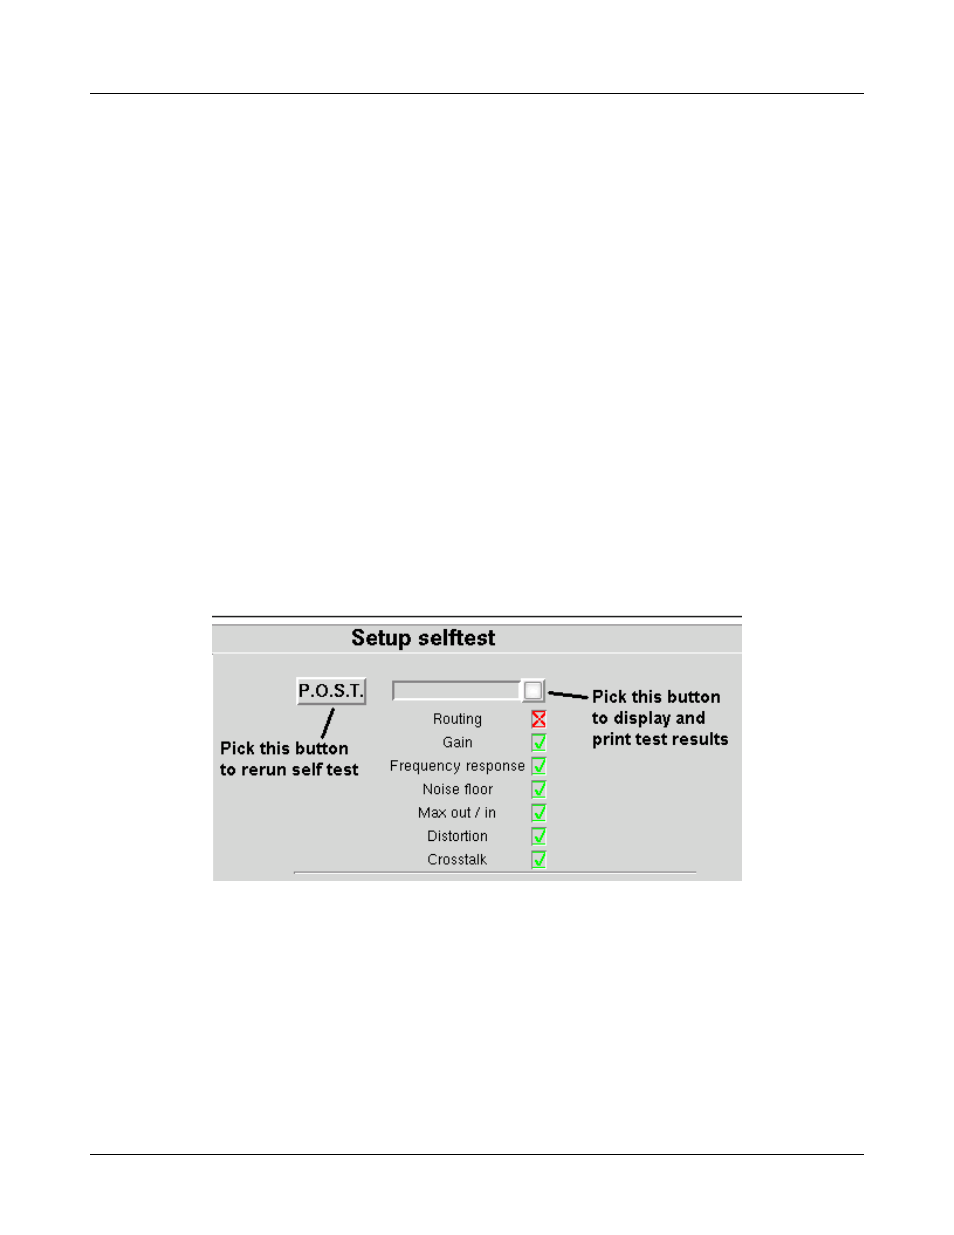
Any failure during power-on self test (P.O.S.T.) is indicated on-screen and further use of the instrument is
denied. Try the following steps to resolve the failure:
1. To access Self test, press <Setup>, then highlight and <PICK> [Self test].
2. If you received a Max out/in or a Routing failure, remove any hearing aids from the test chamber, unplug the
monitor headphones (if used) and rerun self test.
3. Check that the cables from the rear display unit to the test chamber and that the test box reference
microphone are firmly plugged in. Rerun self test.
4. Unplug all microphones (On-ear & Test box) from the test chamber. Rerun self test. If self test passes,
reconnect the microphones, one by one, running self test each time until a failure occurs. If the failure
returns, display and print the test results and contact Audioscan for help.
Initialize Function
Initializing your Audioscan unit will reset it to default factory settings. This erases the user preference files
stored in internal memory. Any custom printer choice, network settings, test setups will need to be re-entered
and the user calibrations will also be required.
1. To initialize, press <Setup>, then highlight and <PICK> [Self test]
2. Highlight and <PICK> [Initilize]. Unit will automatically restart.
123