Keypad keys – Audioscan Verifit User Manual
Page 21
Verifit
®
User's Guide Version 3.12
May 2015
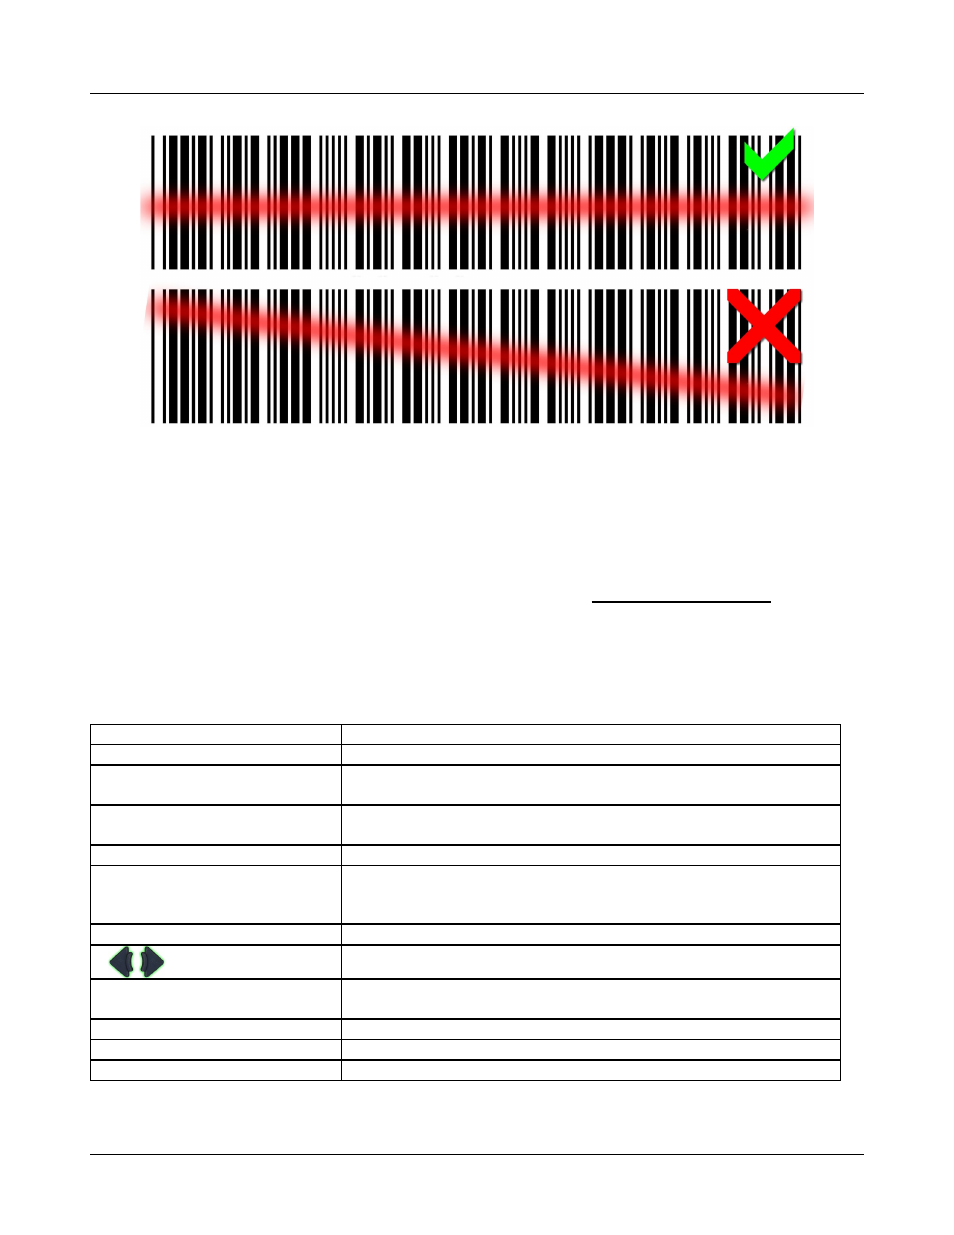
2. Hold the printout so that the barcode is flat. With the scanner 6 – 8 in. (15 – 20 cm) from the barcode, press
the trigger on the scanner and center the illuminated red line along the length of the barcode.
3. When the scan is successful, the scanner will 'beep', the red line will extinguish and a Barcode Entry poster
will appear on the screen. A green checkmark on the poster shows which data have been accepted. A
message will advise if the barcode does not contain data for the screen you are viewing.
4. When all desired data have been accepted, select [Done] to apply the data.
See Barcodes, tabular data, headers and comments on printouts under Printing and Storing Results.
Keypad keys
Keypad Button
Function
<Help>
Summon context-sensitive Help Screen.
<Setup>
Summon Setup Menu containing a list of Verifit features that can be
modified. Any modifications made will be maintained after power off.
<Tests>
Summon Test Selection Menu containing a list of the available test
procedures.
<Session>
Summon Session Data Menu to erase, export or import data
<Left/Right>
Used in the Single View Mode to alternate between ears or A/B Data. Used
in the Dual View Mode to navigate between ears or test panels. Used in
Help to switch between Help index and Help page.
<Print>
Print on internal or external printer or print to file.
Arrows
Move across screen columns.
Arrows
Move within a screen column.
Round Key (<PICK> key)
Select a highlighted item or operate a screen button.
<Continue>
Proceed from current state.
<Cancel>
Revert to previous state.
21