Test box directional procedure – Audioscan Verifit User Manual
Page 56
Verifit
®
User's Guide Version 3.12
May 2015
Test box directional procedure
To test directional function in the test chamber:
1. Mount the hearing aid to the appropriate coupler (see Coupling the hearing instrument).
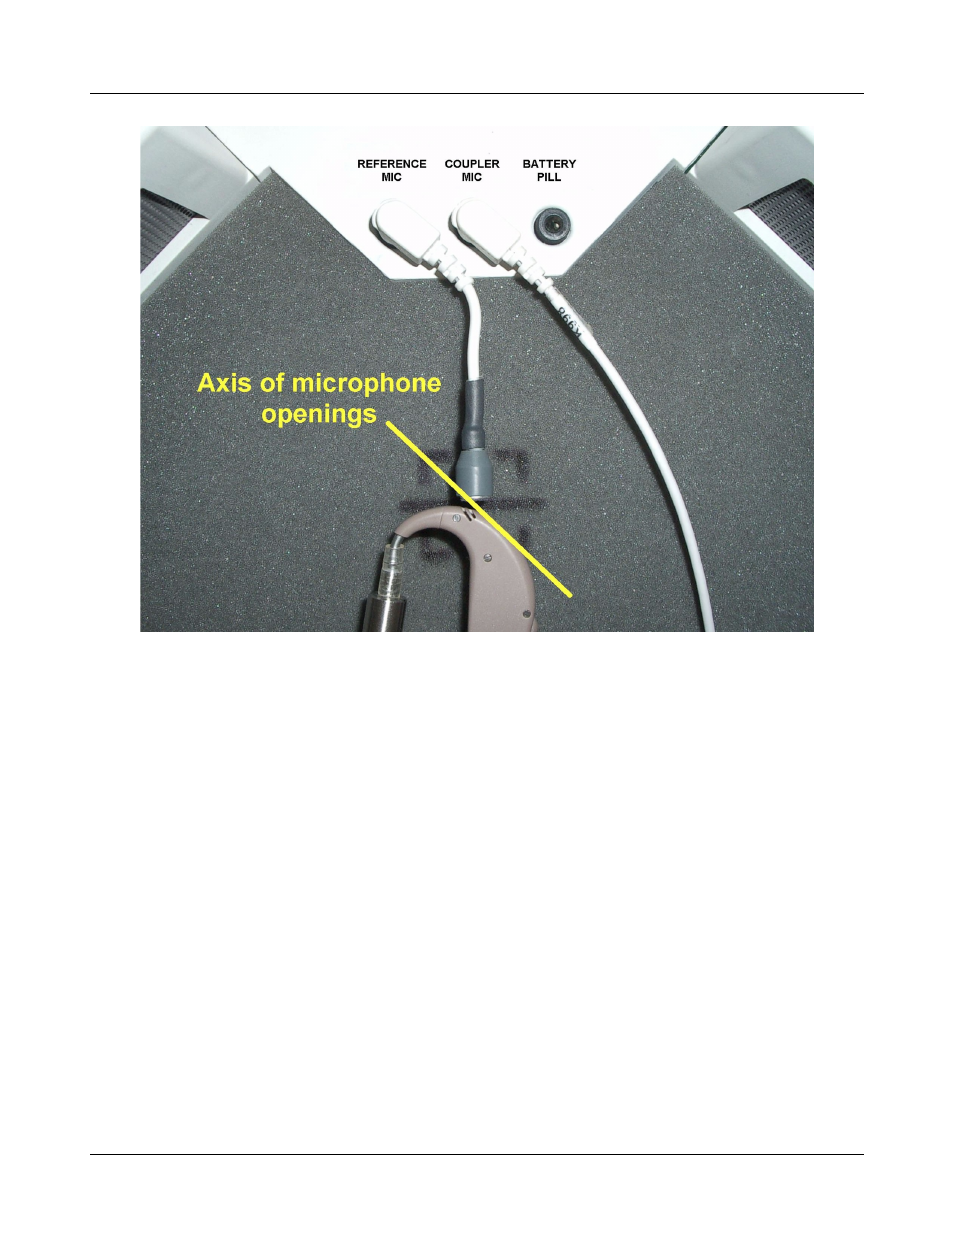
2. Position the hearing instrument in the test chamber as shown in 9.6: Directional ITE positioning or 9.7:
Directional BTE positioning.
3. Press <Tests>, then highlight and <PICK> [Test box measures], then highlight and <PICK> [Directional].
4. Highlight and <PICK> Test 1, 2, 3 or 4. This presents test signals from both speakers. Two real-time curves
appear on the screen - the heavier one is the response to the left speaker signal and the lighter one the
response to the right speaker signal. For a non-directional instrument, the two curves will be nearly identical.
Setting the instrument for directional operation should produce a separation of the curves.
5. On the Test control poster, highlight and <PICK> the Level window, then highlight and <PICK> a level
from the drop-down list. For an adaptive directional instrument, a stimulus level between 60 and 70 dB
should cause the separation to change over a 15 – 45 second period. For a noise-reducing instrument, both
curves may change with time and stimulus SPL.
6. Highlight and <PICK> [Speech S/N] within the Test control poster and select a signal to noise ratio from the
list box (defaults to 0 dB). A S/N ratio between 0 and 6 dB will usually induce directional performance after
15 – 45 seconds. Optionally, highlight and <PICK> [Speech S/N] and select Off. This presents noise
alternating between the left and right test speakers. Speech-adaptive directional instruments may appear to be
non-directional if [Speech S/N] is set to Off.
56