Appendix d: dc power, D.1: assembly of the wago mcs dc power connector – Thinklogical Secure Console Server Manual User Manual
Page 83
S e c u r e C o n s o l e S e r v e r M a n u a l , R e v . K , J u l y , 2 0 1 3
Page 83
Appendix D: DC Power
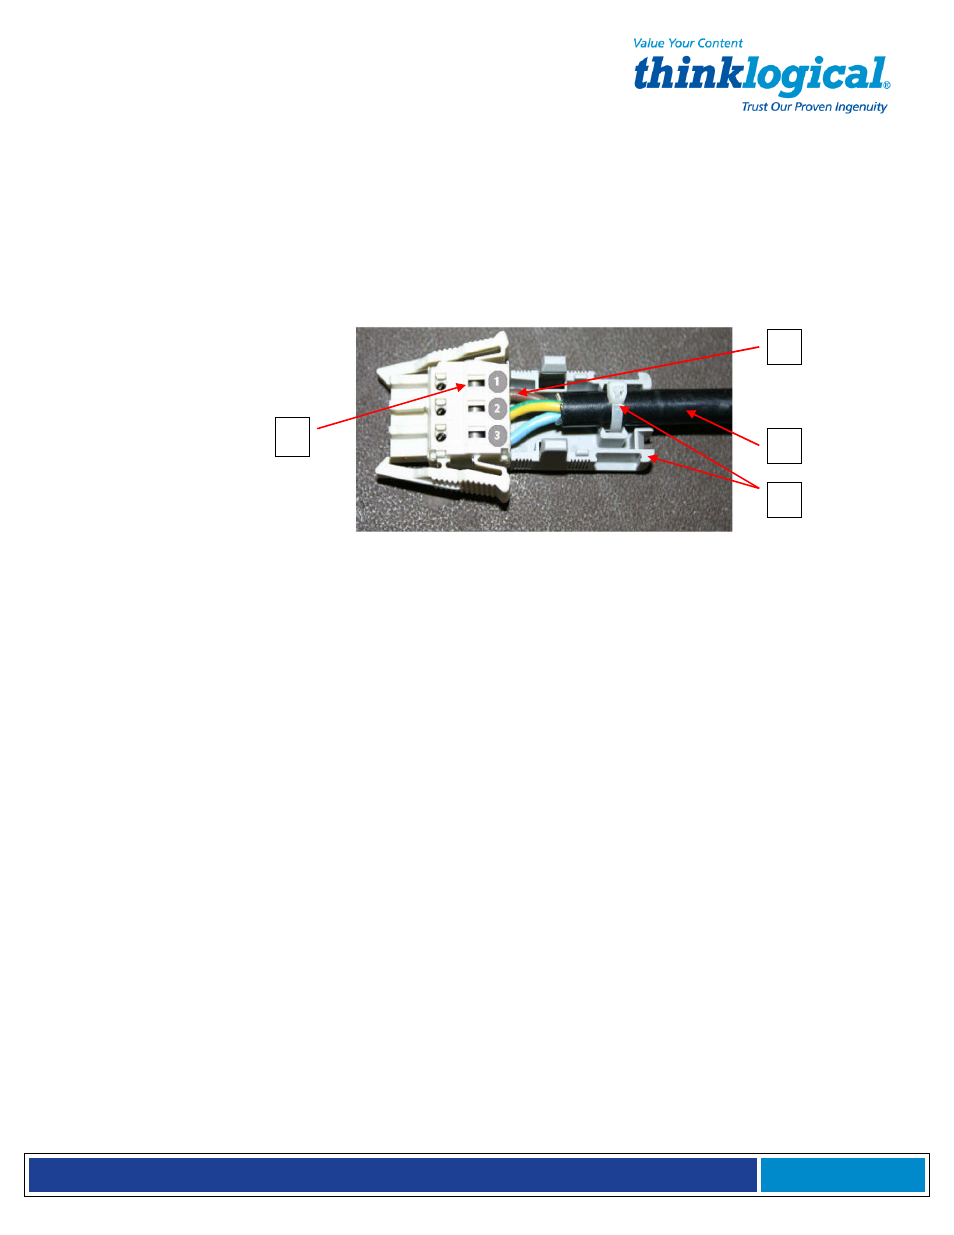
D.1: Assembly of the WAGO MCS DC Power Connector
What you will need: Small flat-blade screwdriver, Wire stripper, DC power connector kit
(provided with DC models), 48 VDC power cord (See Step 2, below and Appendix D.3)
WAGO MCS DC power connector:
1. Brown
= -48VDC
2. Green/
Yellow
= Power Supply Ground
3. Blue
= Common
1. Turn off the circuit breaker to the DC power supply.
2. Select a UL style 1028 or other UL 1581 (VW-1) compliant equivalent 16 AWG three-wire set
(-48V, Power Supply Ground and Common).
3. Strip 0.35 inches (9 mm) of installation from each wire.
4. Insert a small flat-blade screwdriver, one at a time, into each of the connector’s clamp slots
to depress the internal wire clamp.
5. Insert the appropriate wire into the connector. Remove the screwdriver.
Check that the clamp has captured the wire. Repeat steps 4 and 5 for the other two wires.
6. Attach the provided strain relief to the connector. Be sure to use a tie-wrap to firmly attach
the strain relief to the cable.
7. Attach the connector to the socket on the back of the Console Server. Repeat the above
steps to attach each power module input.
4
2
5
6