Playing back with shuttle/slider, Drag the shuttle/slider – Grass Valley EDIUS Pro v.7.4 Reference Manual User Manual
Page 273

Chapter 6 Editing Timelines — Playing Back Timelines
273
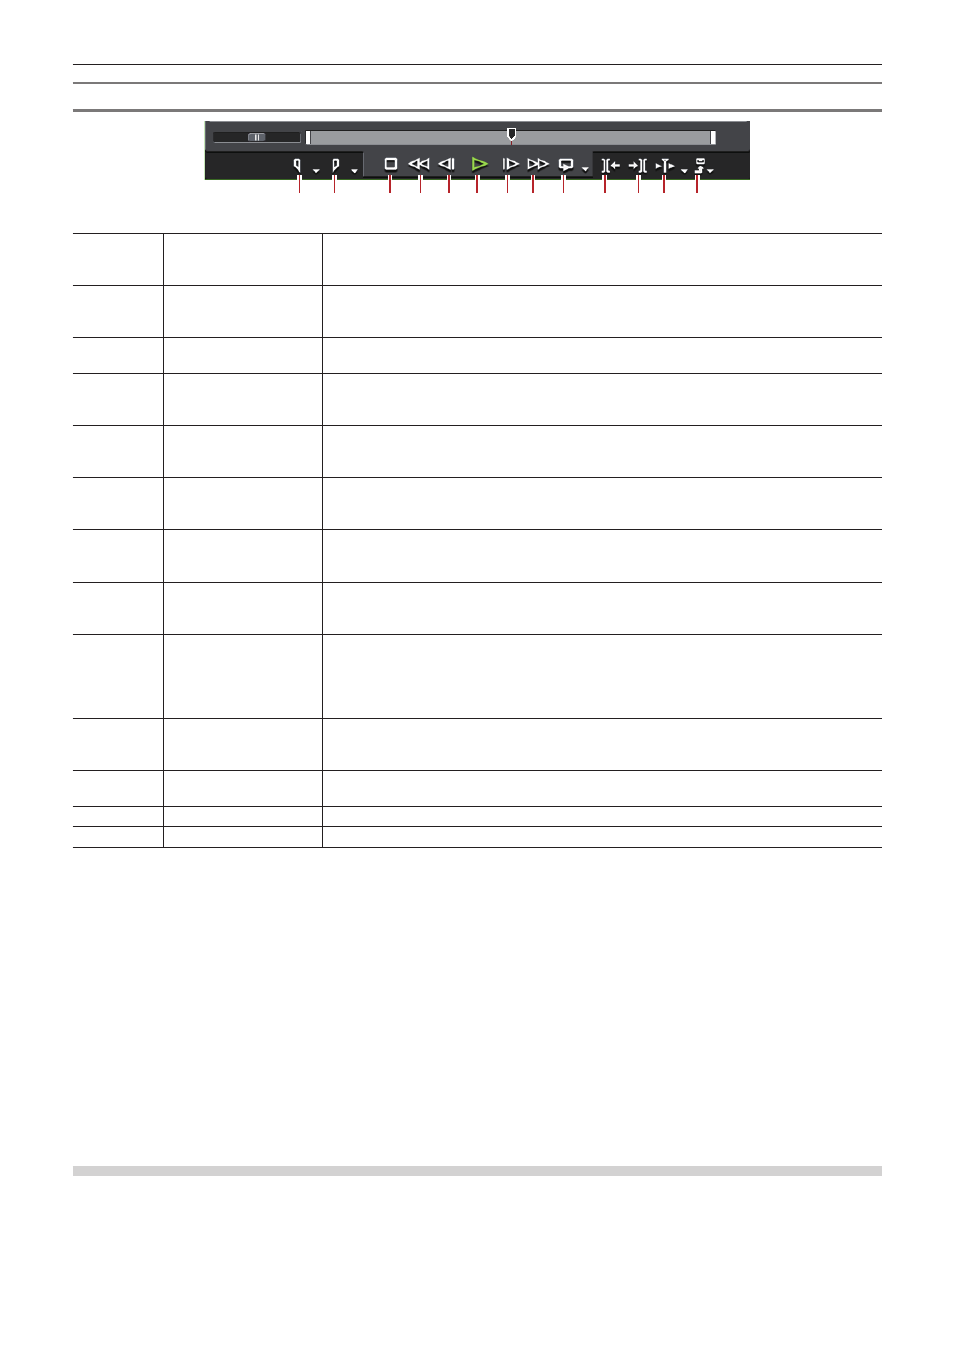
Recorder Operation Buttons
(1) (2)
(3) (4) (5) (6) (7) (8) (9) (10) (11) (12) (13)
(1)
[Set In]
Set the In point to any position on the timeline.
[I]
“Setting the In and Out Points on the Timeline” (w page 217)
(2)
[Set Out]
Set the Out point to any position on the timeline.
[O]
“Setting the In and Out Points on the Timeline” (w page 217)
(3)
[Stop]
Stop playing back the timeline.
[K], [Shift] + [↓]
(4)
[Review]
Rewind the timeline. Each click switches the playback speed in the reverse direction between 4
times and 12 times.
[J]
*1
(5)
[Previous Frame]
Each click rewinds the timeline one frame at a time in the reverse direction. Keeping this button
clicked plays back the source at the same speed in the reverse direction.
[←]
(6)
[Play]
Play the timeline in the forward direction. When this button is clicked during playback, playback
pauses. Click again to restart playback.
[Enter], [Space]
(7)
[Next Frame]
Each click advances the timeline one frame at a time in the forward direction. Keeping this
button clicked plays back the source at the same speed in the forward direction.
[→]
(8)
[Fast Forward]
Fast forward the timeline. Each click switches the playback speed in the forward direction
between 4 times and 12 times.
[L]
*2
(9)
[Loop]
Repeat playback between In and Out points of the timeline. If no In point has been set,
playback is repeated from the beginning of the timeline, and if no Out point has been set,
playback is repeated until the end of the timeline. The entire timeline can also be played back
as a loop.
[Ctrl] + [Space]
(10)
[Move to Previous Edit
Point]
Move the timeline cursor to the edit point (e.g. the border of clip, In and Out points of the
timeline) at the left side of the timeline cursor position.
[A], [Ctrl] + [←]
(11)
[Next Edit Point]
Move the timeline cursor to the edit point at the right side of the timeline cursor position.
[S], [Ctrl] + [→]
(12)
[Play the Current Area] Play back the area before and after the timeline cursor.
(13)
[Export]
Display output (import) related menus.
*1 Each press of [J] on the keyboard switches the rewind speed in 6 levels between 2 to 32 times. Press [L] to slow down the rewind speed. Press
this key with the source paused to play back at the same speed in the reverse direction.
*2 Each press of [L] on the keyboard switches the fast-forward speed in 6 levels between 2 to 32 times. Press [J] to slow down the fast-forward
speed. Press it while pausing to play back at the same speed in the forward direction.
2
f
When playback processing is slow, try the following operations.
g
Click [Play] with [Shift] on the keyboard held down. (Playback is performed after the data is temporarily stored in the playback buffer.
The playback buffer can be changed by [Application] in [System Settings] → [Playback].)
g
Render clips or a part of the timeline.
“Rendering only Overload/Load Areas” (w page 279)
“Rendering Clips/Transitions” (w page 280)
f
To move the timeline cursor to the start and end of the timeline, press [Home] and [End] on the keyboard, respectively.
f
Moving 10 frames back:
[Shift] + [←]
f
Moving 10 frames forward:
[Shift] + [→]
Playing Back with Shuttle/Slider
You can play back a clip by dragging the shuttle or slider on the Recorder.
“Control Area Settings” (w page 131)
1)
Drag the shuttle/slider.
f
A frame at the slider position is displayed on the Recorder.