Removing and attaching the gr-v1 camera grip, Removing and attaching the gr-v1 camera, Grip 43 – Canon EOS C200 EF Cinema Camera and 24-105mm Lens Kit User Manual
Page 43
43
Preparing the Camera
Removing and Attaching the GR-V1 Camera Grip
The camera grip comes originally attached to the C200; it is an optional accessory for the C200B. You can
remove it and replace it with the thumb rest should the minimal configuration be necessary.
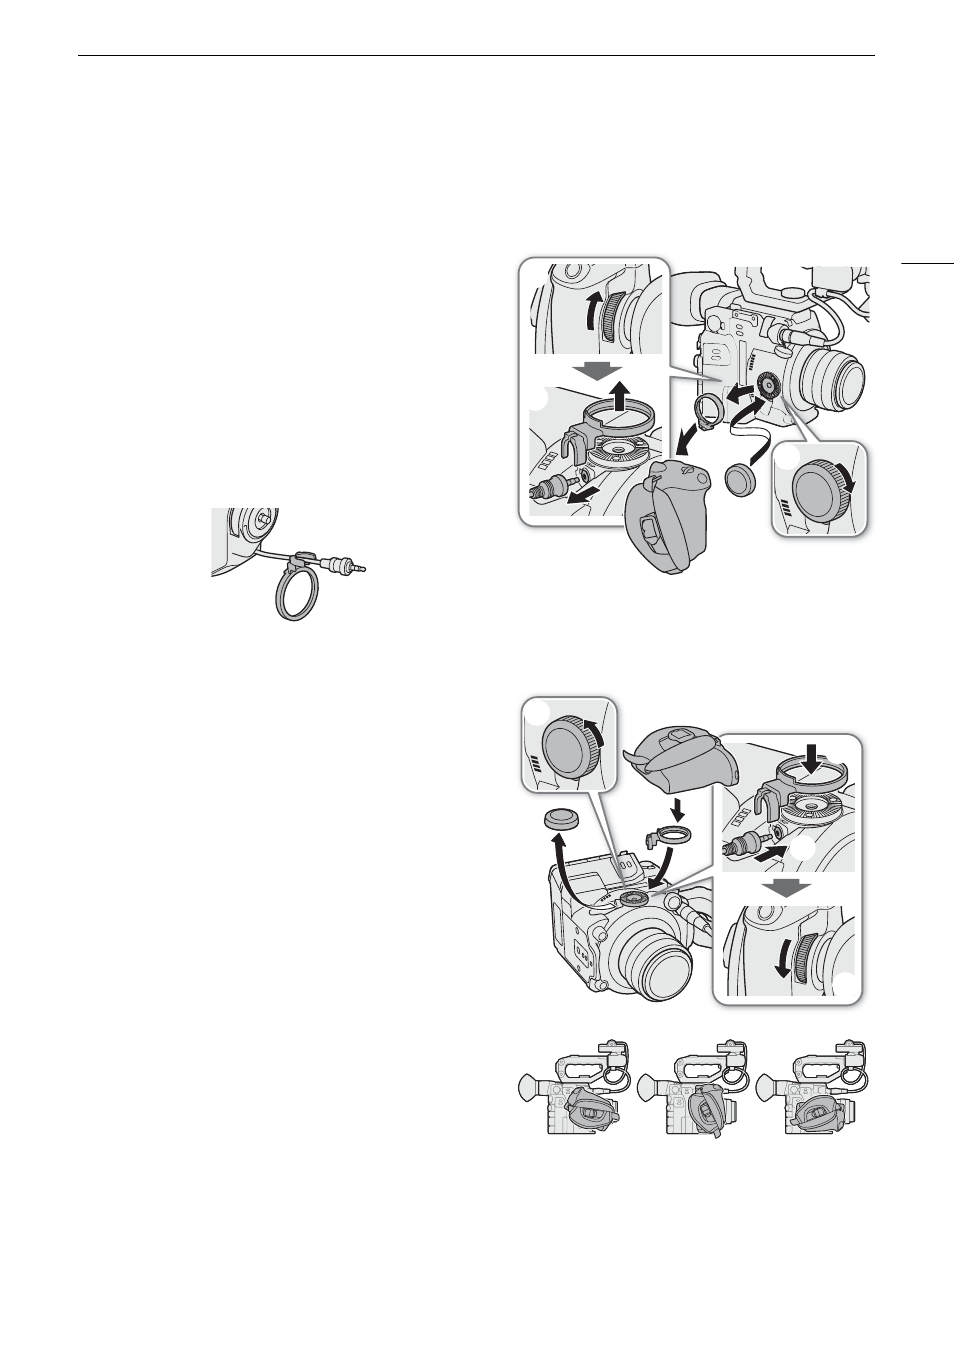
Removing the Camera Grip
1 Set the
Q
switch to OFF.
2 Unscrew the camera grip’s lock screw and gently detach
the camera grip.
• The camera grip contains an internal connection cable
so be sure not to pull it too forcefully.
3 Remove the grip attachment ring and disconnect the
camera grip’s connection plug.
• You can attach the grip attachment ring to the
connection cable so that you do not lose it.
4 Screw the thumb rest onto the camera.
Attaching the Camera Grip
The camera grip can be attached in a number of positions
from 90° toward the lens to 60° toward the viewfinder at 6°
intervals.
1 Set the
Q
switch to OFF.
2 Unscrew the thumb rest and remove it from the camera.
3 Lay the camera on a flat, stable surface with the rosette
facing up.
4 Firmly insert the camera grip’s plug all the way into the
camera grip connection terminal on the camera.
• Make sure to insert the plug all the way in, until the
terminal is not visible.
• If the plug is not correctly connected, all the controls
on the camera may be disabled.
5 Attach the grip attachment ring.
6 Return the camera to an upright position, with the top
side facing upward.
7 Attach the camera grip to the camera aligning it at the
desired angle and tighten the camera grip’s lock screw.
60°
0°
90°