Onscreen markers and zebra patterns, Displaying onscreen markers, 90), zebra patter – Canon EOS C200 EF Cinema Camera and 24-105mm Lens Kit User Manual
Page 90: Onscreen markers and zebra patterns 90, Displaying onscreen markers 90
Onscreen Markers and Zebra Patterns
90
Onscreen Markers and Zebra Patterns
Using onscreen markers allows you to make sure your subject is correctly framed and is within the appropriate
safe area. The zebra patterns help you identify areas that are overexposed. The onscreen markers and zebra
pattern will not affect your recordings.
Displaying Onscreen Markers
The camera offers several onscreen markers. You can display multiple onscreen markers simultaneously.
1 Open a marker activation submenu.
>
[
A
&
Assistance Functions]
>
[Center Marker], [Horizontal Marker], [Grid Marker], [Aspect
Marker]
>
[
A
'
Assistance Functions]
>
[Safe Area Marker]
2 Select a marker you wish to display, select the desired marker color and then press the joystick.
• Select [Off] to turn off the selected marker.
• You can display multiple markers simultaneously. Repeat this step as necessary.
• If you selected [Aspect Marker] or [Safe Area Marker], select the desired safe area or aspect ratio with the
following procedures (
A
91) before continuing with step 3.
3 Select [Markers: VF+VIDEO Output] (
l
[Markers: VIDEO Output]) and/or [Markers: SDI/HDMI
Output], select [On] and then press the joystick.
• Select [Markers: VF+VIDEO Output] (
l
[Markers: VIDEO Output]) to display the markers on the
viewfinder (
k
only) and from the VIDEO terminal; select [Markers: SDI/HDMI Output] to display the
markers from the SDI/HDMI OUT terminal. Select [Off] instead to not display the onscreen markers on the
respective video outputs.
Options
[Center Marker]:
Displays a small marker that indicates the center of the screen.
[Horizontal Marker]:
Displays a horizontal line to help you compose level shots.
[Grid Marker]:
Displays a grid that allows you to frame your shots correctly (horizontally and vertically).
[Aspect Marker]:
Displays markers that indicate various aspect ratios to help you keep your shot within that
area. Available options for [Marker Aspect Ratio] are [4:3], [13:9], [14:9], [16:9], [1.375:1],
[1.66:1], [1.75:1], [1.85:1], [1.90:1], [2.35:1], [2.39:1] and [Custom], a free aspect ratio set
by the user.
[Safe Area Marker]:
Displays indicators that show various safe areas, such as the action safe area and text
safe area. You can select the core area used as the basis for calculating the safe area and
a percentage ([80%], [90%], [92.5%] or [95%]), relative to that core area.
Operating modes:
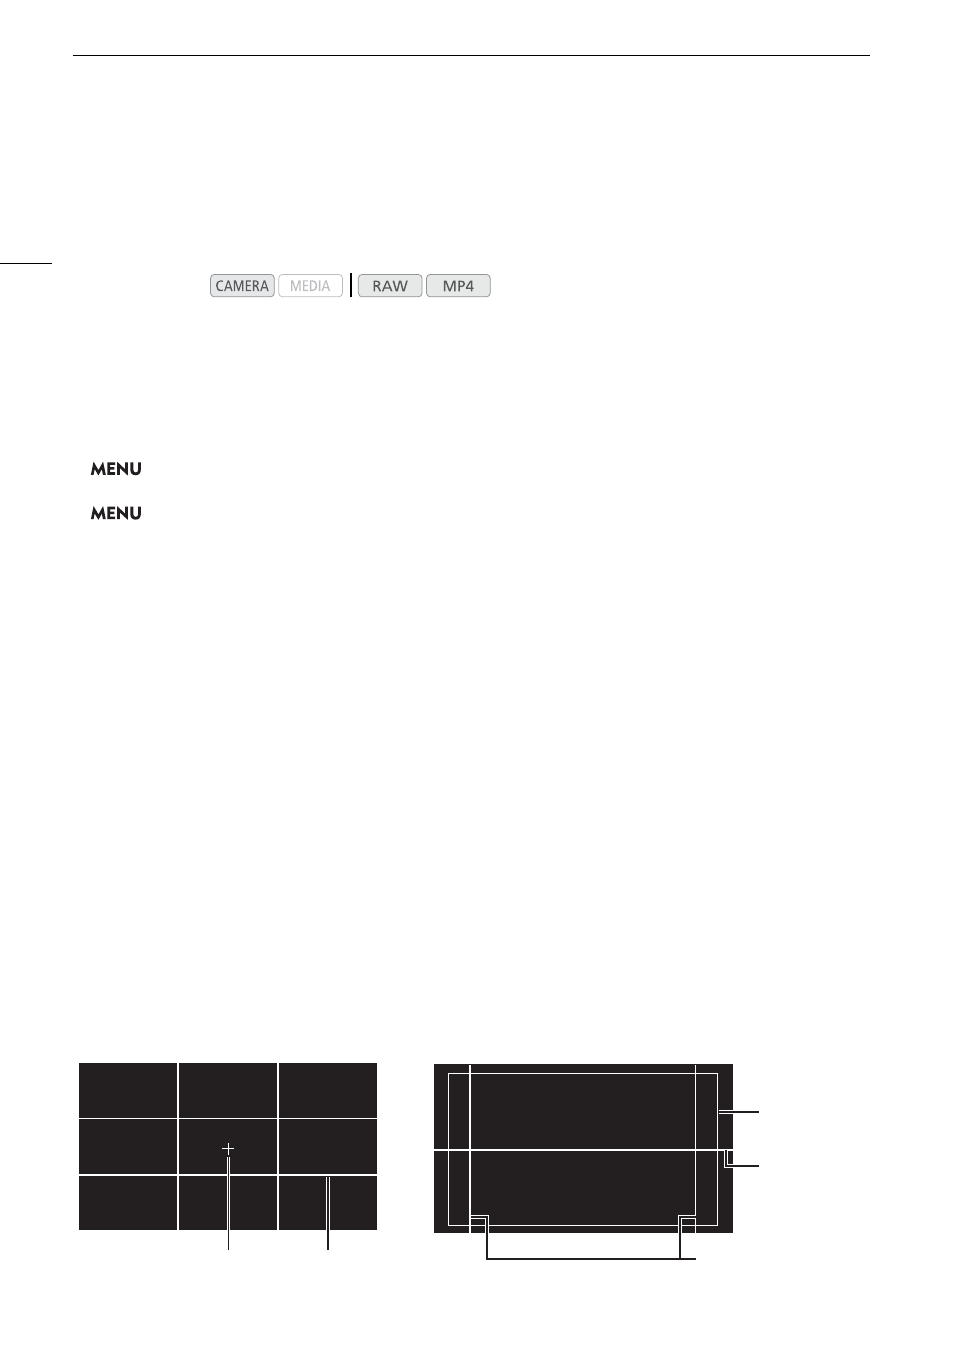
Aspect guide 4:3
Center marker
Grid
Level marker
Safe area 80%
out of the whole
picture