4 sound previews and quick load, 5 loading instruments, Sound previews and quick load – EastWest Hollywood Orchestra Opus Edition Virtual Instrument Plug-In (Download) User Manual
Page 59: Loading instruments
HOLLYWOOD ORCHESTRA OPUS EDITION
<
CHAPTER 3: BROWSE
59
<
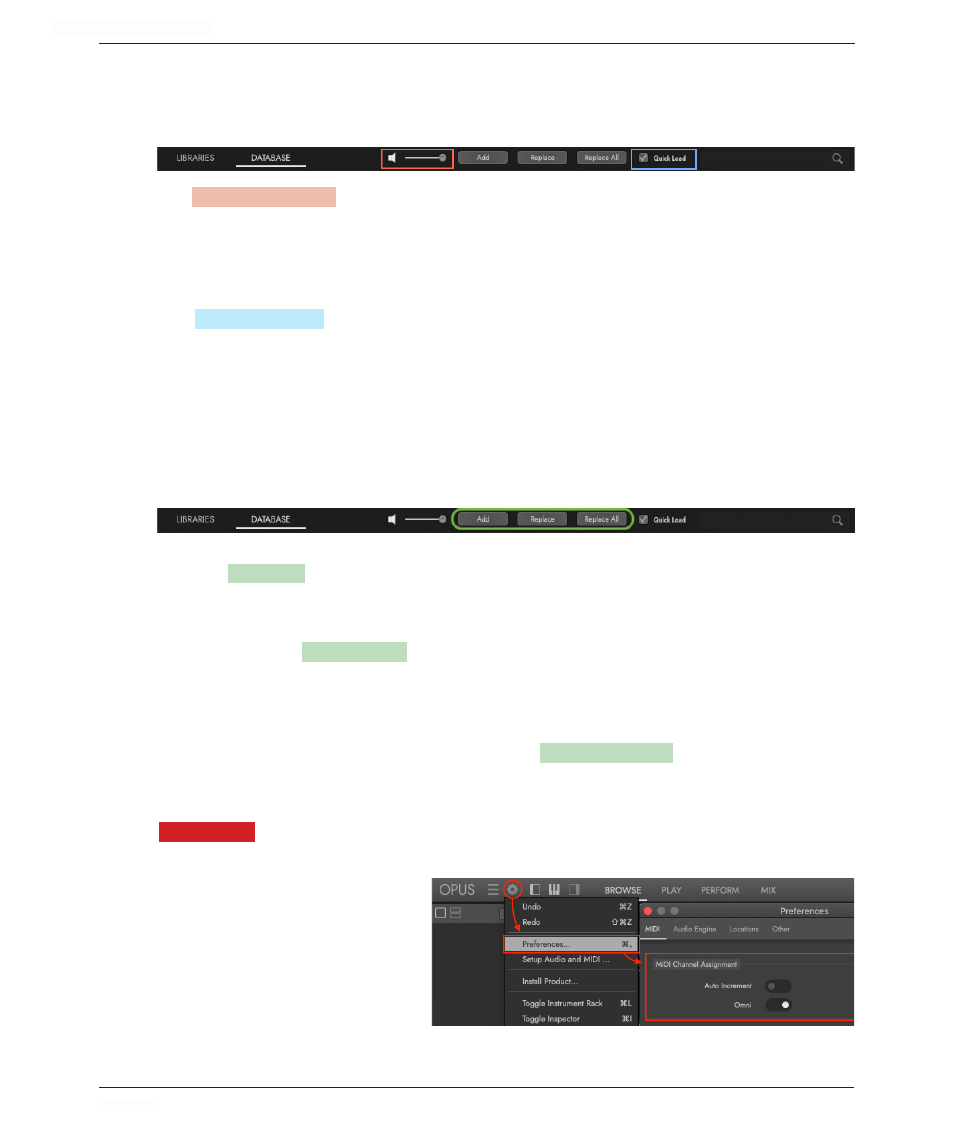
3.1.4 Sound Previews and Quick Load
A variety of tools are available to help speed up the instrument selection process, includ-
ing playback of an audio example, and an instant loading process.
The
SOUND PREVIEW
OPTION
allows you to hear an audio example by selecting an instrument in
the Results List, without having to load it. Click on the speaker icon to turn this feature
on and off, and use the volume slider to set the desired level. While this preview only
represents a single note of a single dynamic layer, it is a useful tool to aid in the selec-
tion process.
The
QUICK LOAD
ENABLE
offers a near instant loading process, by loading an instrument in
a purged state (nothing loaded into memory). As you play notes, samples are instantly
loaded into memory in real-time. To enable this feature, click on the box next to Quick
Load to leave a check-mark.
3.1.5 Loading Instruments
Instruments can be loaded in various ways either by using the buttons shown below, or by
using keyboard shortcuts in conjunction with mouse-clicks.
To add one or more instruments, click on an instrument from the Results List, and then
click the
ADD
BUTTON
. Repeat this process to continue loading instruments. Alternatively, hold
the [shift] key while you double-click on an instrument to add it to the current selection.
To replace the currently selected instrument, click on an instrument from the Results List,
and then click the
REPLACE
BUTTON
. To load a different instrument in place of the one you just
loaded, repeat this process. Alternatively, simply double-click on an instrument to replace
the current selection.
To replace all loaded instruments with a single instrument, first select an instrument from
the Results List by clicking on it, then click the
REPLACE ALL
BUTTON
. Alternatively, hold the
[command] key while you double-click on an instrument to replace all loaded instruments
with the current one.
PLEASE NOTE!
When loading multiple instruments, make sure the desired MIDI Channel As-
signment mode is set. Click on the Settings Menu, click on Preferences, then click on the
MIDI tab. Now select either Auto
Increment, which will load each
new instrument to the subse-
quent MIDI channel (1, 2, 3,
etc), or OMNI, which will load
each instrument to receive MIDI
on all channels (1-16).