Mounting sequenza 5 w to sequenza 5 b, flown – KLING & FREITAG K&F SEQUENZA 5 W User Manual
Page 38
User's manual
K&F SEQUENZA 5 incl. accessories
KLING & FREITAG GMBH © 2015
Version 4.1
Page 38 of 88
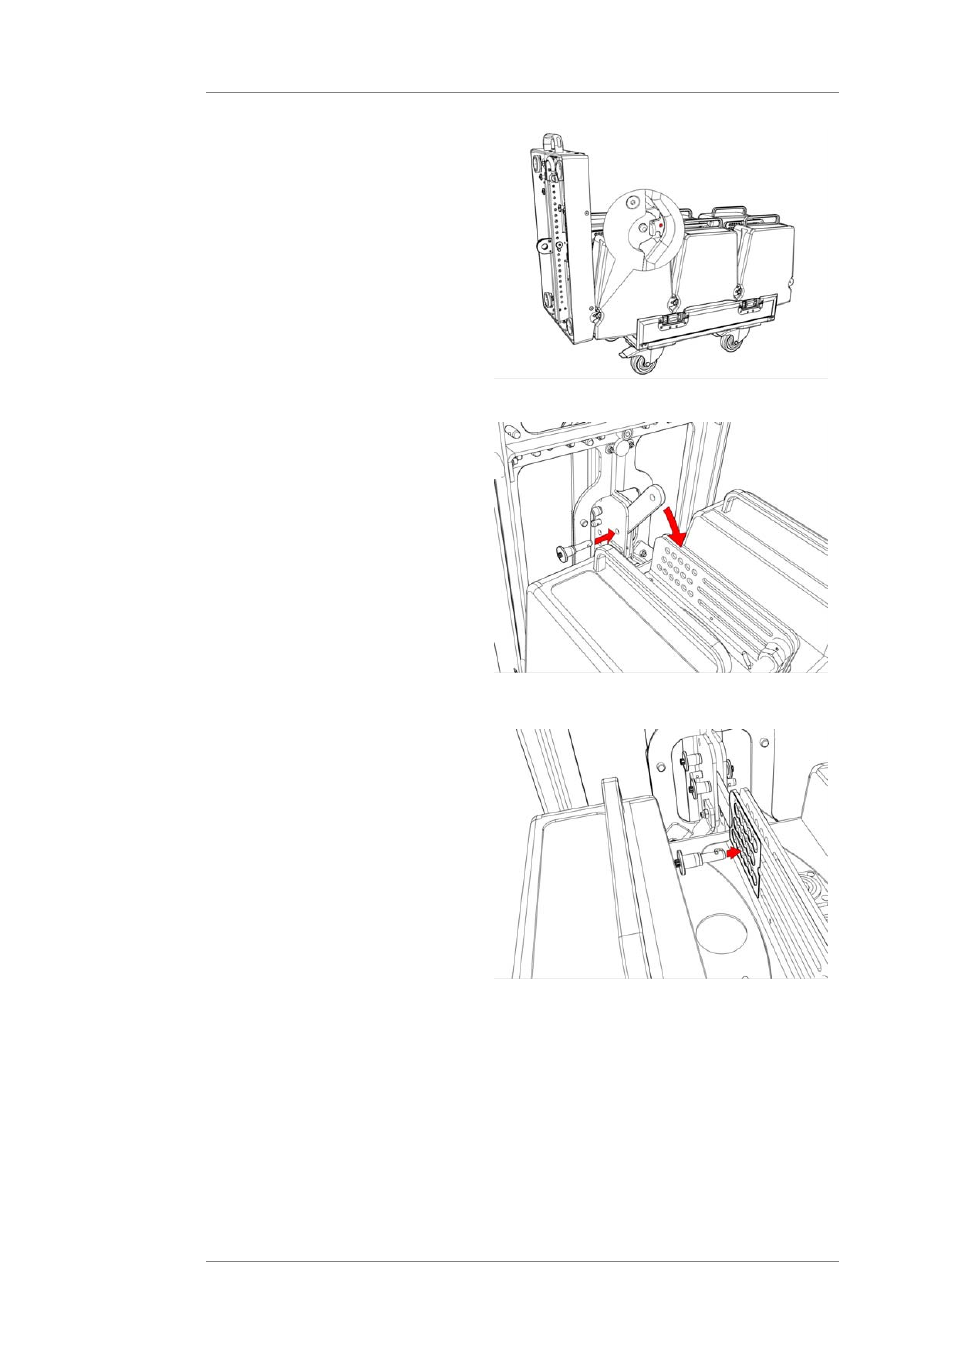
4.
Make sure you can see the
red dot on the safety latch.
5.
Fasten the flying frame
connector onto the flying
frame with a ball lock pin.
Fold the flying frame's
connector (that was
mounted to the speaker
during preparations)
upwards between the
connecting plates of the
flying frame.
To prevent losing the
SEQUENZA 5 W connector,
it should be mounted in the
intended parking position of
the rigging frame.
6.
The simulation software
CON:SEQUENZA+ specifies
real angles.
With the help of the chart
on the rigging frame, you
can determine the required
hole position.
Using a further ball lock pin,
secure the connector to the
speaker using the tilt angle
drill hole calculated by the
software CON:SEQUENZA+.
7.
The speaker is now completely assembled and secured.
If you don't want to mount any more speakers, then you can now wire the speakers.
Further information in chapter 'Wiring' on page 65.
Detailed information for connecting the speakers and configuring the K&F system amplifier
TOPAS or the K&F SystemRack is in the hardware manuals.