Genee World ClassComm User Manual
Page 100
Advertising
100
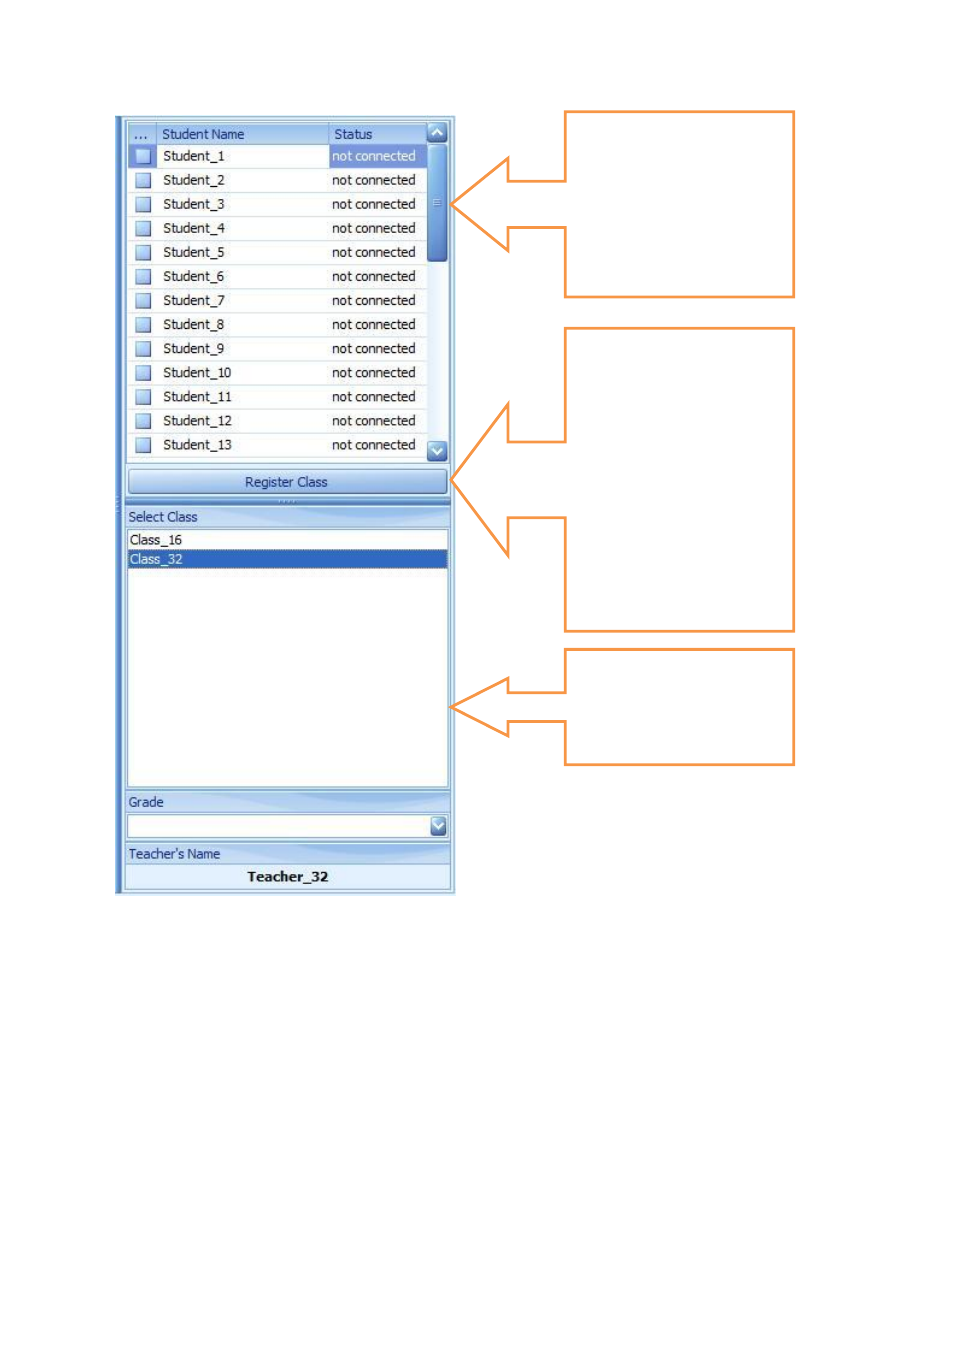
SELECT CLASS area – all existing
classes will be listed here ready
to present with
In this example, we have
selected the sample “Class_32”
that is available within
ClassComm. After Class_32 has
been highlighted, the students
appear in the Student register
above. At this point the status
of the students is “not
connected”. To connect the
students, click the “Register
Class” button to bring up the
existing class mapping interface.
REGISTER CLASS area – all
students in the selected class
will appear along with their
status. They will appear as
connected after successful
mapping.
Advertising