Kanguru Optical Duplicator User Manual
Page 75
75
Using CopyConnect
After you have successfully installed the CopyConnect applications onto your Mac, you can now copy or
save DVD image files to the Kanguru Duplicator’s hard drive through your computer.
Warning! Do not try to access the Duplicator’s hard drive through your computer before you have installed
CopyConnect. If you try to access the Duplicator’s hard drive through your computer before installing
CopyConnect, your computer will not be able to recognize the hard drive’s file system and you will be
prompted to format the hard drive. Do not format the hard drive; doing so will erase any data stored on the
hard drive.
1. Connect the Kanguru Duplicator to your computer using the provided USB cable.
2. From the Duplicator’s main menu, turn the USB Connection setting to On (see section “3.15 USB/
External Connection” on page 51). This will require you to restart the Duplicator.
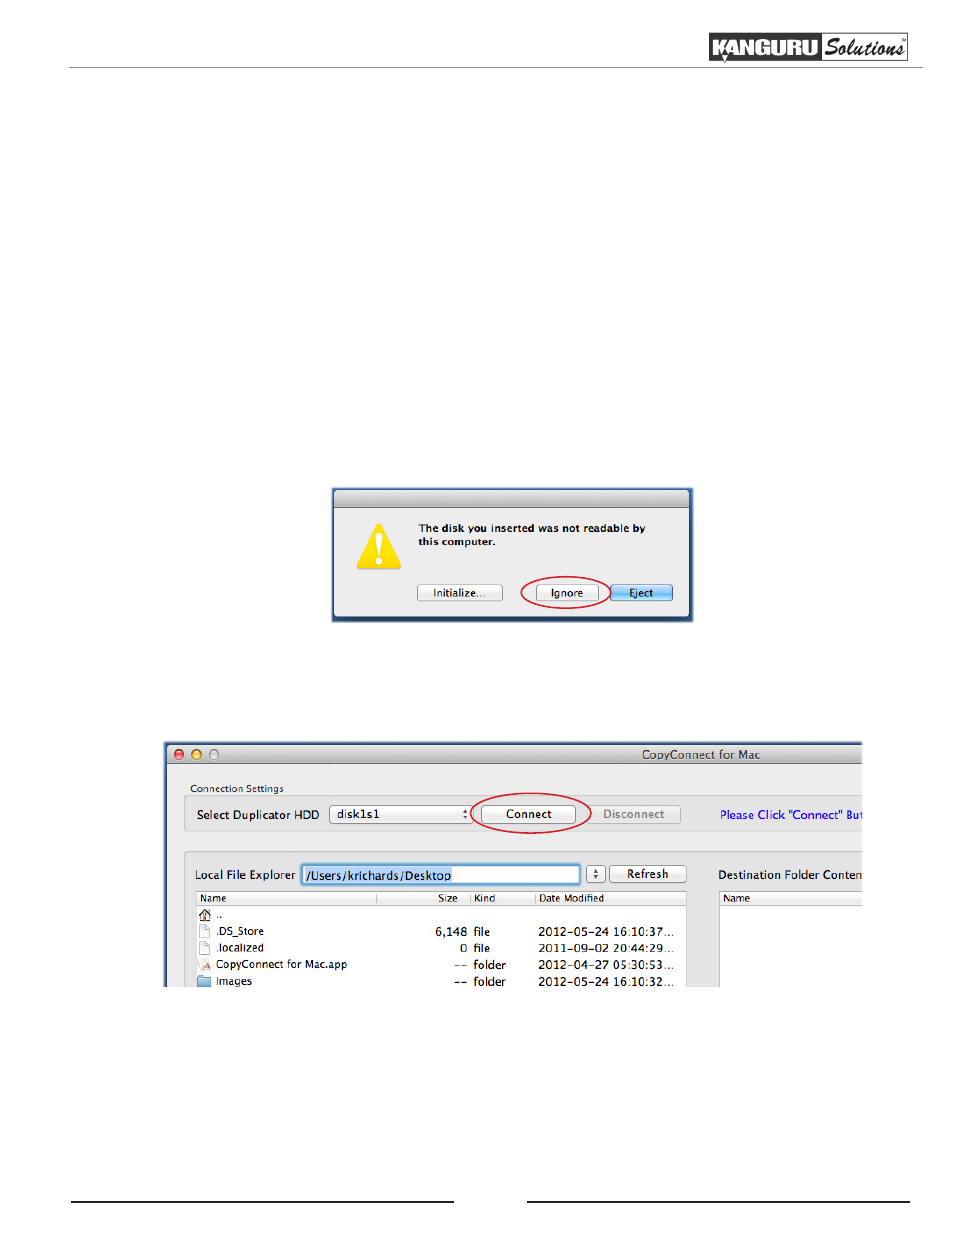
3. You will receive a message saying that the connected disk is not readable. This is normal. Click on
the Ignore button to continue.
4. Double-click the CopyConnect for Mac icon on your desktop to run the CopyConnect application.
5. Select the duplicator’s hard drive from the list and then click on the Connect button.
Note: Your Duplicator’s HDD name may appear differently depending on your Mac’s configuration.
Appendix C: CopyConnect for Mac