Kanguru Optical Duplicator User Manual
Page 79
79
Using the Duplicator Network Center Software
Once your Duplicator has been setup and connected to your LAN, you can begin using the Duplicator
Network Center software to transfer files to and from the Duplicator’s internal hard drive over your network.
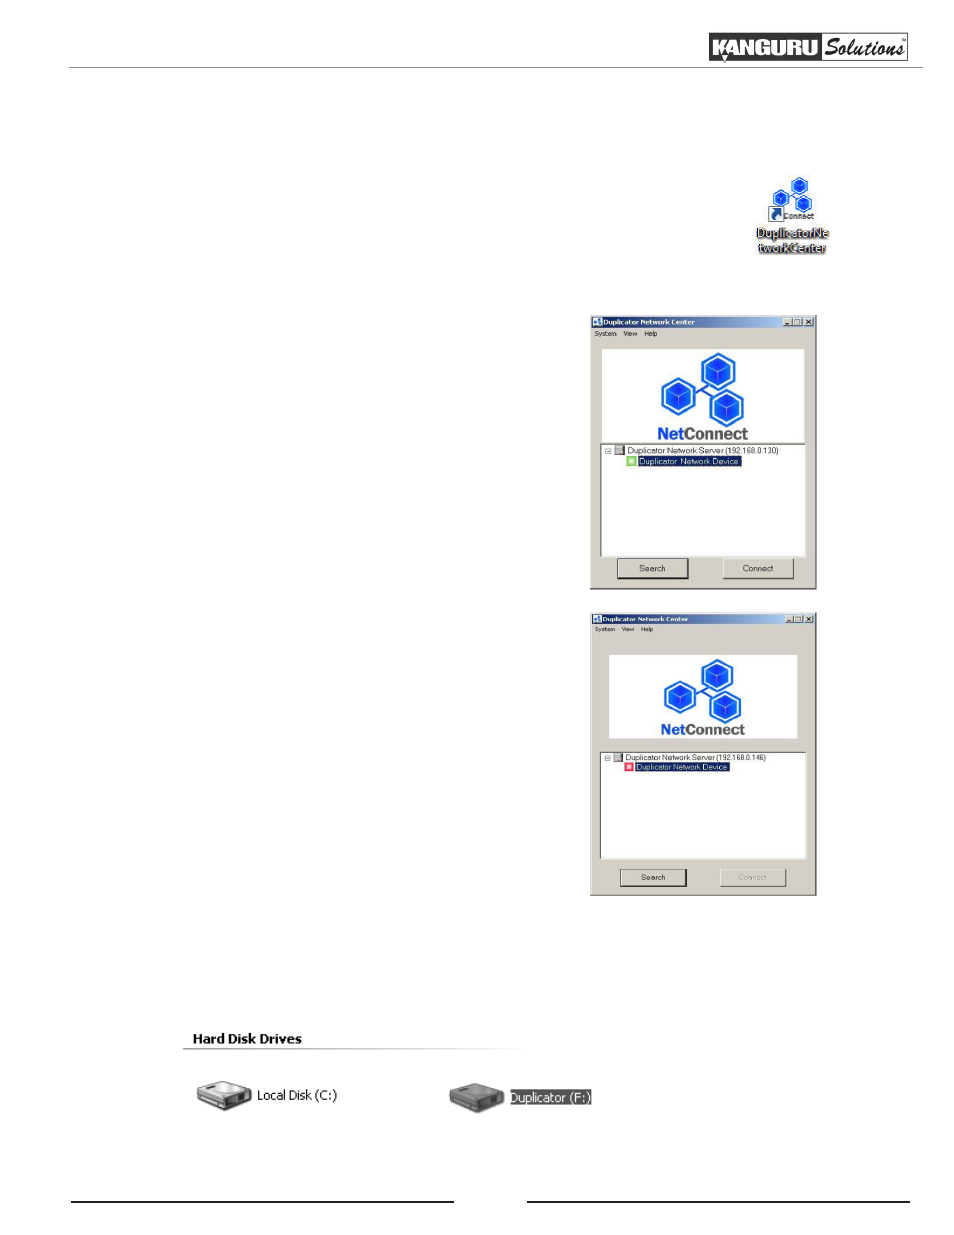
1. Double-click on the “Duplicator Network Center” icon located on your desktop
.
2. The Duplicator Network Center window appears.
• Normally you will see a green icon appear
next to “Duplicator Network Device”.
The green icon indicates that the network
Duplicator has been recognized and is ready
to be connected. Click on the Connect button
and proceed to the next step.
• A red icon appearing next to “Duplicator
Network Device” indicates that the network
Duplicator is currently being accessed by
another user.
You can send the other user a request to
disconnect by right-clicking “Duplicator
Network Device” and then selecting “Request
Disconnect” from the menu. You will receive
a notification when the Duplicator Network
Device is available. The red icon will turn
green when the Duplicator is ready. Click on
the Connect button and proceed to the next
step.
3. A new Hard Disk Drive named “Duplicator” now appear under My Computer. You can now copy/
paste or click/drag your files into the Duplicator’s internal hard drive. CD and DVD images should
be saved in the folder named “DUP” located in the “Duplicator” hard drive.
Appendix D: Duplicator Network Center