Dmx connector plate - option – LSC Lighting Redback Wallmount Operators Manual User Manual
Page 15
Redback Wallmount Dimmer
Installation
Operator Manual V1.3
Page 11
2.6.7 DMX Connector Plate - Option
The Optional Redback wall mount dimmer DMX input plate is designed to fit all Redback wall
mount series dimmers. The Redback Wall-mount Dimmer has four blanking or cable access
plates to suit different installation requirements—one access opening in each corner of the
dimmer on the upper or lower end plate. The DMX input plate may be fitted to any access
opening as long as there is sufficient room and clearance from high voltage mains cabling
within the dimmer.
The DMX input plate provides DMX In and Thru connectivity with no buffering between the
connectors. The DMX Input plate does not terminate the DMX cable in any way.
Termination should be provided by setting the internal “DMX Term” switch.
This kit is supplied with:
1.. DMX connectors on circuit board and mounted on a metal cover plate.
2.. Connection cable—with 6 way connector at one end and 3 stripped wires at the other.
Installation
1..
Remove the existing blanking plate and fit the DMX
input plate using the two black screws as shown. Note
that the picture below show the left hand cover panel
removed—this is for illustration purposes only to show
cable routing. LSC recommends this left hand cover panel
is not removed.
2.. Ensure cabling inside the dimmer is clear of the
internal electronics and other HV cabling. Secure cabling
to the chassis using cable ties or cable tie blocks.
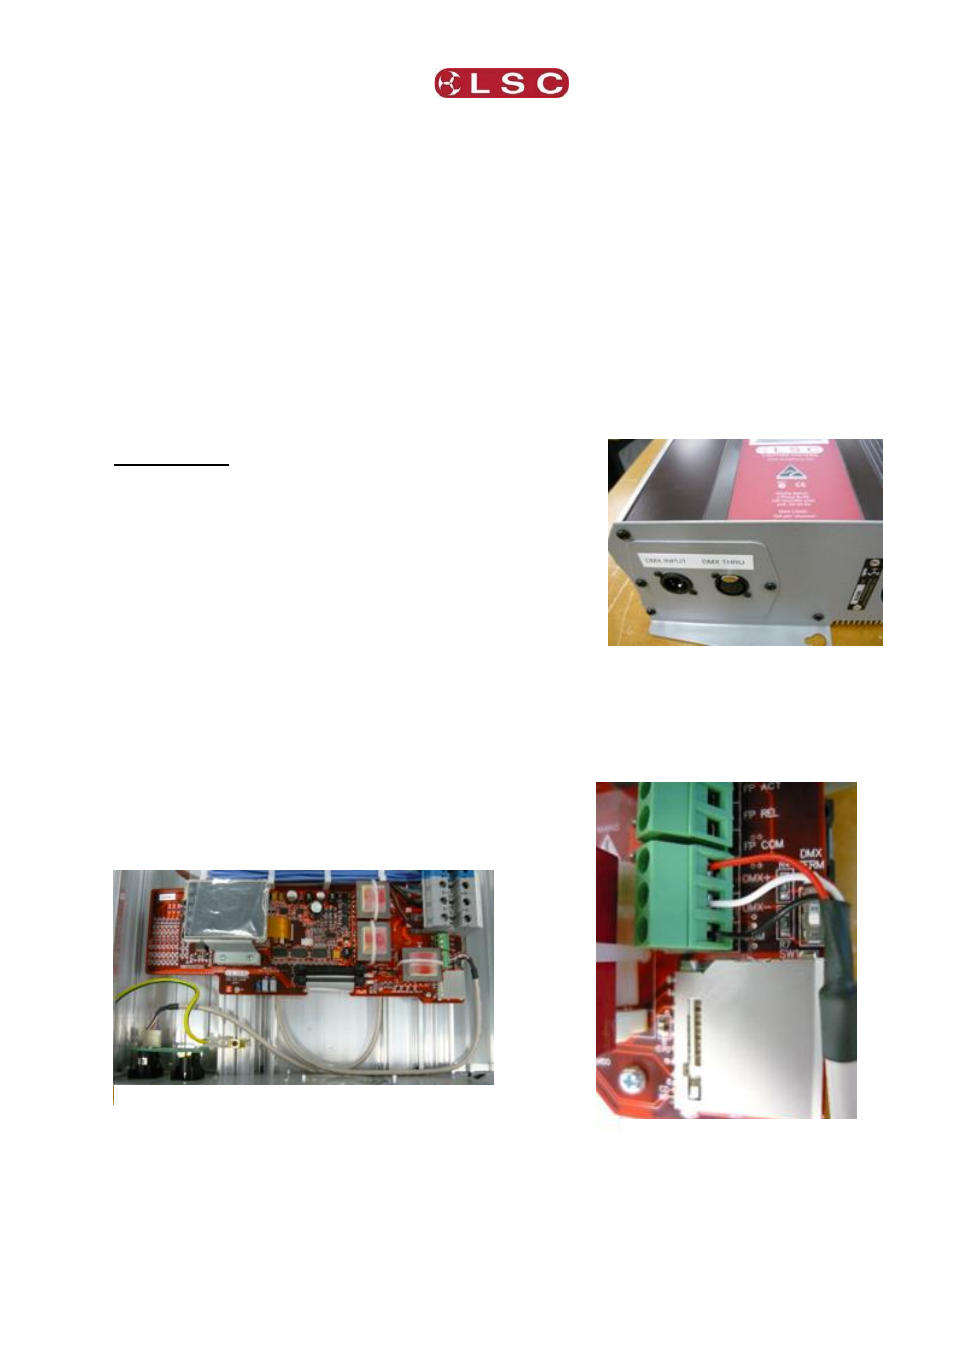
3..
Wire the stripped ends of the cable into the DMX connector block as shown. Ensure
the cabling is connected as follows:
DMX+ (XLR Pin 3) >> Red wire
DMX— (XLR Pin 2) >> White Wire
COM (XLR Pin 1) >> Black Wire
Internal wiring and cable routing. Left hand cover
panel removed to show cable routing. Leave in
place to avoid damage to static sensitive control
electronics.
DMX cable connection detail