Panic menu, Manually setting channel levels – LSC Lighting Redback Wallmount Operators Manual User Manual
Page 32
Menu System
Redback Wallmount Dimmer
Operator Manual V1.3
Page 28
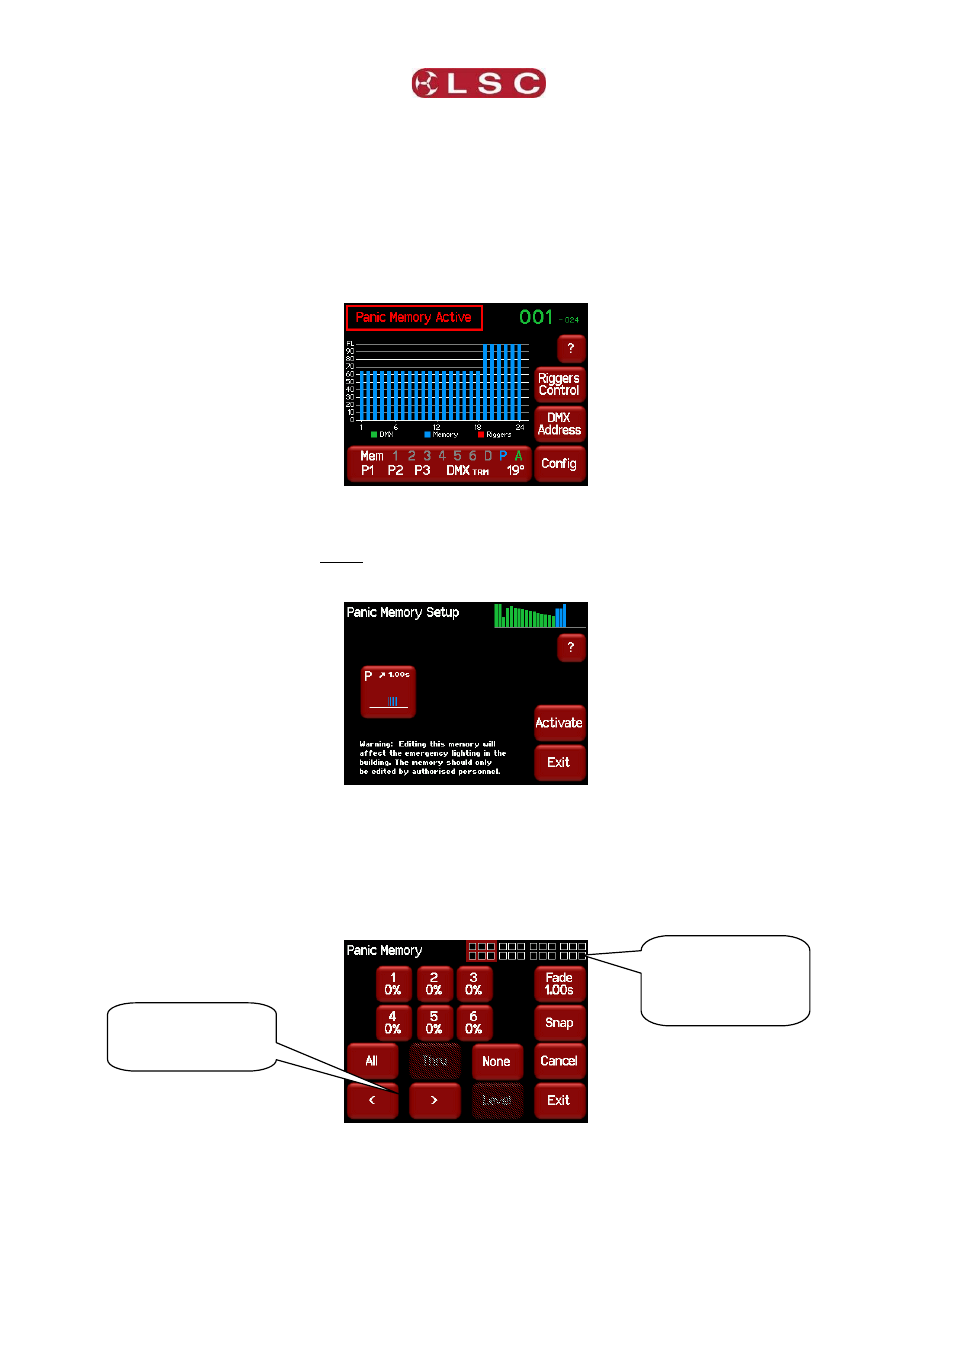
4.10 PANIC MENU
The “Panic” function provides emergency evacuation lighting that can be easily recalled by
either a simple “Panic” or “Evacuate” button or it can be connected to a BMS (Building
Management System) so that it is automatically operated when a fire alarm is activated.
The “Panic” input is a dry contact closure that stops all current output and replaces it with a
“Panic Memory” that you have created in the Redback. This memory will typically contain
channel levels that will provide suitable lighting for evacuation purposes. A separate contact
closure is required to release the panic memory. When Panic has been activated , “Panic
Memory Active” flashes on the screen.
See the “Installation” section for details on how to connect the Panic and Release buttons.
Selecting [Config] [Panic] provides menus for:
Creating, editing the Panic Memory (P).
Activating the Panic Memory for testing purposes.
The “P” button shows a bargarph display of the current Panic memory and also its fade time
in seconds.
Pressing the [P] button allows you to create or edit the memory.
You can either take a [Snap] (snapshot) of the current DMX input signal or the current
state of the Redback’s Outputs or select a channel(s) and manually set their levels using the
controls on the screen.
4.10.1
Manually Setting Channel Levels
The “Panic Memory Setup” menu (above) shows the first 6 channels. Use the [<] or [>]
buttons to see the other groups of 6 channels (if fitted). The navigator at the top right of
the screen shows current group of 6 selected channels highlighted.
The default setting for the Panic memory is for all dimmer channels at an intensity of 65%
and all non dim channels set to ON.
Navigator shows
current group of 6
selected channels
highlighted
Selects next group
of 6 channels (if
fitted)