Installation, Safety, Unpacking – LSC Lighting Redback Wallmount Operators Manual User Manual
Page 9: Mounting the redback, 2 installation
Redback Wallmount Dimmer
Installation
Operator Manual V1.3
Page 5
2 Installation
2.1
SAFETY
All electrical work must be carried out by suitably qualified persons.
The Redback Wallmount dimmer is primarily designed for mounting on a solid flat vertical
surface.
The dimmer is heavy. Use the correct lifting procedures when handling the dimmer.
2.2
UNPACKING
The Redback Wallmount dimmer is fully tested and inspected before leaving the factory.
Upon delivery, inspect the dimmer for signs of damage or mishandling. In the event of any
damage, contact your LSC agent.
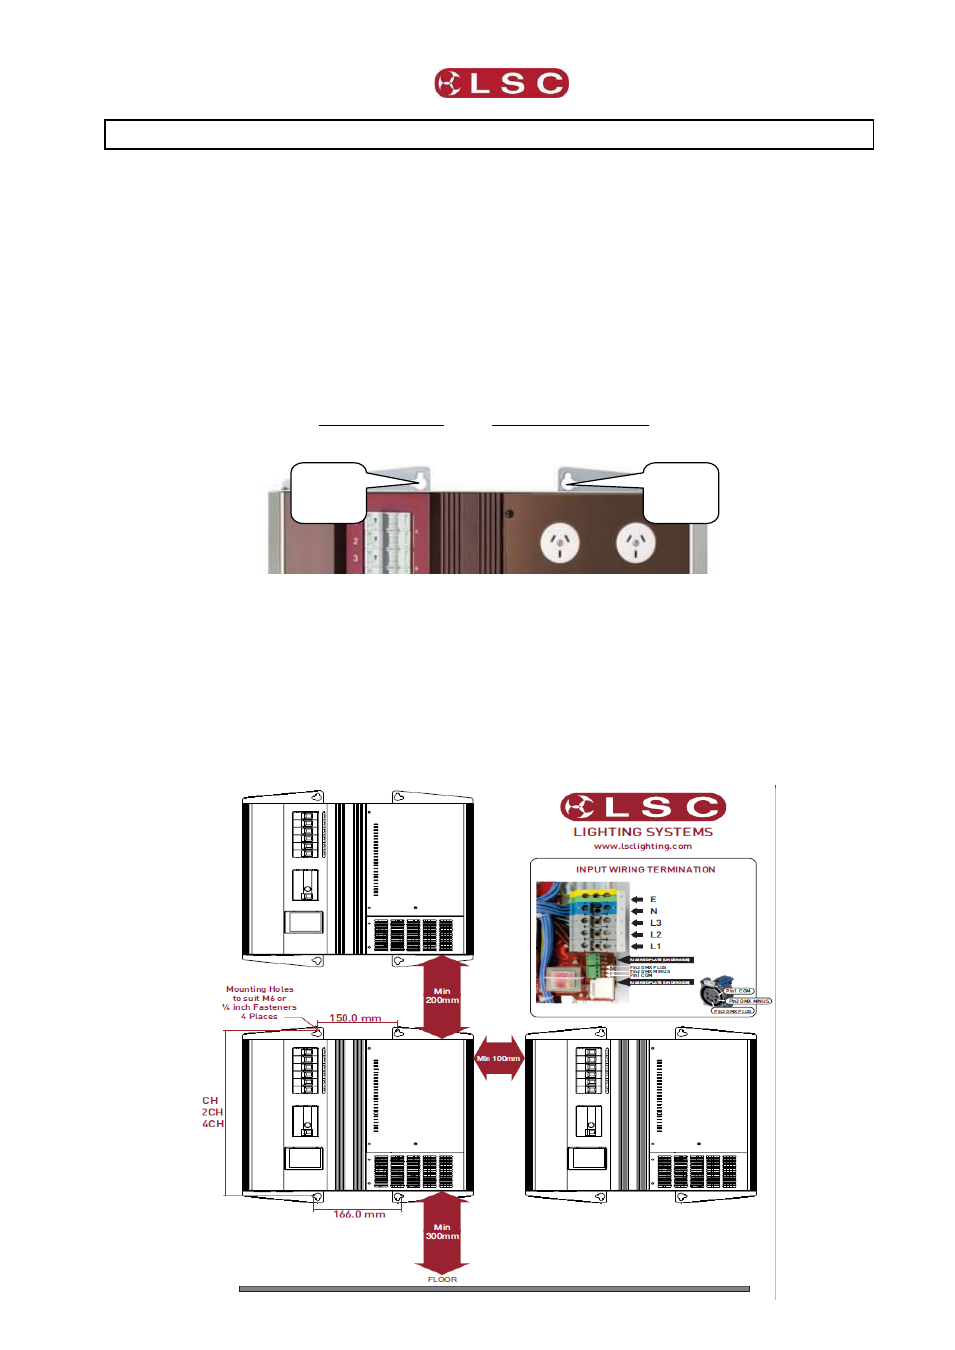
2.3 MOUNTING THE REDBACK
The Redback Wallmount dimmer is designed for wall mounting and is provided with keyhole
cut-outs in 4 locations, two at the top and two at the bottom. A mounting template is
provided with unit.
Ensure that the mounting can support the weight. Refer to the specifications at the end of
this manual for the weight of your model.
The ventilation holes at the top, bottom and front of the unit must be kept clear. When
mounting multiple dimmers, allow a minimum space of 100mm between dimmers and
200mm above and below each dimmer. Refer to the diagram below for recommended
spacing between dimmers and fixed obstacles.
Keyhole
mounting
point
Keyhole
mounting
point