Creating a shared folder – TA Triumph-Adler DCC 6526L User Manual
Page 135
Basic Operation
3-34
Creating a Shared Folder
Create a shared folder to receive the document in the destination computer.
NOTE:
If there is a workgroup in System Properties, configure the settings below to limit folder access to a
specific user or group.
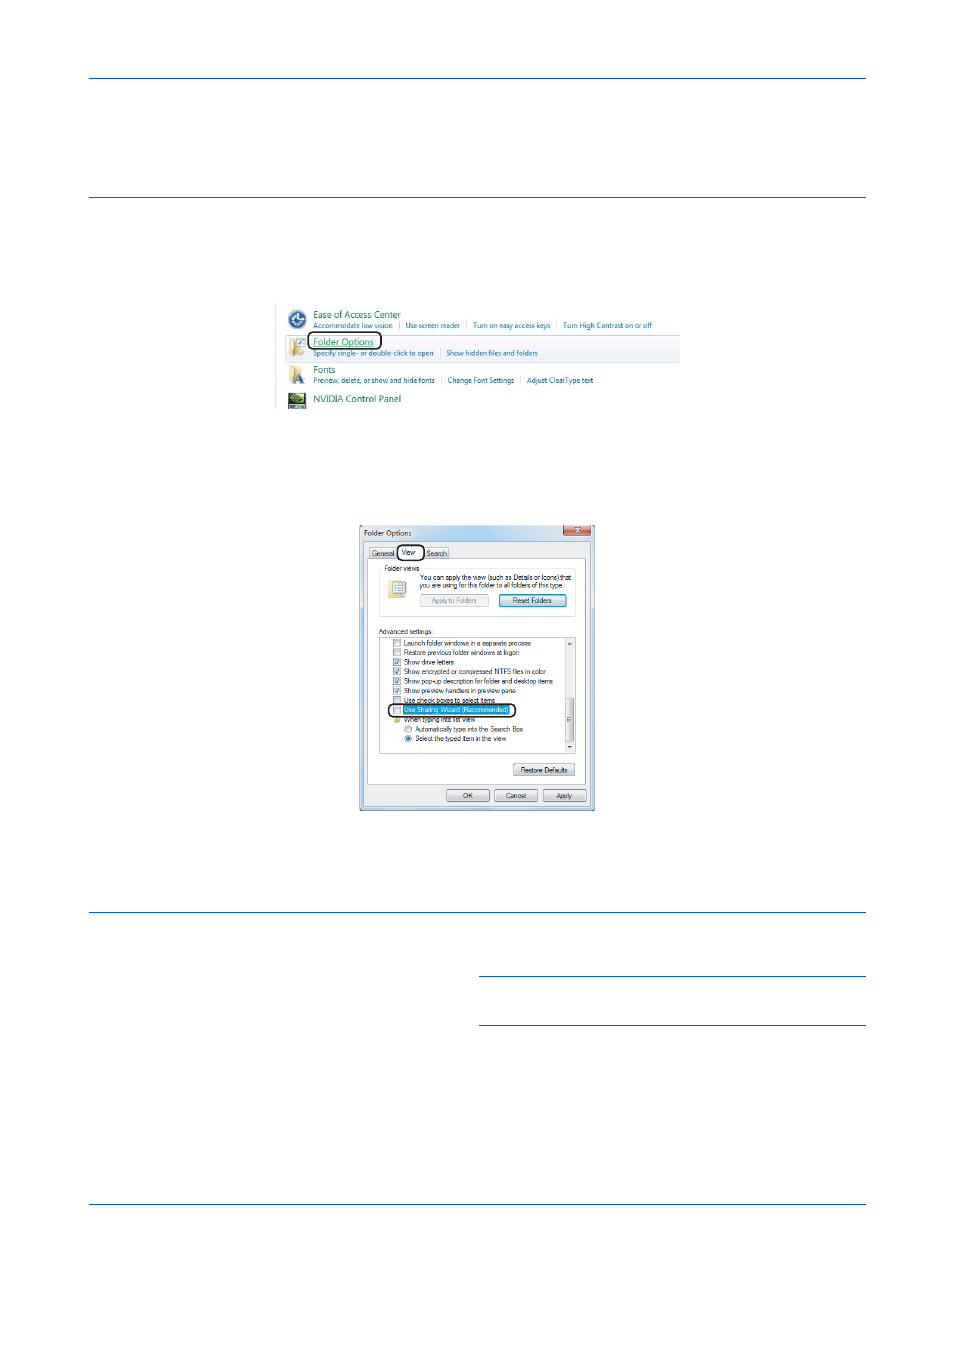
1 From the Start menu, select Control Panel, Appearance and Personalization, and then Folder Options.
Windows XP, click My Computer and select Folder Options in Tools.
2 Click the View tab and remove the checkmark from Use Sharing Wizard (Recommended) in Advanced
settings
.
In Windows XP, click the View tab and remove the checkmark from Use Simple File Sharing
(Recommended)
in Advanced settings.
3 Click the OK button to close the Folder Options screen.
1
Create a folder on the local disk (C).
NOTE:
For example, create a folder with the name
"scannerdata" on the local disk (C).
2
Right-click the scannerdata folder and click Share
and Advanced sharing. Click the Advanced
Sharing
button.
The scannerdata Properties dialog box appears.