Slice display – LinPlug RMV User Manual
Page 72
Loop Module
yellow triangular marker to the left or right. Note that the Start Cursor
can only be moved to the left as far as the start position of the
preceding slice, or to the right the position of the slice's end position.
Slice End Cursor:
The End Cursor for the currently active slice is shown as a red
triangular marker positioned at the right edge or the currently active
slice. The end position of the slice can be adjusted by dragging the
red triangular marker to the left or right. Note that the End Cursor
can only be moved to the left as far as the start position of the slice,
or to the right as far as the end position of the following slice.
Magnification:
The Waveform Display's magnification is set using the plus/minus
buttons at the bottom right of the display. The number in the middle
of the plus/minus buttons shows the number of samples compressed
into a single pixel's width. For example, if the magnification is 1, then
one sample is displayed per pixel. If the display shows 16, then 16
samples are compressed into a single pixel thus creating a display of
the waveform that is compressed 16 times. The scrollbar at the
bottom of the display allows you to scroll the sample when it is too
long to be displayed in the window. This, of course, depends on the
current magnification setting.
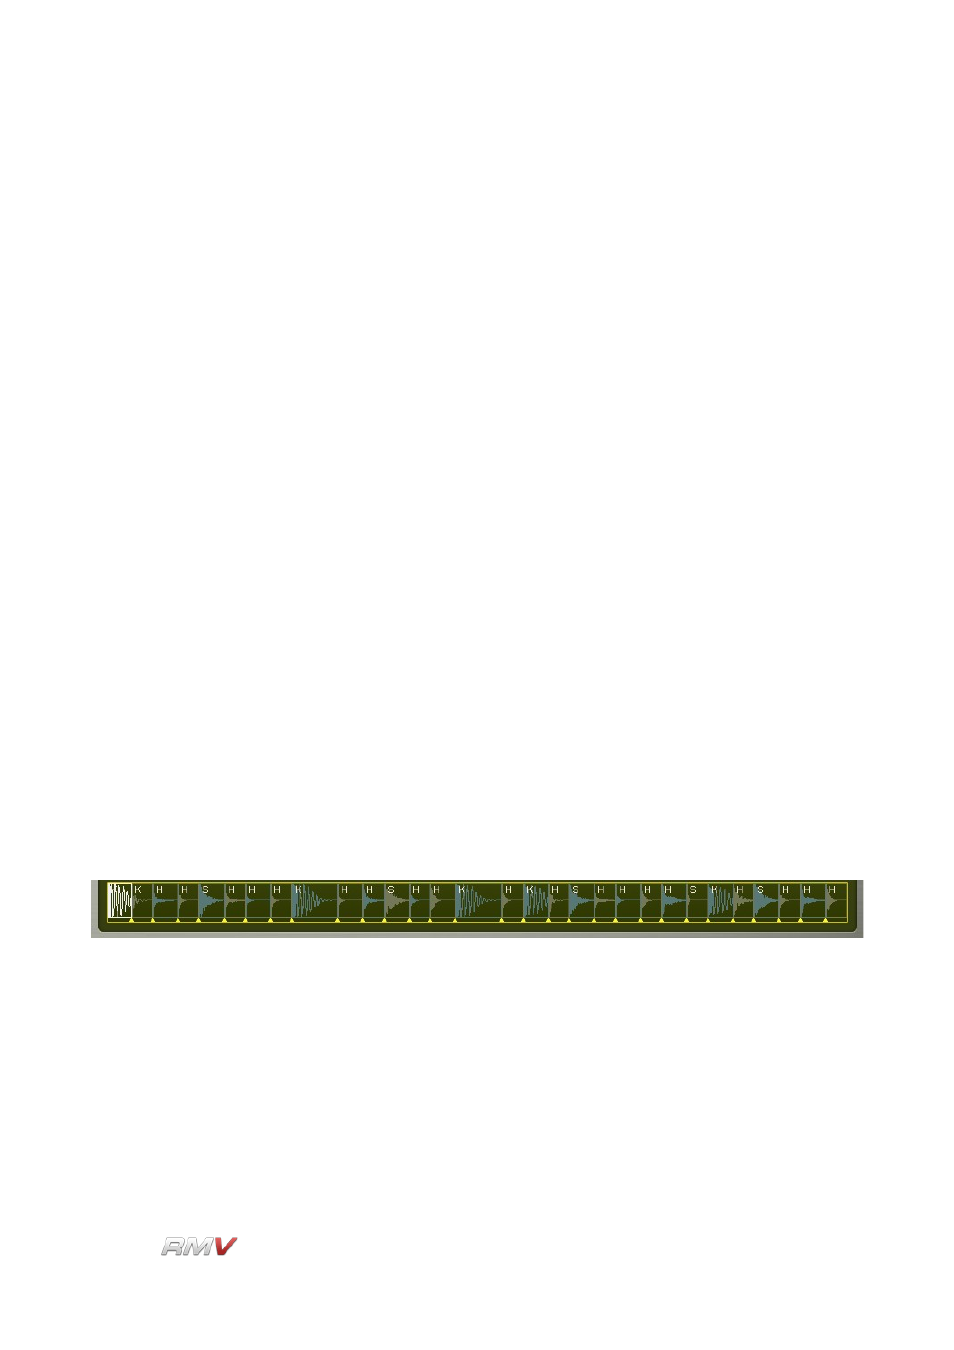
Slice Display
The Slice Display shows the entire Loop or Sample as a set of Slices. Each Slice has a
Start and End Cursor which is shown as a yellow triangular marker. The currently active
slice is shown in white, while the other slices are alternately coloured blue and olive-green.
Each Slice is also labelled according to its content. “K” refers to a Kick drum Slice, “S”
refers to a Snare drum slice, and “H” refers to HiHats and other percussion. Start and End
cursors for each Slice can be adjusted by dragging the triangular markers to the left or to
the right. Note that a cursor can only be moved as far as the preceding or following cursor.
Clicking on a Slice triggers the Slice and highlights it in the Waveform Display (described
above). The position at which the Slice is clicked determines the MIDI NoteOn velocity at
which the Slice is triggered. Clicking at the lower edge of the Slice triggers the Slice with a
low NoteOn velocity. The NoteOn velocity increases as the Slice is clicked at higher
positions.
LinPlug
Reference Manual 5.0.1
72