Hardware maintenance, Required tools, Removing and installing a psu – H3C Technologies H3C WX6000 Series Access Controllers User Manual
Page 48: Removing a psu
40
Hardware maintenance
Required tools
•
ESD-preventive wrist strap
•
Screwdrivers
Removing and installing a PSU
The DC and AC PSUs of the WX6103 are similar in the way they are removed and installed. This section
uses an AC PSU as an example.
CAUTION:
•
The power supply units (PSUs) of the WX6103 access controller are hot swappable.
•
To avoid bodily injury, do not touch any naked wire, terminal, or any part with a high voltage hazard
warning sign when installing or replacing a PSU with the access controller powered on.
Removing a PSU
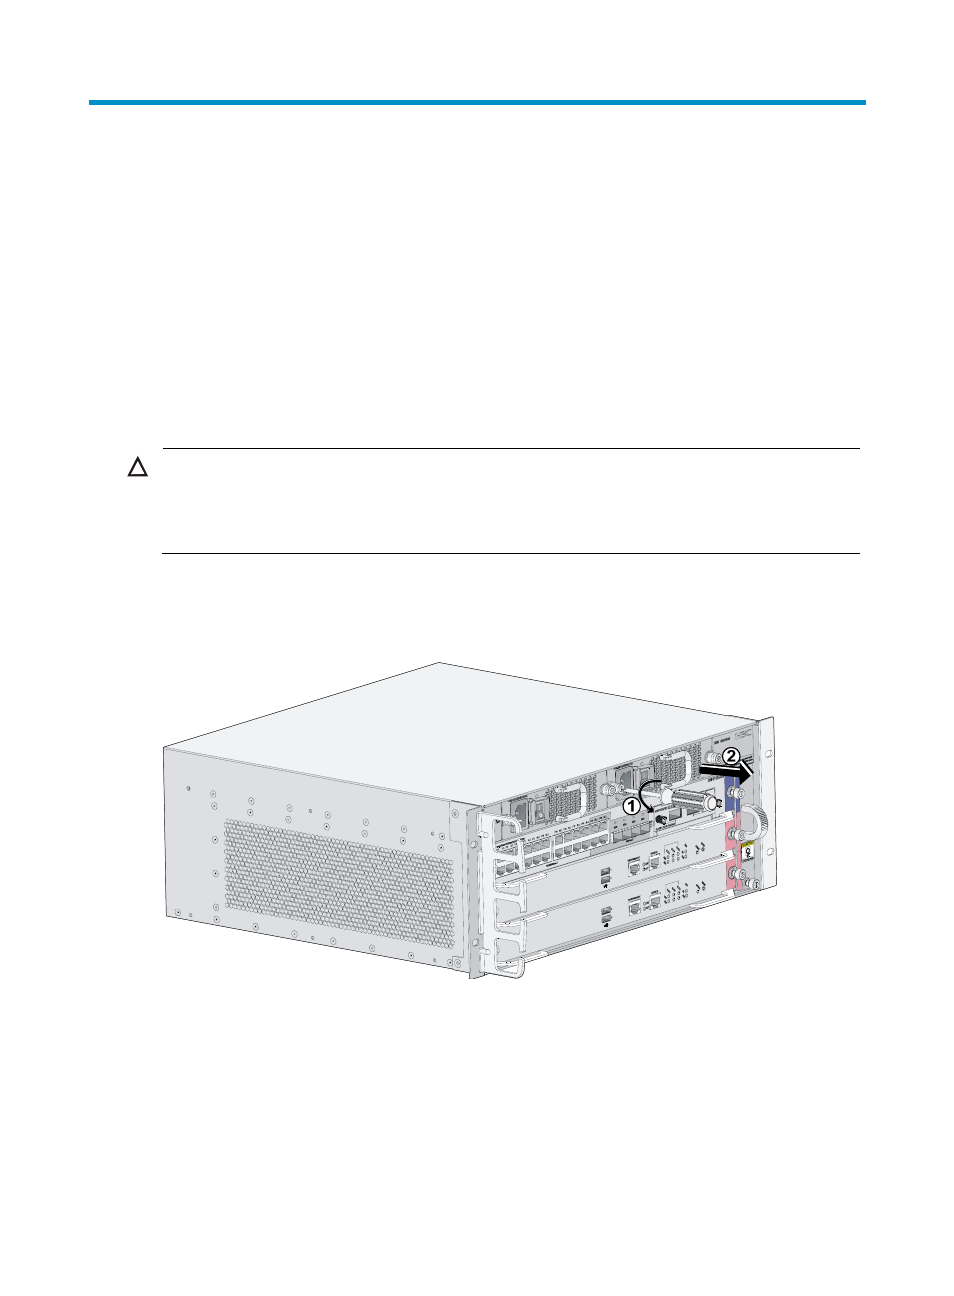
Figure 35 Remove a PSU
Follow these steps to remove a PSU:
Step1
Put on an ESD-preventive wrist strap, and loosen the captive screws on the PSU, as shown in callout 1 of
Step2
With one hand holding the PSU handle, pull the PSU part way out of the chassis. Then, support the
bottom of the PSU with the other hand and gently pull it all the way out, as shown in callout 2 of
.