Sources, Add source - mic/line inputs (sources), Atmosphere – Atlas Sound Atmosphere C-ZSV Zone, Source, and Volume Wall Controller (Black) User Manual
Page 15: User manual
Atmosphere
User Manual
AtlasIED.com
TELEPHONE: (800) 876-3333
1601 JACK MCKAY BLVD.
ENNIS, TEXAS 75119 U.S.A.
– 15 –
7.
Zone Status - displays the activity of each zone output, what source feeds them, and active bar graph style indicator; Blue = signal activity,
Red = clipping. A quick link “>” to each of the Zones’ settings is at the right side of the area.
8. Accessories, when connected on any of the A-B-C-D Bus-ports, will be automatically detected by the AZM. When detected, the accessory
image will be displayed on this page by type and quantity. There is also a quick link to the Accessories page.
9. Notifications - will display as an exclamation mark when a fault condition is active and a green checkmark when there are no active faults.
The settings link will take you to the Event Log UI page to interrogate and resolve the fault issue.
10. Message Player Status – when no message is playing, shows “available memory” for message uploads. Click Settings link “>” to go to
Message Page. When a message is playing – a bold Cancel button displays, to stop the message if necessary. The file name and
length/progress bar with elapsed time will indicate progress of current message playing.
11. Network displays the IP address and status of the WiFi and wired connections. The AZM can be connected to both WiFi and wired
connections at the same time using two IP addresses. Settings link “>” navigates to the Network Setup page.
12. Upcoming Scheduled Events along with the current Bell Schedule will be listed in this display. The quick link “>” navigates to the
Event Scheduler page.
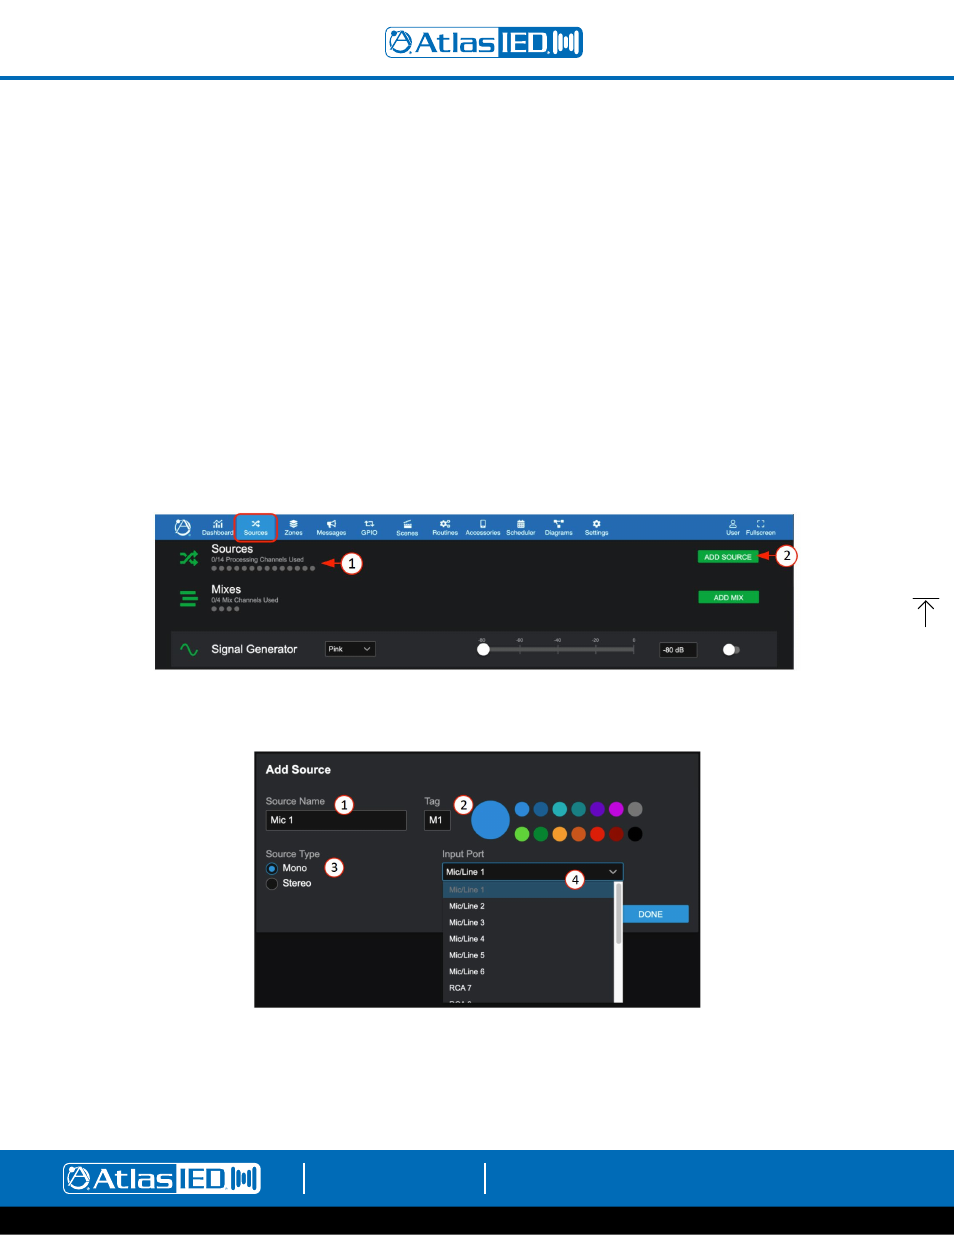
Sources
The Sources page is where you add or delete and configure the types of input sources available: Mic/Line inputs, RCA inputs, Audio Wall Plate Accessory
inputs, Mixes (Group Mix) inputs, and Signal Generator input. Input sources can also be mono or stereo.
Add Source - Mic/Line Inputs
1.
The Sources display lights a green LED style status indicator for each input source channel as it is assigned to an input port. When you first open
the Sources tab, you begin by selecting and configuring each of the input sources in your project.
2. Select “Add Source” to open the configuration popup and begin configuring your sources.
1.
Each source input can be named and will be added to the inputs selection list as well as populate the name on all other respective inputs system
wide, including the printable connections diagram.
2. A letter or numeric tag and color can be selected to enhance visualization identity of source types.
3. Source type can be mono or stereo. Select prior to assigning the input port.
4. Select the input port or, if stereo, input ports (left/right) from the drop-down list of available inputs and select OK to add the source to the sources list.