Audio wall plate accessories (sources), Atmosphere, User manual – Atlas Sound Atmosphere C-ZSV Zone, Source, and Volume Wall Controller (Black) User Manual
Page 23
Atmosphere
User Manual
AtlasIED.com
TELEPHONE: (800) 876-3333
1601 JACK MCKAY BLVD.
ENNIS, TEXAS 75119 U.S.A.
– 23 –
Audio Wall Plate Accessories
Audio Wall Plate Accessories that begin with an “A”, denoting that they are audio inputs, include:
A-XLR, A-RCA, and A-BT. Note: Only one audio input accessory can be connected to each bus-port (AZM4 has Ports A & B; AZM8 has Ports A,B,C,D).
Once the Audio Wall Plate is connected to the AZM bus-port, the input associated with the bus-port will activate and can be selected as an input source
where general settings can be configured. The general settings DSP available will be the same as source inputs.
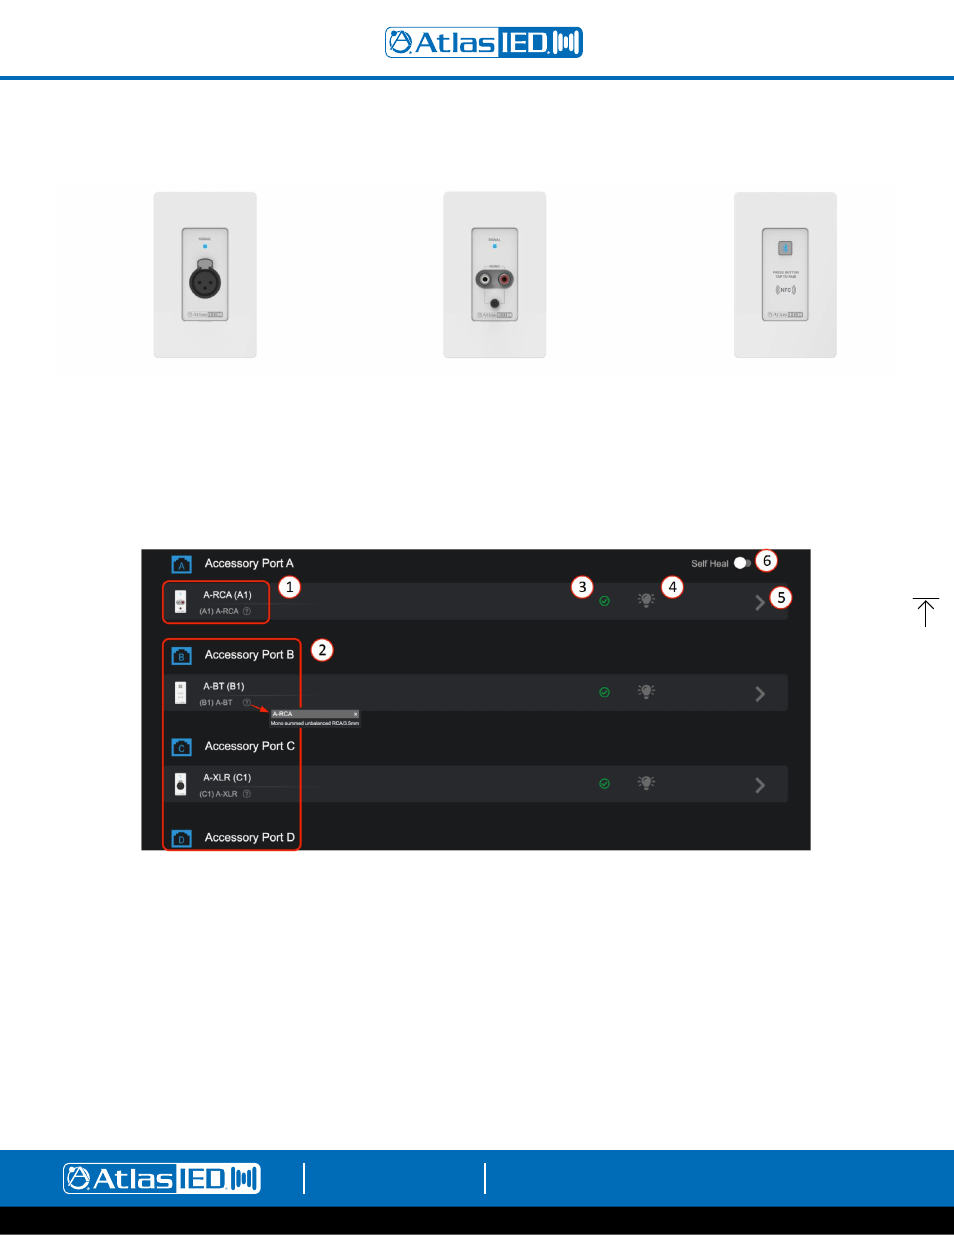
To add an Audio accessory, begin by opening the Accessory tab and connect the accessory to a port that does not have another Audio accessory. When an
audio wall plate accessory is connected to one of the 4 ports (AZM8), the device will show up on the respective port and display the type. When it becomes
active, the indicator displays a green check mark (#3). It will then appear on the input source selection list in the Add Source popup configuration page.
1.
The accessory input ports remain unpopulated until an accessory is present and detected on the bus-port.
2. Once connected, like Port A, B & C, the port will light up and identify the accessory type. The top default name can be edited, the lower ID with
type and port number, will not change. This is the accessory part number and not the same as the Input Source Name. Clicking on the “?” will
show a description of the accessory type for reference.
3. After the accessory is recognized, a green check appears indicating it is updated and ready to use. Note: It can take up to 30 seconds for an audio
wall plate to be detected and start streaming audio.
4. Click on this “Locate” icon to flash the LED on the accessory to aid in finding its physical location.
5. The “>” icon is the link to the accessory page. The accessory page allows editing of the name, shows the location of the accessory on the bus
port, and in some cases, basic settings specific to the type of Audio wall plate. Go to Source General Settings to configure the audio settings.
6. After installing a system, switch on “Self-Heal” and the system will automatically retain the settings in the event a wall controller accessory
requires replacement on a port. Simply remove the faulty unit and plug in the new; the system will recognize it and update the settings exactly
as it was before. No additional programming will be required.
A-XLR
Balanced Mic/
Line Input
A-RCA
Stereo Summed
dual RCA or
3.5mm TRS Input
A-BT
Bluetooth
Input