PLANET NAS-7410 User Manual
Page 55
4-Bay SATA NAS RAID Server with iSCSI
NAS-7410
55
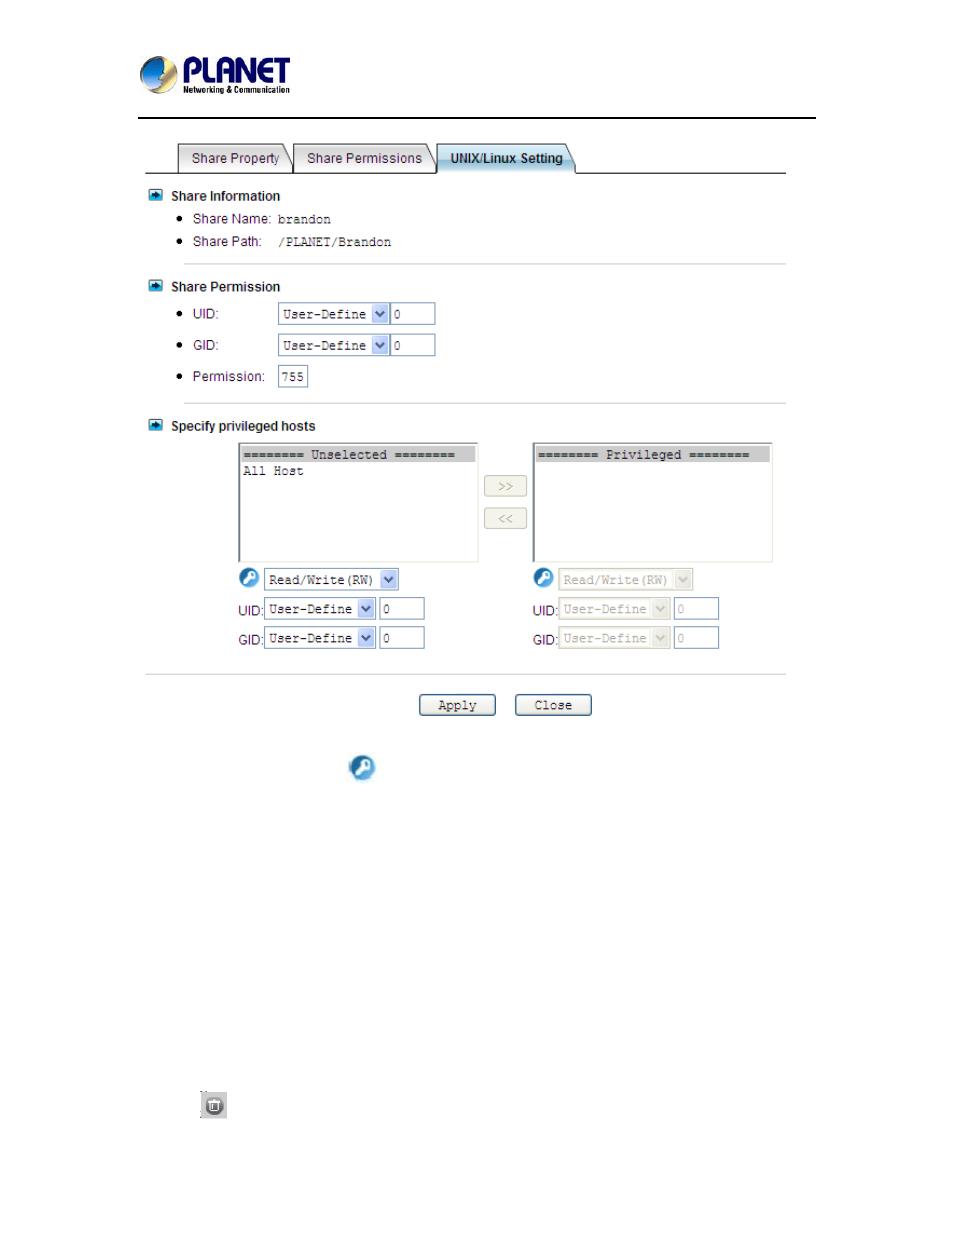
To assign share permission of a share for UNIX/Linux host:
1. Go to Security→Share menu.
2. Locate the share and click
to assign share permission to this share.
3. Click the UNIX/Linux Setting tab.
4. Assign the UID, GID and Permission of this share. It will overwrite the ownership and
permission of the mount point once the share is mounted by the NFS client. If the NIS support is
enabled, the UID and GID pull-down menus will list all NIS users for you to choose.
5. You can allow all hosts to access the share with read/write or read only permission. Then go to
Step 9.
6. Or, you can specify privileged hosts by highlighting the host IP from the left hand windows.
7. Select the appropriate permission from the pull down menu at the bottom of the left hand
windows.
8. Assign which UID/GID the root account of the UNIX host should be converted into when
accessing the share. This is the ‘root squash’ function.
9. Click the >> button to join the privileged list.
10. You can modify the permission of the hosts in the privileged list by first highlighting the
privileged host and then select the appropriate permission from the pull down menu at the bottom
of the right hand windows.
11. Click Apply to save the setting.
12. If you want to remove shares, check the corresponding checkbox located at the end of the row
and click
.
You can assign the following share permission to UNIX/Linux Hosts on NAS system: