Switching the monitor view, Audio level meter indication, Panel descriptions – Roland VR-6HD Direct Streaming AV Mixer User Manual
Page 12
12
Panel Descriptions
Switching the Monitor View
Aside from multi-view display, you can switch between videos to monitor such as the input video or a list of still images, according to your needs.
1 .
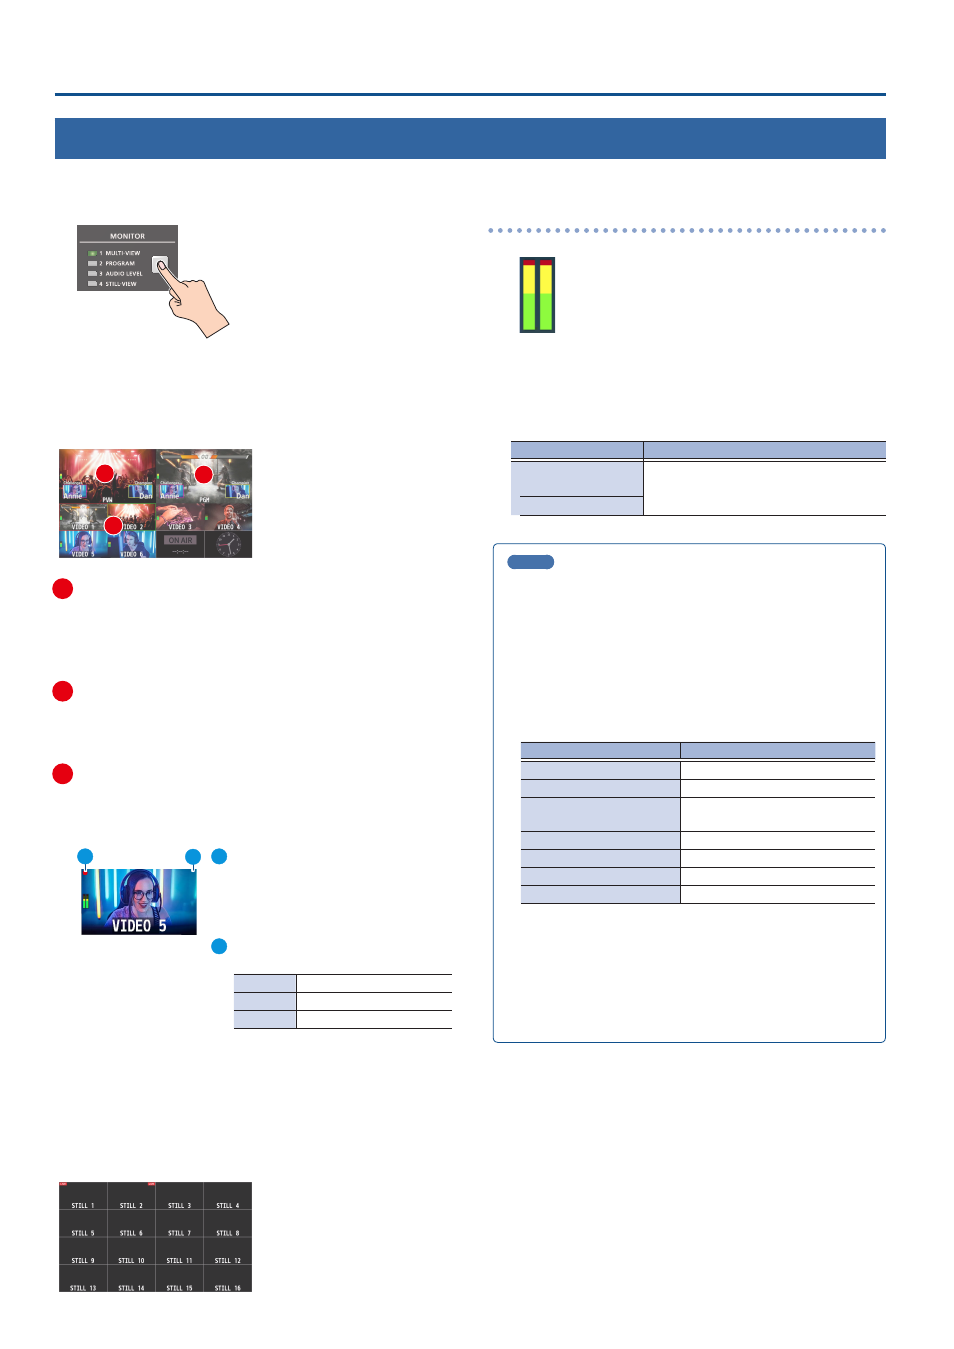
Press the [MONITOR] button.
The monitor view switches each time you press the button.
MONITOR 1 (MULTI-VIEW)
The final output video, preview output video and the videos allocated to
the VIDEO SWITCHER [1]–[6] buttons are shown in sections of the display
(multi-view).
1
2
3
1
PVW (preview) section
Displays the preview output video (the video to be output next).
* The fade-in/out effect (p. 32) is not reflected here.
* You can change the settings to swap the PGM section and view position. (p.
2
PGM (program) section
Shows the final output video.
* You can change the settings to swap the PVW section and view position. (p.
3
VIDEO SWITCHER [1]–[6] button video
Displays the video assigned to each VIDEO SWITCHER button.
The final video output and preview output video are displayed with
tally frames (red and green).
1
2
1
EXTERNAL REC indicator
If a camera that supports the REC
status function is connected, this is
shown when the camera’s REC button is
pressed VR-6HD.
2
AUX/SOURCE indicator
This displays as follows.
Yellow
PinP & KEY inset screen
Magenta
DSK video source
Green
AUX bus video source
MONITOR 2 (PROGRAM)
Shows the final output video.
MONITOR 3 (AUDIO LEVEL)
Indicates the audio level for each channel.
MONITOR 4 (STILL-VIEW)
Shows the loaded still images in 16 separate sections on the screen.
Audio level meter indication
Red: Excessive
Yellow: Suitable
Green: Insufficient
(dB)
-30
-20
-6
0
-50
¹
You can set the audio level meter to show or hide. You can also
individually set where each audio level meter in the multi-view is
displayed.
Set the following menu parameters from the [MENU] button
Ó
“SYSTEM”
Ó
“MULTI-VIEW SETTINGS”.
Menu item
Explanation
AUDIO LEVEL METER
Sets whether to show or hide the audio
level meter.
MULTI-VIEW
MEMO
¹
You can change the monitoring videos that you use the MONITOR
button to switch between.
Set this from the [MENU] button
Ó
“SYSTEM”
Ó
“MONITOR
SELECT ASSIGN”
Ó
“1”–“4”.
¹
Items shown on the monitor
You can individually set whether items like the tally frame, label
and so on are shown or hidden.
Set the following menu parameters from the [MENU] button
Ó
“SYSTEM”
Ó
“MULTI-VIEW SETTINGS”.
Menu item
Explanation
TALLY FRAME
Tally frame
AUX/SOURCE INDICATOR
AUX/SOURCE indicator
EXTERNAL REC INDICATOR
Rec indicator for externally
connected video
AUDIO LEVEL METER
Audio level meter
MULTI-VIEW LAYOUT
Multi-view layout
LABEL EDIT
Multi-view label
LABEL SIZE
Label size
¹
You can change the label names that are shown in the monitor.
Edit this from the [MENU] button
Ó
“SYSTEM”
Ó
“MULTI-VIEW
SETTINGS”
Ó
“LABEL EDIT”.
¹
For details on the cameras that support the REC status function,
refer to the Roland website.
https://proav .roland .com/