Recording a macro, Macros), Other functions – Roland VR-6HD Direct Streaming AV Mixer User Manual
Page 69
69
Other Functions
Recording Multiple Operations to Automatically Execute (Macros)
This feature lets you record multiple operations and then automatically execute them (as a macro function). You only need to record the macro operation
beforehand and then select the macro to perform the series of operations you recorded. This function is useful for executing exactly the same operations,
even when a different operator is using the unit.
You can create up to 100 macros.
Recording a Macro
A single macro can contain up to 10 different operations. You can include a macro within another macro, to make a single macro execute a more
complicated set of functions.
* The demo macro data in this unit that’s available by factory default includes some recorded operations.
1 .
[MENU] button
Ó
“MEMORY/MACRO/SEQ”
Ó
“MACRO”
Ó
select “8VIEW”, and press the [VALUE] knob.
The macro screen appears.
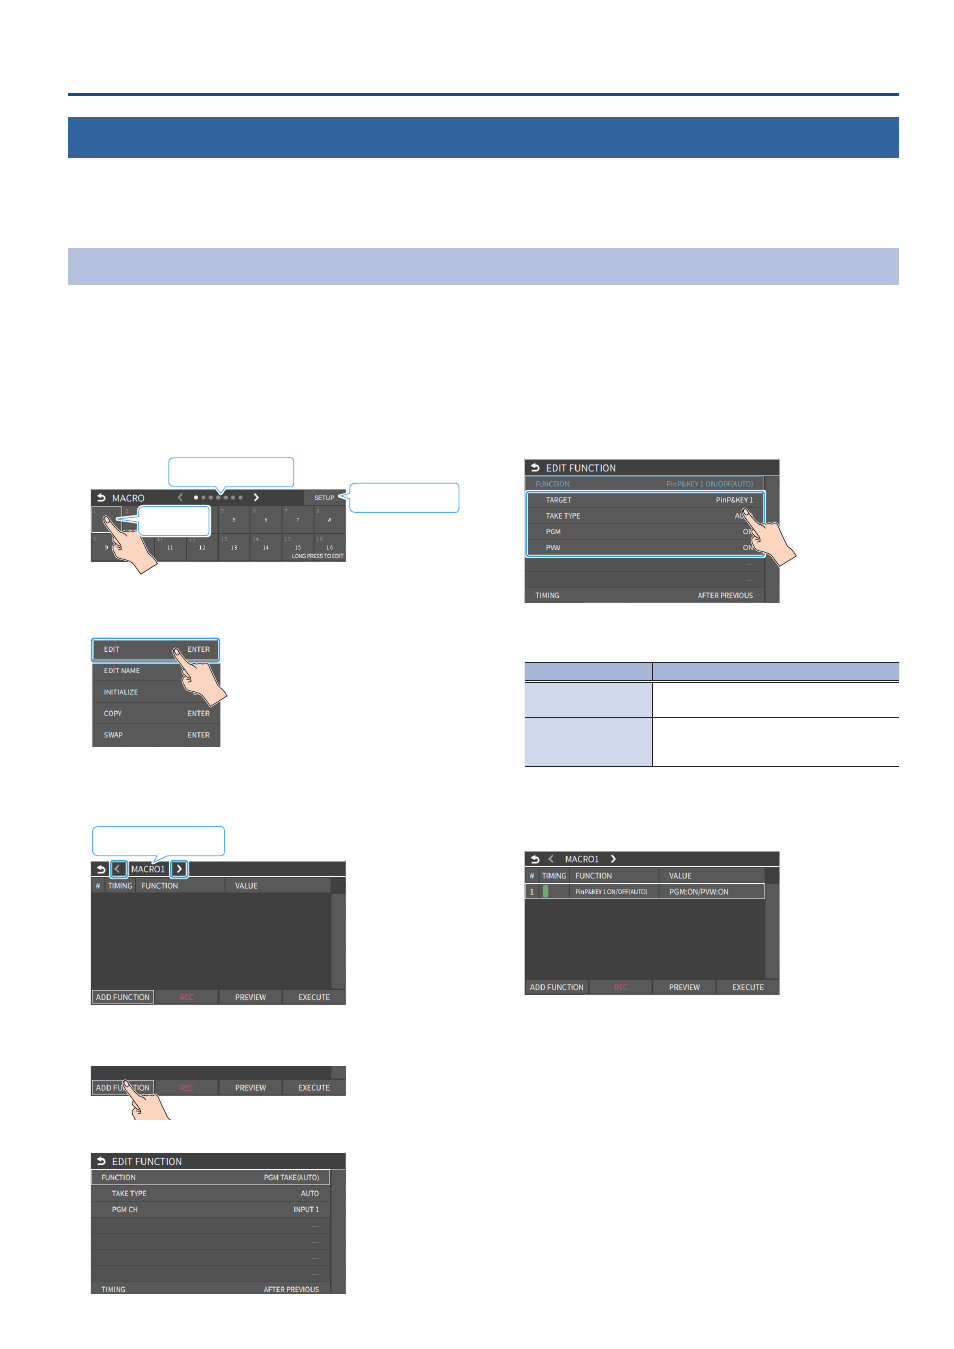
2 .
Long-press the area of the macro number you want to
record.
Long-press
To setup screen
Switch between pages
A popup menu appears.
3 .
Touch <EDIT>.
The Macro edit screen appears.
4 .
Touch the arrows in the macro number selection area to
select the macro to edit.
Macro number selection
This shows the list of operations recorded in the macro.
5 .
Touch <ADD FUNCTION>.
The EDIT FUNCTION menu appears.
6 .
Touch the screen to select the operation to record to the
macro.
* See “Editing a macro” (p. 70) for details on which operations you can
record to a macro.
7 .
Touch the screen to configure the related parameters.
8 .
Touch <TIMING> to set the timing used to execute the
operation.
Value
Explanation
AFTER PREVIOUS
The function is executed after the preceding
one. The next sequential list number is used.
SAME AS PREVIOUS
Executes the operation at the same time as
the preceding one. The same list number as
the previous operation is used.
* If you place a function at the beginning of the macro, setting the
timing has no effect.
9 .
Press the [EXIT] button to return to the previous screen.
10.
Repeat steps 5–10 to finish making the macro.
11.
Press the [EXIT] button to close the screen.