Sony Underwater Housing for Select RX100-Series Cameras User Manual
Page 16
16
3
Select [Basic mode], and click [Next >].
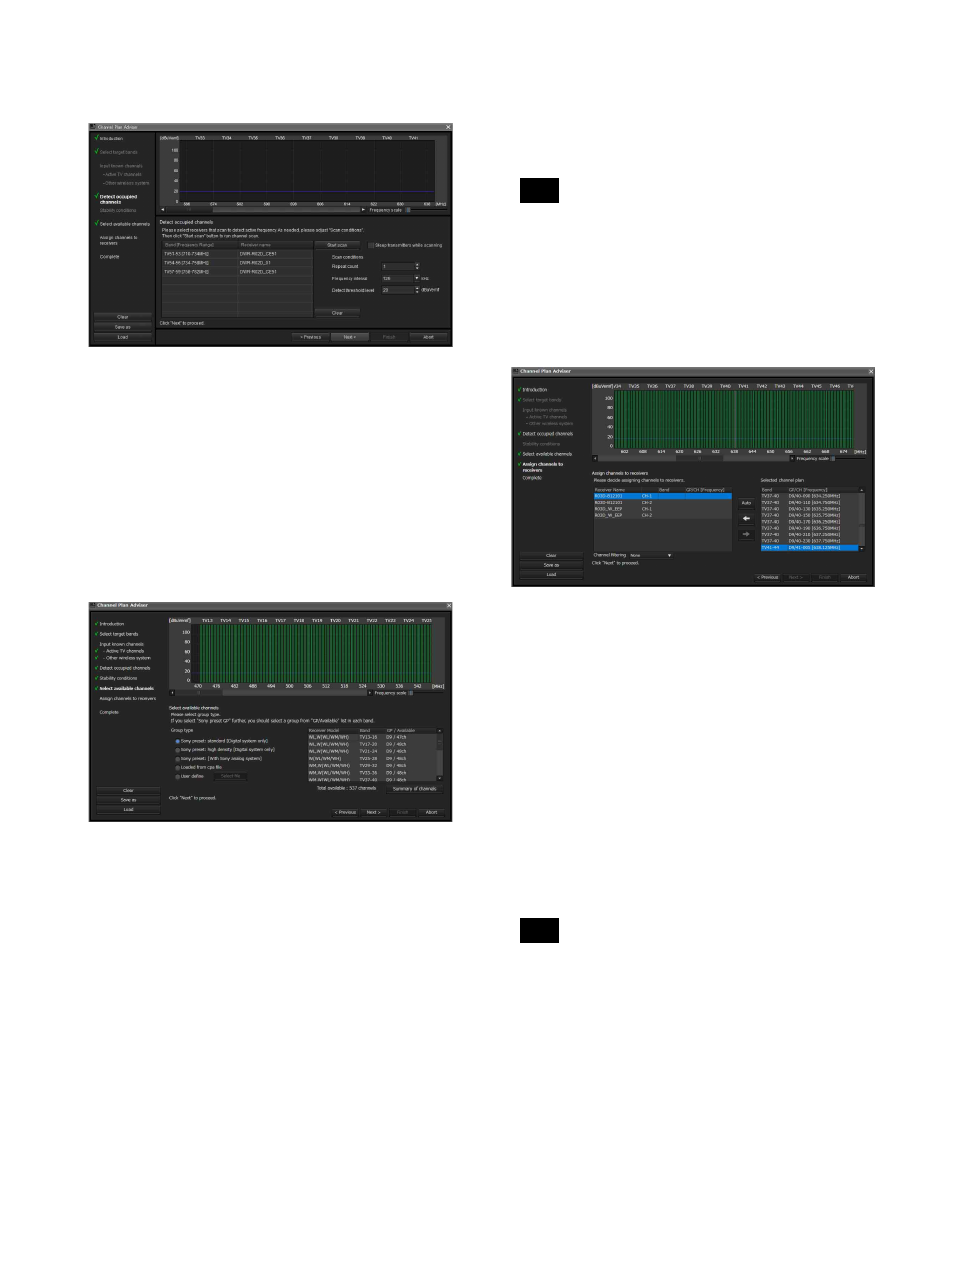
The following screen appears.
The receivers for which channel scan will be
performed will be displayed here for each frequency
band.
4
Click [Start scan].
Channel scan is performed, and the results are plotted
on the frequency spectrum display in the upper part of
the screen.
5
Click [Next >].
The following screen appears.
Candidate channel plans and the number of receivers
that can use the channel plans at the same time will be
displayed here for each frequency band.
6
Select the [Group type] to use for each frequency band.
Select the group type based on the device
configuration.
Sony preset: standard [Digital system only]
:
Select
this when only Sony digital wireless systems are used
(up to 48-ch channel plans are supported).
Sony preset: high density [Digital system only]
:
Select this when only Sony digital wireless systems
are used (up to 64-ch channel plans are supported).
Sony preset GP [With Sony analog system]
: Select
this when the configuration also includes Sony analog
wireless systems.
Loaded from cpa file
: Select this to use channel plans
that were selected during previous uses of [Channel
Plan Adviser].
User define
: Select this to use user defined channel
plans.
The recommended channel plan when “Sony preset:
high density [Digital system only]” is selected cannot
be assigned to the DWR-R01D, DWR-R02D, or
DWR-R02DN.
7
Click [Next >].
The following screen appears.
The selected channel plan is assigned to the receivers
here.
When [Receiver’s band block] or [Receiver’s band] is
selected in [Channel filtering], a channel plan is
extracted according to the [BAND BLOCK] or
[BAND] setting of the digital wireless receiver. This
allows you to assign a channel plan without changing
the [BAND BLOCK] or [BAND] setting of the digital
wireless receiver.
For details on the [Channel filtering] setting, see
“Extracting a channel plan” on page 53.
8
Click [Auto].
The channel plan is assigned automatically.
You can also assign channels one at a time by selecting
the receiver and frequency, and clicking the
T
button.
9
Click [Next >].
Configuration of the assigned channel plan starts for
the receivers.
If the receivers are already paired with transmitters,
the configuration is also sent to the transmitters.
The following screen appears.
Note
Note