Maintenance – Beisler 1282-4 User Manual
Page 45
Closing Seam Machine 1282-4 Working Instructions
- 16 -
Beisler Automated Sewing Equipment
C.5
Maintenance
C.5.5 Machine set-up
NOTE - Activating inputs/outputs!
To allow for testing machine movements or interval ope-
ration, the individual stages of movement can be activa-
ted with the inputs/outputs of the machine control unit (see
programming instructions, Section D.4.3., Service menu
level 1).
Usually, the setting up of the machine is controlled by
parameter values of the sewing programs (special para-
meters) and the parameter values of the machine control
unit (global parameters). The following mechanical chan-
ges may be required additionally to ensure correct seams
with the set parameter values.
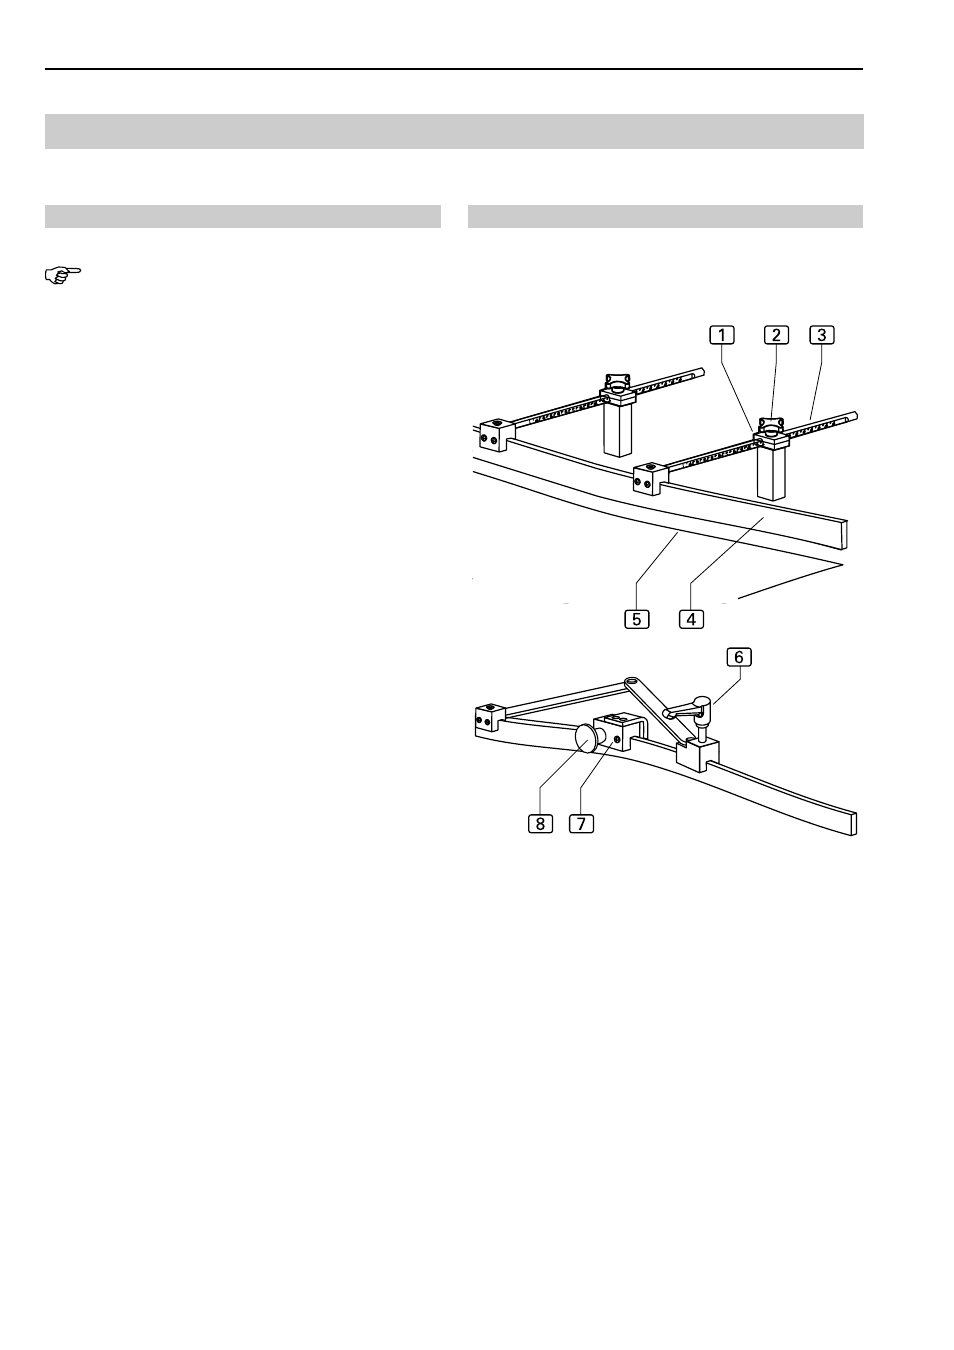
Guide rail adjustment:
Fig. 12: The flexible guide rail
4
determines the routing
direction of the guide clamp.
The shape of the guide rail is identical with the contour of
the pieces that are to be sewn
5
. The routing is deter-
mined by changing the position of the guide shaft
3
.
Setting the contour:
1. Place trousers component under guide rail and align
hip side with the sewing unit, with the contour guide stop
and with the end at the insertion station.
2. First, set the slightly flat contour at the insertion stati-
on. Loosen fixing screws
2
of corresponding clamp
elements
1
, shift guide shafts
3
with guide rail to
trousers hem and fix it there by tightening fixing
screw
2
.
3. Set guide rail finishing curve above the contour guide.
Release clamping element locking lever
6
, align guide
rail curve with trousers component and fix it by tighte-
ning locking lever.
4. Position pick-up clamp
7
. This clamp is used to dis-
engage the trousers components from the guide clamp
just before it reaches the contour guide. The traveling
motion of the guide clamp should occur as late as pos-
sible; however, the pick-up clamp should stop the mo-
tion in a sufficient distance from the contour guide.
Loosen knurled screw
8
, position pick-up clamp at
guide rail and secure it in this position by tightening
knurled screw.
5. Tuck trousers components, check routing of seam and
readjust guide rail if required.
Fig. 12
Fig. 12