Auto track function, Using the menu, Auto track function using the menu – Teac SS-CDR1 User Manual
Page 47: 6 − recording, 47 auto track function
6 − Recording
TASCAM SS-CDR1
47
Auto Track function
Auto Track recording is a function that automatically
assigns a new track number when the specified condition is
satisfied during recording. A new audio file is created each
time a new track number is assigned.
You will use the menu to select Auto Track mode and make
detailed settings. However, the Auto Track mode setting
itself can be made using the
A.TRACK
key of the remote.
If the Auto Track function is on,
A_TRACK
will light in the
home screen.
Auto track settings can be made at any time, and you can
change the settings after you start recording.
NOTE
If you have recorded in WAV format on a CF card, you
can use editing functions to divide or join tracks after
recording (see “Dividing a file (DIVIDE)” on page 56,
“Combining files (COMBINE)“ on page 57).
Using the menu
(For details on menu operations, refer to “Operations in the
menu screens” on page 18).
1 Press the
MENU
key to access the main menu list
screen.
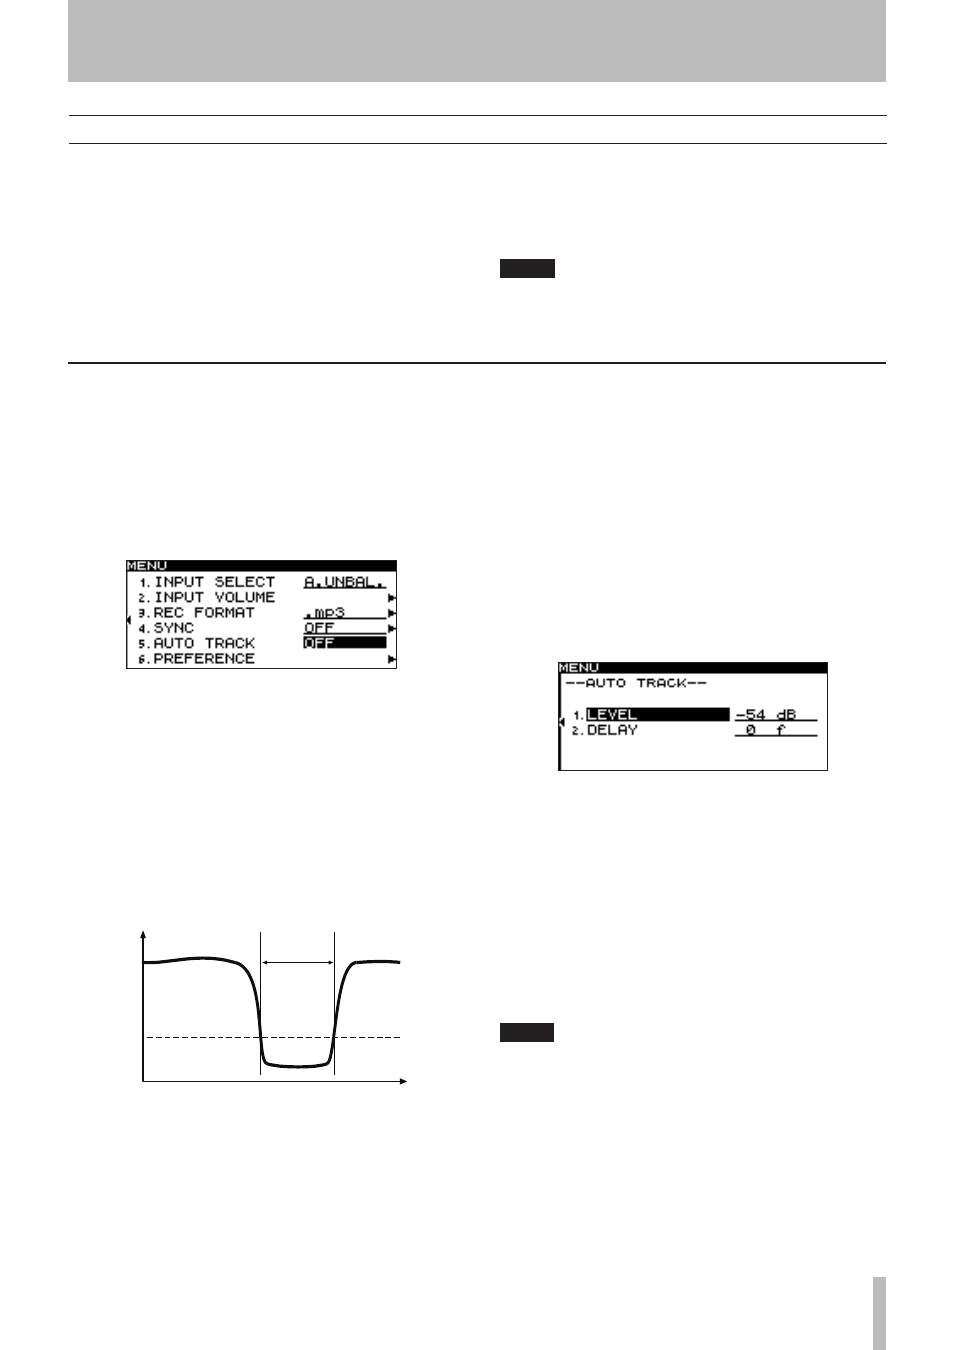
2 Select the REC menu.
3 Select the AUTO TRACK item.
4 Turn the
MULTI JOG
dial (or use the remote’s
cursor
§
, ¶
keys) to select the Auto Track mode
from the following choices.
OFF
:
New track numbers will not be assigned automatically.
LEVEL
:
A new track number will be assigned when the signal
exceeds the auto track level (specified in the screen for
detailed settings described below) after having stayed
below it for two seconds or longer.
Level
Time
A_TRACK
LEVEL
At least
2 sec
Track increment
DD
:
When recording a digital source (CD, DAT, MD) via the
DIGITAL IN
jack, a new track number will be assigned
when a track division is detected in the source.
However when recording an analog source or a digital
source other than those listed above, this will operate as
LEVEL mode, and a new track number will be assigned
according to the input level.
TIME
:
A new track number will be assigned at a fixed interval of
time (specified in the screen for detailed settings described
below).
5 If you selected a choice other than
OFF
, press the
front panel
˚
key (or the remote’s
cursor
¥
key) to proceed to the screen for detailed settings.
6 Make detailed settings for the function.
If
•
LEVEL
is selected
Use the LEVEL item to specify the level at which Auto
Track will operate.
You can set this in a range of -72 dB – -24 dB (6 dB steps).
(The default setting is -54 dB).
Use the DELAY item to specify the time (in units of one
frame) from when a signal exceeding the auto track level is
detected until the new track number is assigned (one frame
is 1/75th of a second).
You can set this in a range of -75 frame – +75 frame (the
default setting is 0). Negative values will cause a portion of
the signal prior to the detection point to be captured.
NOTE
If this range is converted into time, the adjustable
range is equivalent from -1 second to +1 second.