3 – names and functions of parts – Teac DP-32 User Manual
Page 25
TASCAM DP-32
25
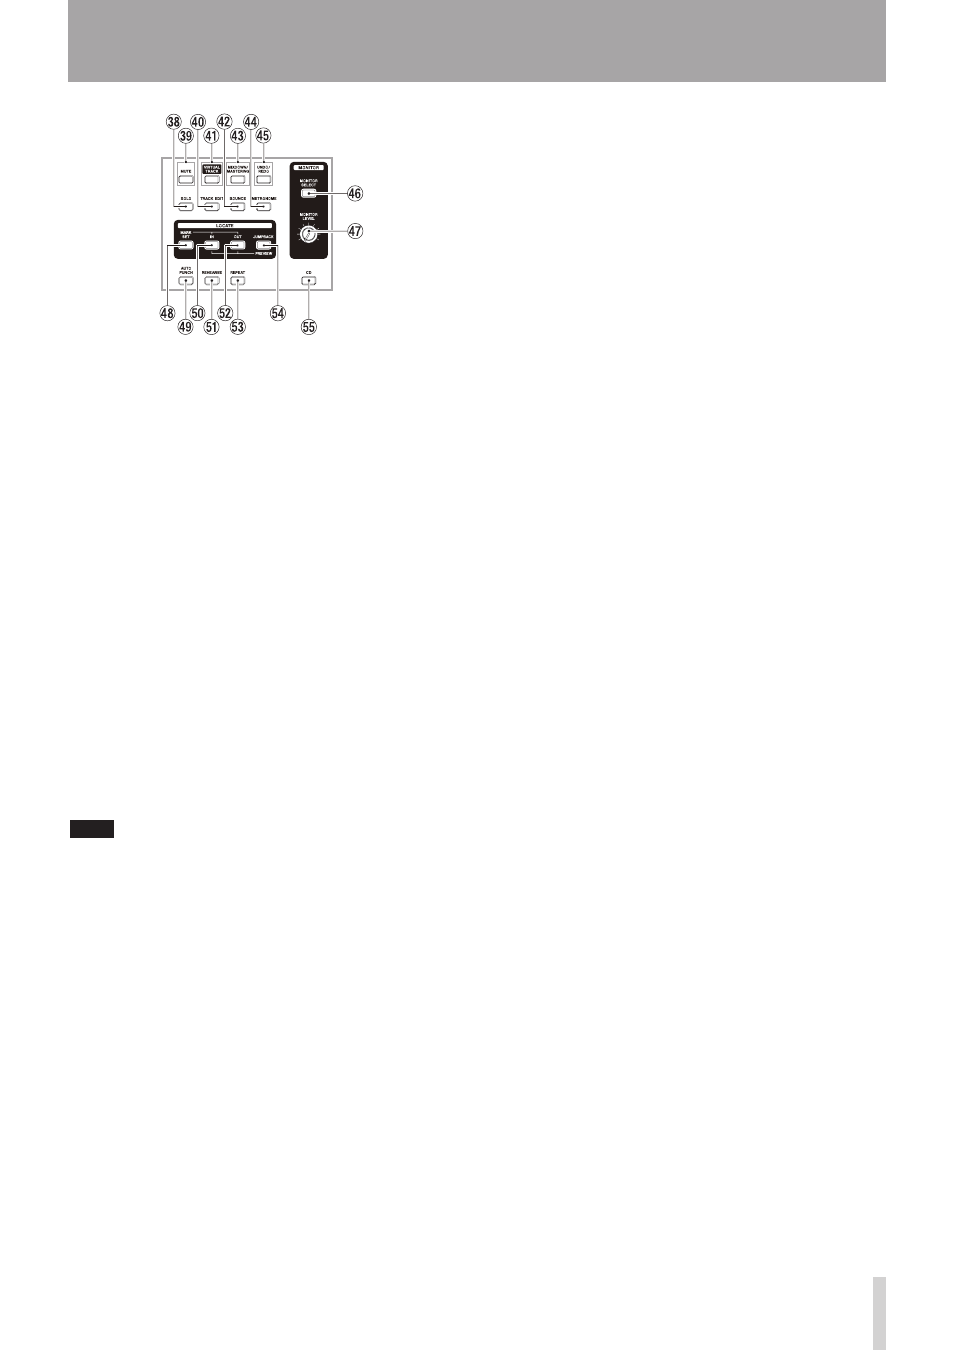
3 – Names and Functions of Parts
,
SOLO button/indicator
Press to switch to Solo mode (the button lights). (See
"Solo" on page 45.)
.
MUTE button/indicator
Press to switch to Mute mode (the button lights). (See
"Muting tracks" on page 45.)
/
TRACK EDIT button
Press to open the
TRACK EDIT
screen. (See
"Overview of track Editing" on page 57.)
!
VIRTUAL TRACK button/indicator
Press to open the
VIRTUAL TRACK
screen. (See
"Virtual tracks" on page 56.)
@
BOUNCE button/indicator
Press to switch to Bounce recording mode (the button
lights). (See "Bouncing tracks" on page 50.)
#
MIXDOWN/MASTERING button/indicator
Press to cycle through the
Multi Track
,
Mixdown
and
Mastering
modes. Mastering mode is only
available when there is a master track. (See "Mixing
down tracks" on page 64, "Creating a master file" on
page 65, "Checking the master file" on page 66 and
"Using the mastering tools" on page 66.)
NOTE
The current mode is shown on the Home screen.
$
METRONOME button/indicator
Press to set the metronome.
The button flashes in time with the set tempo. (See
"Metronome" on page 70.)
%
UNDO/REDO button/indicator
Press to undo the immediately previous action (single
undo) or to cancel the last undo (redo). (See "Undoing
an operation" on page 47.)
After a single or multiple undo, the UNDO/REDO
button lights, showing that an operation has been
undone.
^
MONITOR SELECT button
Press to open the
MONITOR SELECT
pop-up
window on the Home screen. (See "Monitor selection"
on page 42.)
&
MONITOR LEVEL knob
Use this knob to adjust the level of the signals output
from the MONITOR OUT jacks.
*
MARK SET button
During recording or playback, press to set a mark
manually. (See "Setting a location mark" on page 51.)
(
AUTO PUNCH button/indicator
Press to turn automatic punching on and off.
When auto punch is on,
Auto Punch
appears on the
Home screen. (See "Automatic punching in and out"
on page 54.)
)
IN button
Press to locate the IN point.
Press and hold the MARK SET button and press to set
the IN point.
Press and hold the JUMPBACK (PREVIEW) button and
press this to start pre-roll playback up to the current
position where it stops. (See "Previewing cue points"
on page 54.)
Q
REHEARSE button/indicator
Use this button to turn Rehearse mode on and off.
In addition to auto punch in/out, you can also use
the Rehearse mode for ordinary recording. (See
"Rehearsing a recording" on page 45.)
W
OUT button
Press to locate the OUT point.
Press and hold the MARK SET button and press to set
the OUT point.
Press and hold the JUMPBACK (PREVIEW) button and
press this to start post-roll playback from the current
position for a set amount of time, then return to the
current position and stop. (See "Previewing cue points"
on page 54.)
E
REPEAT button/indicator
Press to this button to turn Repeat Playback mode on
and off. (See "Using repeat playback" on page 53.)
R
JUMPBACK (PREVIEW) button
Press to rewind a set number of seconds from the
current position and start playback. (See "Jumpback
playback" on page 53.)
T
CD button
Press to open the
CD
menu. (See "14 – Using CDs" on
page 80.)