11 - various other functions, Midi remote control, Tuner function – Teac DP-32 User Manual
Page 71
TASCAM DP-32
71
11 - Various Other Functions
MIDI remote control
The mixer, effects and recorder of this unit can be remotely
controlled by other devices using MIDI messages.
For more information about MIDI messages that can be
used to control this unit, see "18 - Appendix" on page 97.
When the transport is stopped, press the MENU button to
open the
MENU
screen, select (highlight blue) the
MIDI
item, and then press the F4 (t) button to open the
MIDI
screen.
ª MMC MODE
Set the MIDI Machine Control transmission/reception
mode.
OFF: MMC communication disable.
MASTER: This unit functions as the MMC master.
SLAVE: This unit functions as an MMC slave.
When the unit is the MMC master, the MMC command
is output by the MIDI OUT jack, and it is possible to
remotely control an external MIDI sequencer or another
DP-32 unit.
When the unit is the MMC slave, MMC commands can
be received through the MIDI IN jack, and it is possible
to remotely control this unit from an external MIDI
sequencer or another DP-32 unit.
ª MMC Device ID
Set the MMC device ID.
Select from
1
to
127
, and
ALL
. (Default:
ALL
)
Master units send MMC commands with device IDs that
slaves with the same IDs can receive. When ALL is selected,
however, MMC commands are sent and received for all IDs.
MMC is used for remote transport control of MIDI
equipment. On the other hand, MIDI Time Code (MTC) is
used for synchronization with MIDI equipment. Note that
the MMC mode and MMC device ID are not related to
mixer and effect remote control.
ª REMOTE CONTROL
Use MODE to set this unit as a master or a slave.
Use PROGRAM CHANGE EFF to set whether this unit's
effect changes when a program change message is
received (ON or OFF). In Mastering mode, program change
messages are not received even if this is ON.
Use CONTROL CHANGE to set whether or not received
control change messages control the parameters of this
unit's mixer and effects (ON or OFF).
Tuner function
You can use the built-in chromatic tuner to tune guitars.
1. Connect a guitar or bass to the MIC/LINE INPUT H.
Tuning cannot be performed with instruments
connected to MIC/LINE INPUTS A to G.
2. Set the LINE-GUITAR switch on the rear panel to
GUITAR. (See "Selecting the input sources" on page
40.)
3. When the recorder is stopped, press the MENU
button to open the
MENU
screen.
4. Use the JOG/DATA dial to select the
TUNER
menu
item and then press the F4 (t) button.
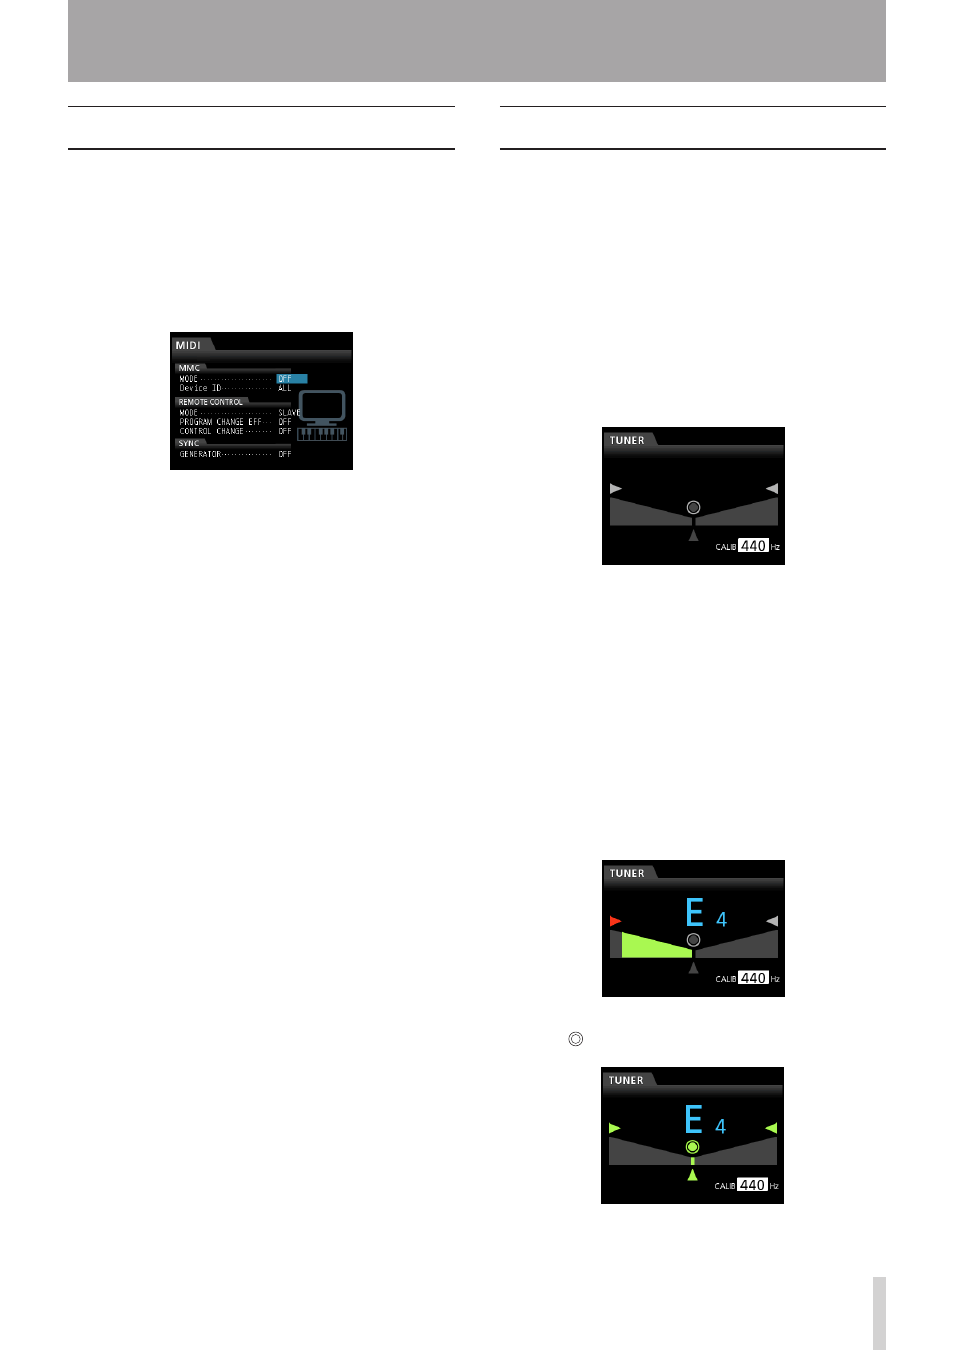
The
TUNER
screen opens.
5. Use the JOG/DATA dial or the CURSOR (5/b)
buttons to set the standard frequency of A4.
The setting range is from
435Hz
to
445Hz
. (Default:
440Hz
)
6. Play the instrument and begin tuning.
The pitch name closest to the string appears above
the meter.
Tune the instrument so that the target pitch name
appears and the center of the tuning meter lights.
A bar appears to the left or right of the center if the
sound is lower or higher than the target pitch. The bar
becomes longer as the sound shifts away from the
target pitch.
When the pitch played matches the note shown, the
center , t and g icons light green.
7. After tuning the instrument, press the HOME
button to return to the Home screen.