Connect to the devicenet option card, Configure the devicenet option card, Set the devicenet option card baud rate – Yaskawa CM012 DeviceNet Option Card User Manual
Page 10: Configure the devicenet option card -5
Installation 1-5
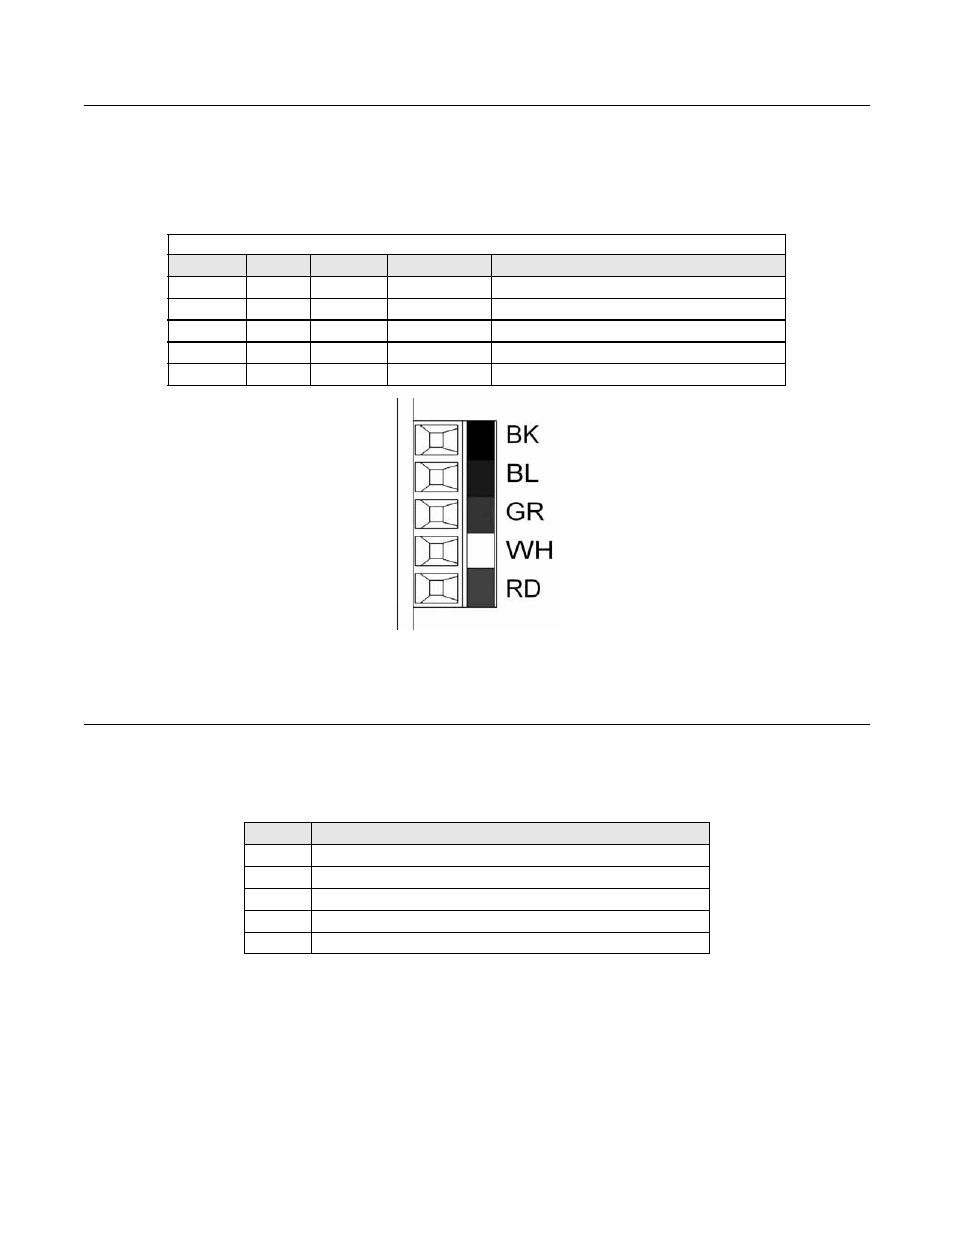
Connect to the DeviceNet Option Card
On small frame drives, make sure to connect the DeviceNet cable prior to installing the DeviceNet Option Card as it is difficult to install the
connector after the DeviceNet Option Card has been installed.
Connect the DeviceNet cable to the connector as shown. If the drive is the last device on a network segment make sure to install the
terminating resistor (121
Ω 1% metal film 1/4W) between the two CAN connections, 2 and 4.
Fig 1.3 – DeviceNet Connector
Configure the DeviceNet Option Card
Set the DeviceNet Option Card Baud Rate
Set the drive baud rate by selecting the appropriate Baud Rate Sw setting. Settings of 3 through 8 will load the previously stored baud rate.
A setting of 9 will enable Auto Baud. The factory default setting is 3.
Table 1.2 – DeviceNet Terminal Connections
Terminal
Color
Name
Wire Color
Description
1
Black
V-
Black
Network Common
2
Blue
CAN_L
Blue
CAN Data Low
3
Green
Shield
Green
Cable Shield
4
White
CAN_H
White
CAN Data High
5
Red
V+
Red
+24VDC
Setting
Description
0
125 kbps
1
250 kbps
2
500 kbps
3 ~ 8
NVRAM (Last stored baud rate) (3 = default setting)
9
Auto Sense