Mount the devicenet option card – Yaskawa CM012 DeviceNet Option Card User Manual
Page 9
Installation 1-4
Mount the DeviceNet Option Card
1.
Remove the operator keypad.
2.
Remove the drive terminal and control covers.
3.
On the F7U, G7U and P7U drives, remove the option hold-down by
carefully compressing the top and bottom until it becomes free of its
holder. Lift it out.
4.
Connect the DeviceNet cable to the DeviceNet Option Card. Refer to
the connection figure below. If the drive is the last device on a network
segment make sure to install the terminating resistor (121
Ω 1% metal
film 1/4W) between the two CAN connections, 2 and 4.
5.
Align the J2 connector on the back of the DeviceNet Option Card with
its mating 2CN connector on the drive control card.
6.
Align the two standoffs on the front of the drive control board with the
two holes on the right side of the DeviceNet Option Card.
7.
Press the DeviceNet Option Card firmly onto the drive 2CN connector
and standoffs until the J2 connector is fully seated on 2CN and the
drive standoffs have locked into their appropriate holes.
8.
Route the DeviceNet cable along the left inside of the AC drive
enclosure.
9.
On the F7U, G7U and P7U drives, replace the option hold-down.
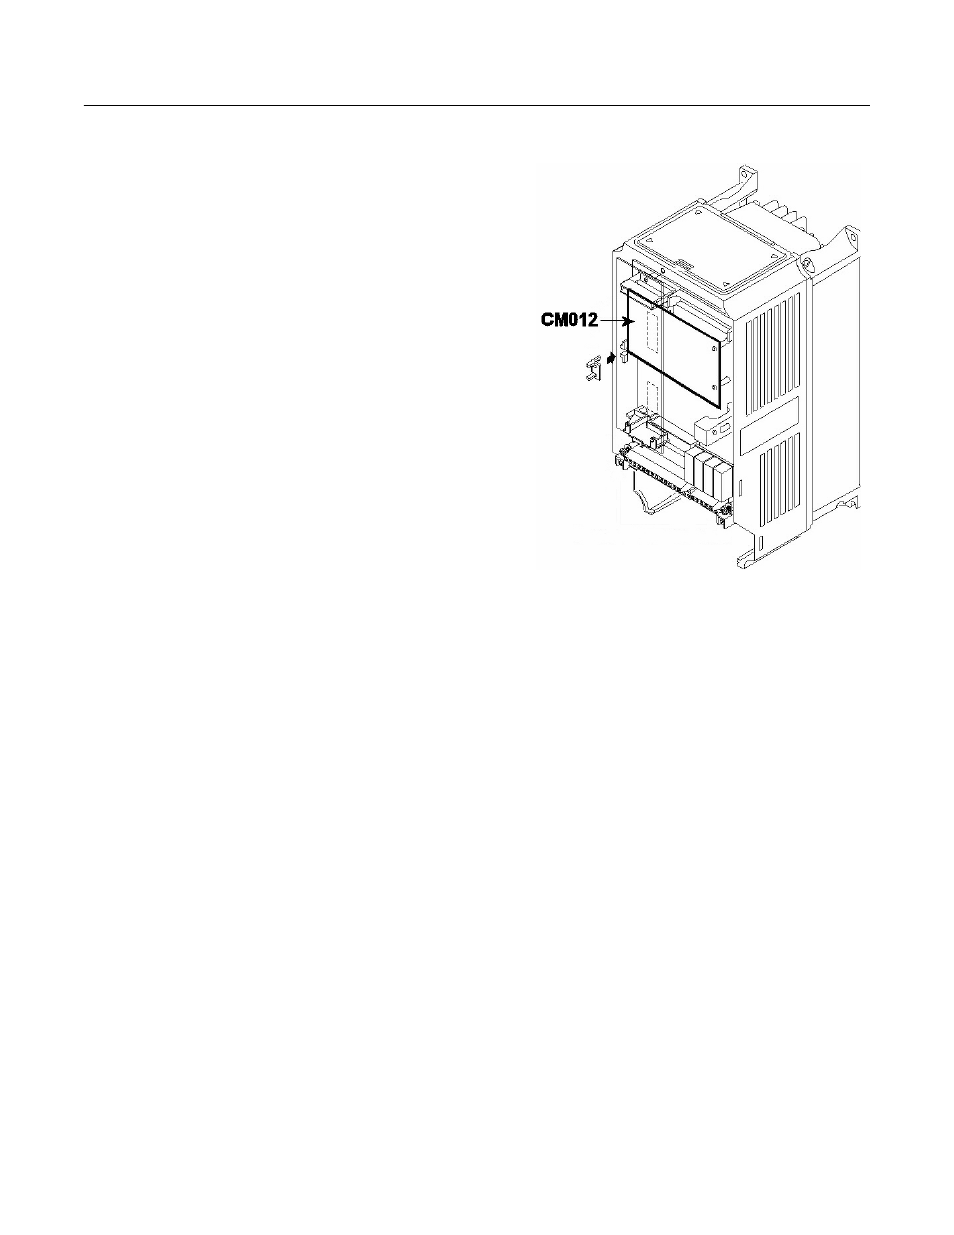
Fig 1.2 – Drive Outline Drawing