Setting up the dot screen, projector, and computer, Dot screen part names, Setting up the dot screen for projection – Casio YA-W72M User Guide User Manual
Page 23: To set up the dot screen for projection, E 23)
23
This section explains how to connect a computer that has the required software installed to a
projector, and how to project computer screen images onto the dot screen.
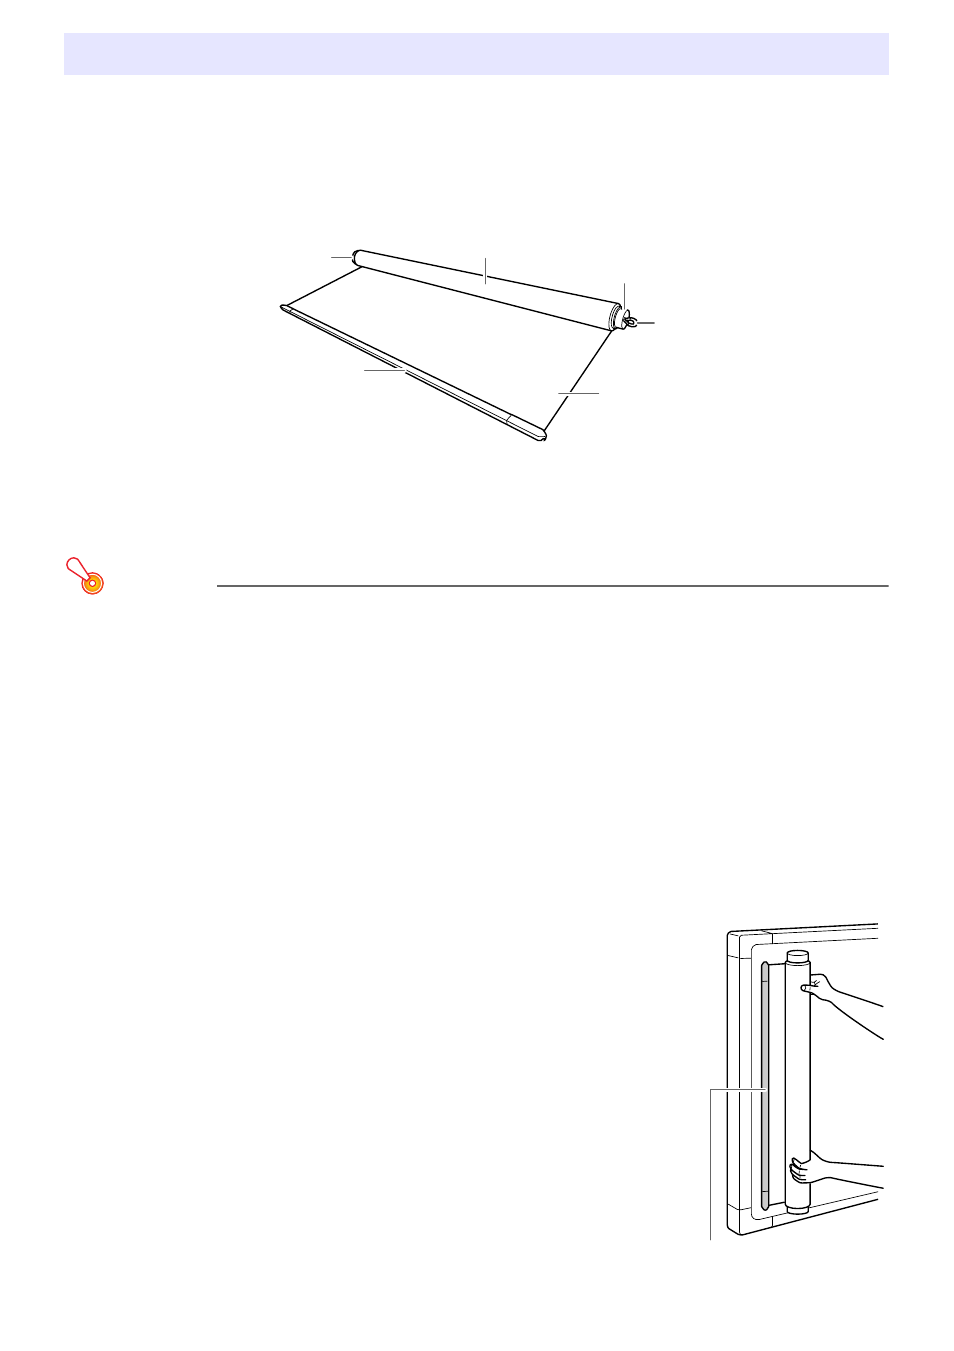
Dot Screen Part Names
Setting Up the Dot Screen for Projection
Important!
z The dot screen that comes with CASIO Interactive Whiteboard is designed for magnetic
adhesion to a metal wall, blackboard, or other appropriate surface. Do not attempt to attach it
to a surface that is soiled with dust or other matter, or a surface that does not allow magnetic
adhesion.
z To keep the dot screen from falling if it detaches from the mounting surface due to impact, be
sure to use the provided safety hook to secure the dot screen to the surface. For details, see
steps 4 and 5 of the procedure under “To set up the dot screen for projection” below.
To set up the dot screen for projection
1.
Remove the dot screen from the screen case and then unhook the anti-slack
wires on either end from the end bar.
2.
Affix the magnetic end bar of the dot screen to a vertical
surface (metal wall, blackboard, etc.) and gradually unroll
the screen.
z While pressing the roll against the surface, slowly rotate it to unroll
the screen.
z Note that you will not be able to adjust the position of the screen
while it is unrolled. To reposition the screen, first roll it back up
onto the roll. Pulling the dot screen from a surface without rolling it
up or allowing it to fall from a surface can result in irreparable
creases in the dot screen.
Setting Up the Dot Screen, Projector, and Computer
Screen
Roll
End cap
Anti-slack wire
End cap
End bar
End bar