Casio YA-W72M User Guide User Manual
Page 75
75
11.
Configure the settings below on the dialog box.
z Use the “Resolution” setting to specify the resolution to be used when converting graphic
images of the file you opened in step 2 of this procedure to a PPG file. The initial default
setting is 200 dpi. A smaller value produces a coarser image and a smaller file. A larger value
results in a finer image and a larger file.
z Interactive Whiteboard for CASIO will not be able to open a page that is 10,000 or more pixels
in width or height. Be sure to set a resolution in accordance with the paper size so the
resulting page is less than 10,000 pixels in width and/or height.
For example, when using landscape orientation A2-size paper, a setting of 300 dpi results in a
page size of 7,016 × 4,961, while 600 dpi produces a page size of 14,031 × 9,921. This means
you should use a resolution setting of 300 dpi or lower.
z For information about settings that can be configured after you click [Advanced Settings], see
“Configuring Advanced Settings on the Dot Pattern Printer for CASIO Dialog Box” (page 76).
12.
After configuring all the settings you want, click [OK].
z This will print the document with special dot patterns from the specified printer.
z Next, a dialog box for saving the PPG file will appear.
13.
Use the [Save] dialog box to specify a file name and a storage location, and then
click [Save].
* Be sure to use a qualified printer. See the “Important!” note on
page 70 for more information.
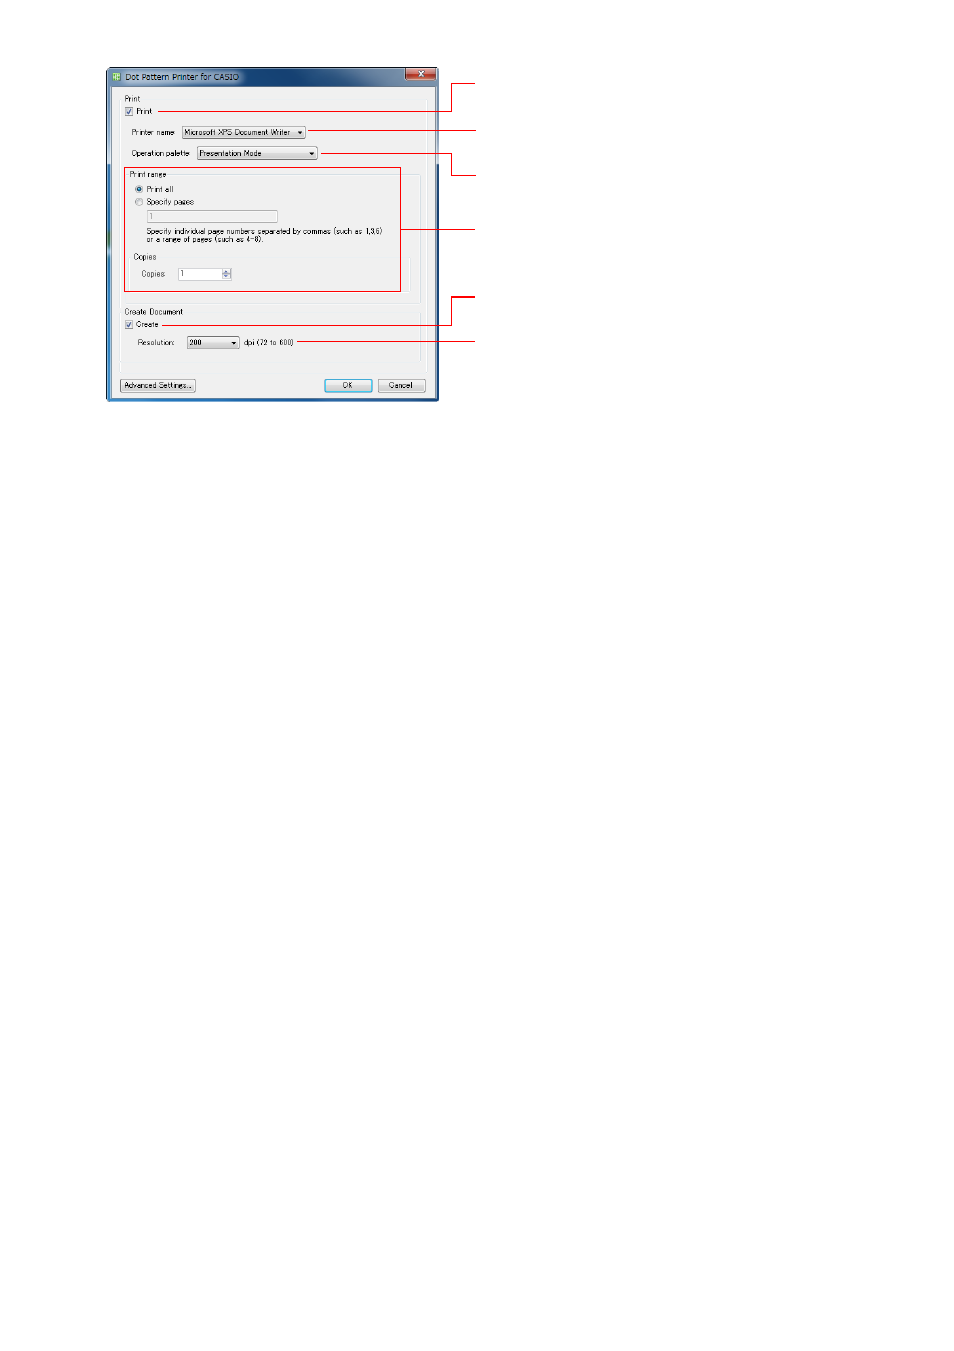
Select the “Print” check box.
Use “Printer name” to select the output printer.
*
Use “Operation palette” to select “Presentation Mode” or
“Presentation Mode for Student”.
Configure the “Print range” and “Copies” settings.
Since we will be creating a PPG file, select the “Create” check
box.
Use “Resolution” to select one of the following settings: 72, 150,
200, 300, 600 dpi.